The Gutenberg editor has completely changed how we build websites and web pages with WordPress. It allows users to create content and layouts piece by piece and comes with many tools to do so. In this post, we want to look at some of the best blocks Gutenberg has to offer for that purpose.
The WordPress editor is a complex piece of software. It’s easy to overlook some of the features of Gutenberg, including the many blocks it comes with.
Consequently, there might be some that you have no idea exist but that could seriously improve your workflow and make it easier to run your site. This list of the best Gutenberg blocks aims to make sure that isn’t the case.
How to Add Any Block to the WordPress Editor
Before moving on to the finest layout elements included in Gutenberg, let’s go over a quick refresher for how to add blocks to the editor. Basically there are three different possibilities:
- Slash commands
- The Add block button
- The block inserter
Here’s how each of them work.
1. Using Slash Commands
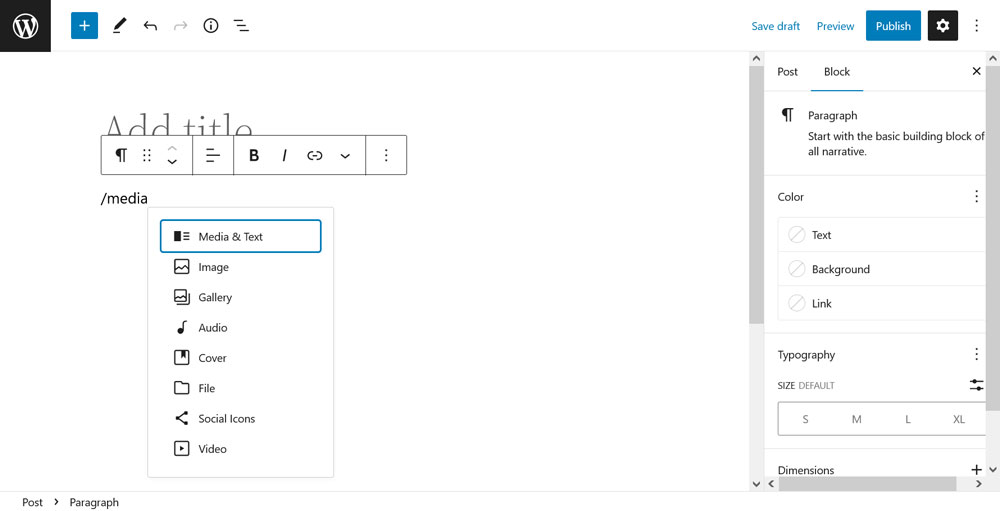
These get their name from the fact that you access them by typing a slash forward (“/”) in an empty line of the editor. Doing so automatically opens a menu with frequently used blocks.
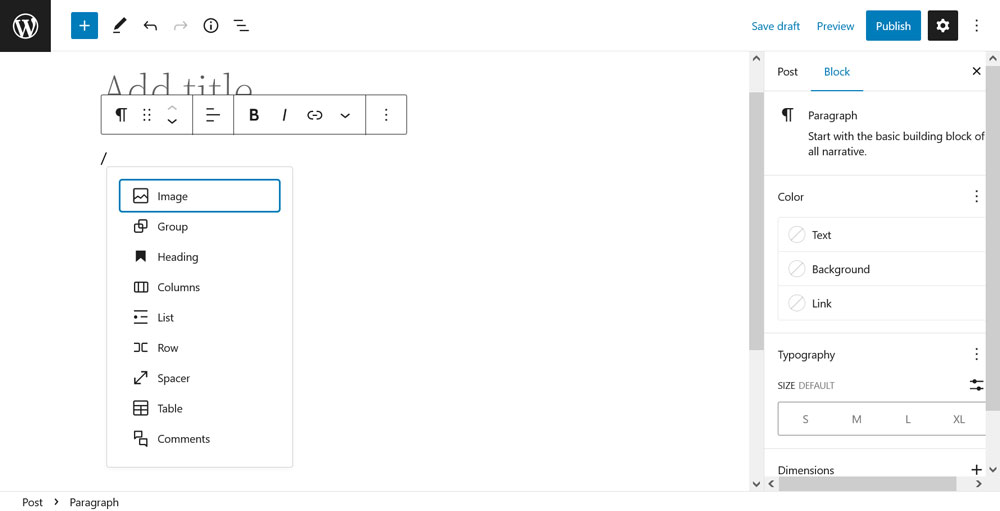
You can directly choose one via the mouse cursor or arrow keys on the keyboard. At the same time, if what you are looking for doesn’t show, simply start typing the name of the block you want to insert. It will then appear in the menu for you to pick.
This is the fastest way of adding a block to the WordPress editor. It works both in the page/post editor and the Full Site Editor.
2. Via the Add Block Button
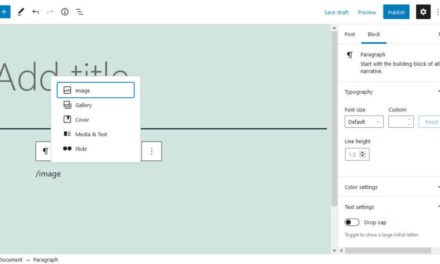
Next up, is using the small “+” button that shows up in the editor below the last-used line.
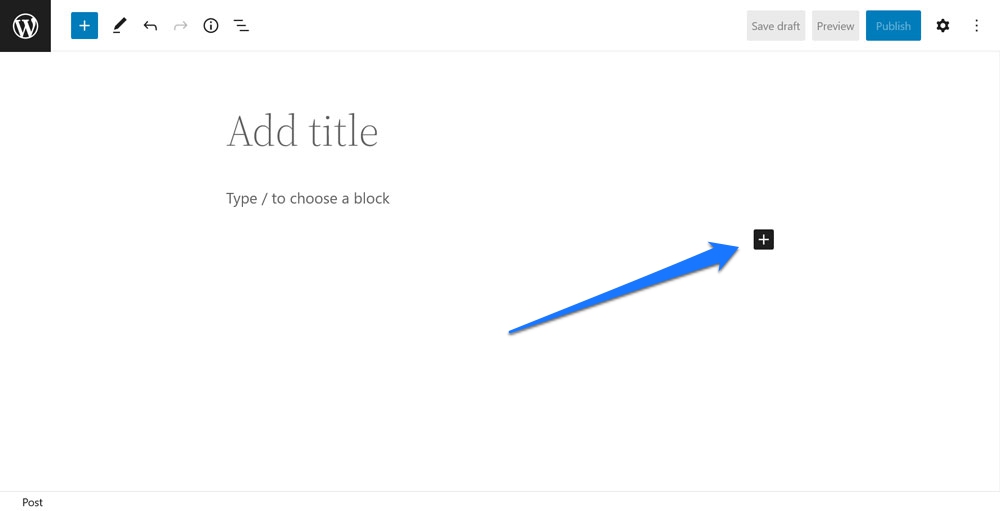
A click on it opens up a similar menu as the slash commands where you can pick from a list of frequently used blocks or search for what you need by name.
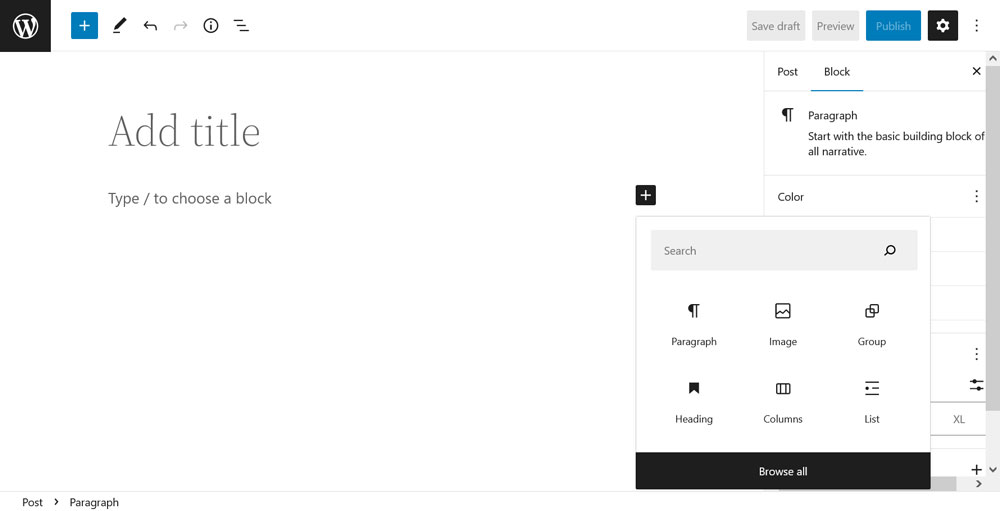
The menu also shows available block patterns during search. You need to choose blocks via the mouse, this menu does not work with the keyboard. A click on Browse all opens up the block inserter, which brings us to the third method.
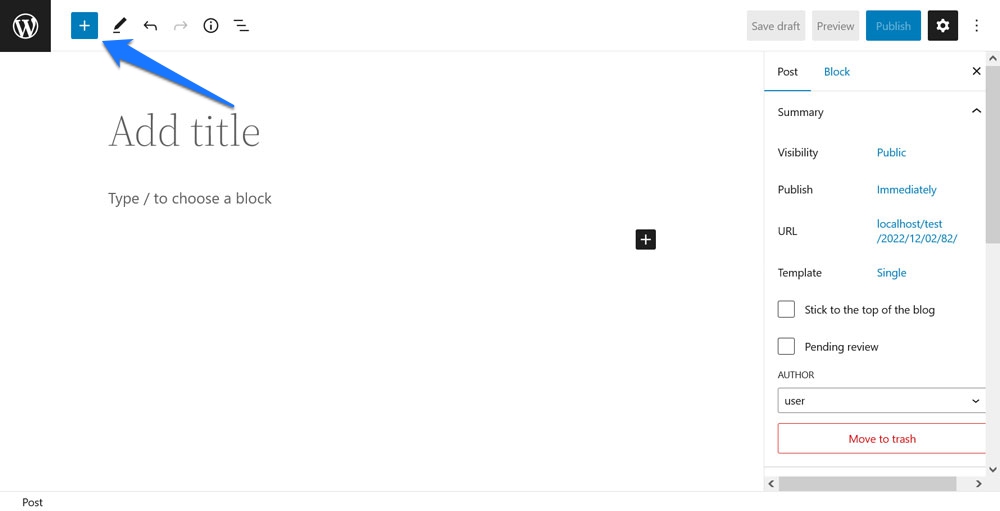
3. Working With the Block Inserter
You can acccess the block inserter by clicking the big blue “+” button in the upper left corner of the editor screen.
Doing so opens up the entire list of blocks (and block patterns) available on your website in a separate side menu.
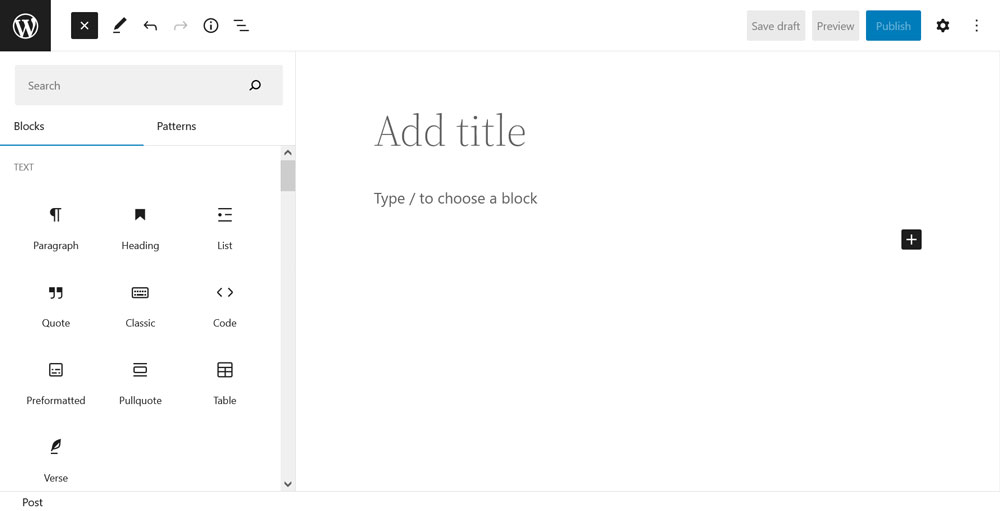
Scroll to find what you need or use the search bar on top to directly look for it. When you have found what you want, you have two ways to add it to the page:
- Click on the block to insert it where the cursor is currently located (it will show the position with a blue line when hovering over your chosen element).
- Drag and drop the block to your preferred place.
Here Are the Best Blocks Gutenberg Has to Offer
Alright, after this quick discourse, it’s time to see what blocks Gutenberg brings to the table that is worth inserting into your site and pages. Note, that in this case, we just concentrate on default blocks available in the editor (with one exception). Of course, it is possible to add more blocks to Gutenberg via plugins but we can not cover all of these here.
Query Loop
We are starting off the list with what is arguably the most powerful block that the block editor has to offer: the Query Loop. It’s basically a WordPress loop, the piece of code responsible for outputting any content in WordPress’ posts and pages, wrapped in a single block.
How It Works
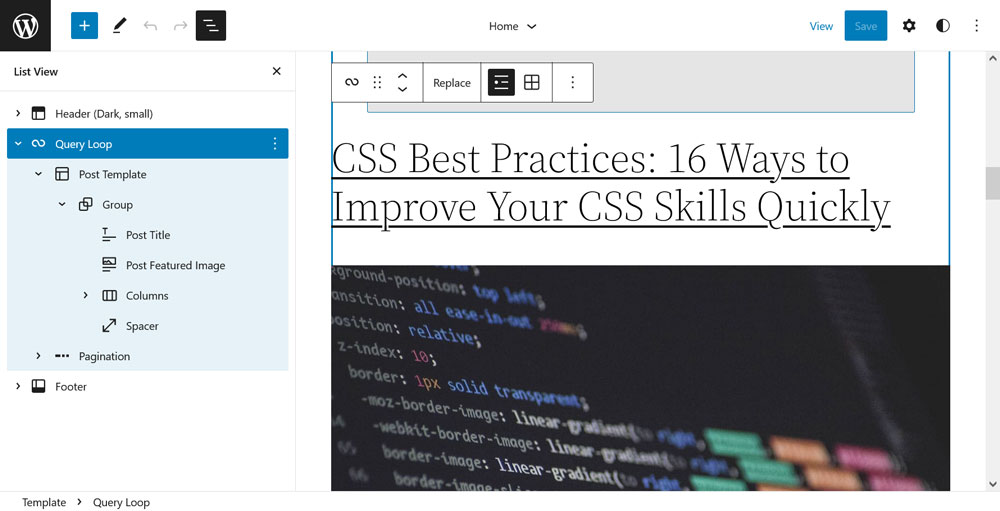
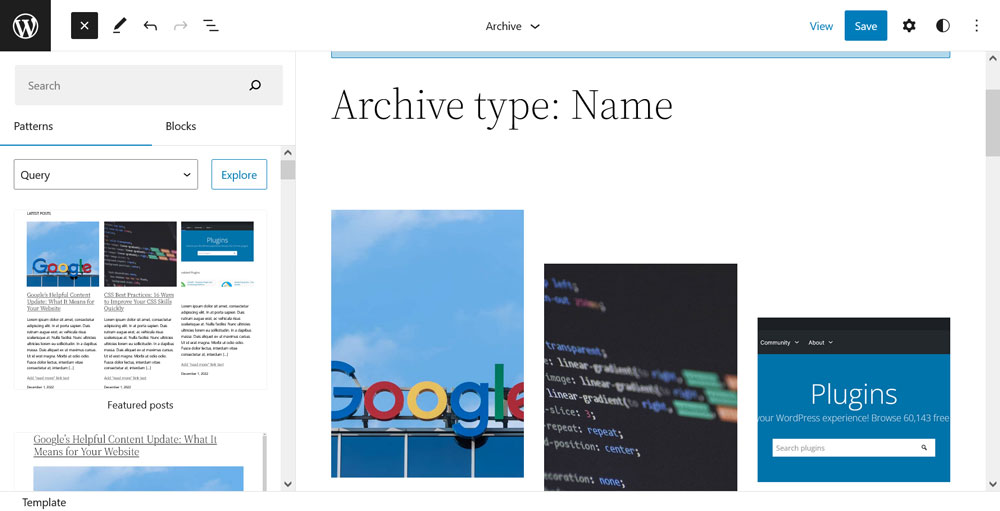
Query Loop allows you to add custom content to your pages very easily. When you input it into the page, you have two options: start with a block pattern or a blank template. When choosing the second option, the block asks you to pick whether to display your content title, date, excerpt and/or image.

(Note: Working with this block works best if you already have posts on your website. Query Loop will use them as examples.)
Once on the page, you have a multitude of ways to customize the content. Two of the most important you can find in the block options on the right.
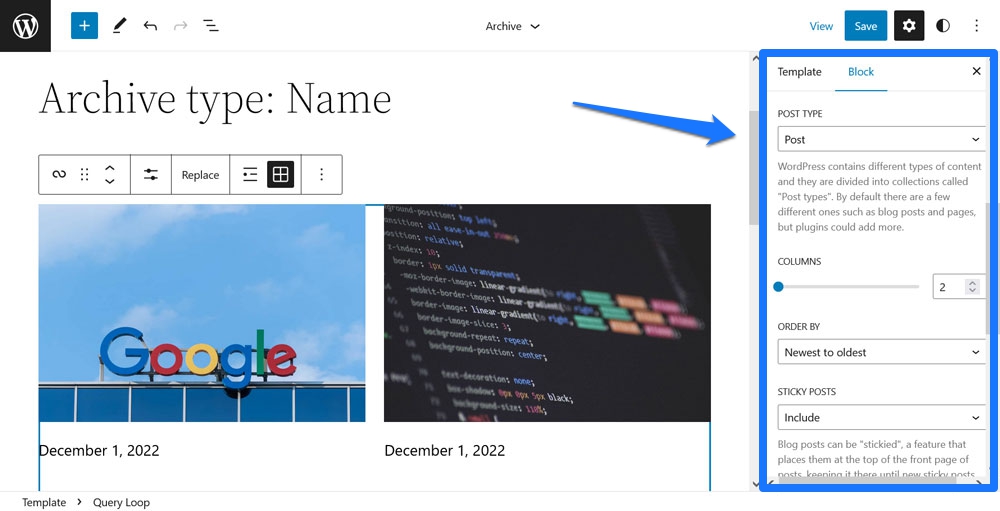
You can a) choose the post type that you want the block to output and b) add filters for what posts or pages show up. For example, you can direct the loop to only show content from certain categories, authors, or with certain keywords. In addition, you have the ability to order it from newest to oldest, the reverse, or either direction of the alphabet.
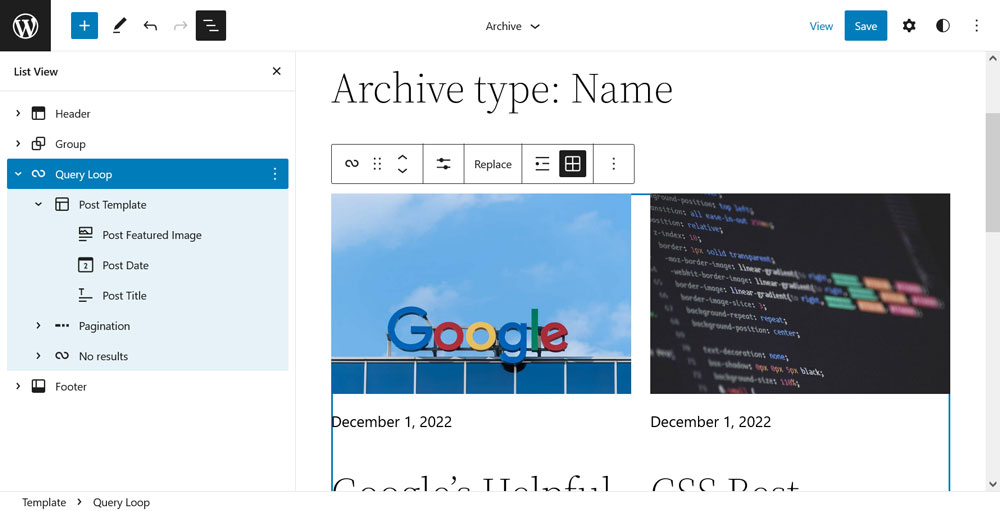
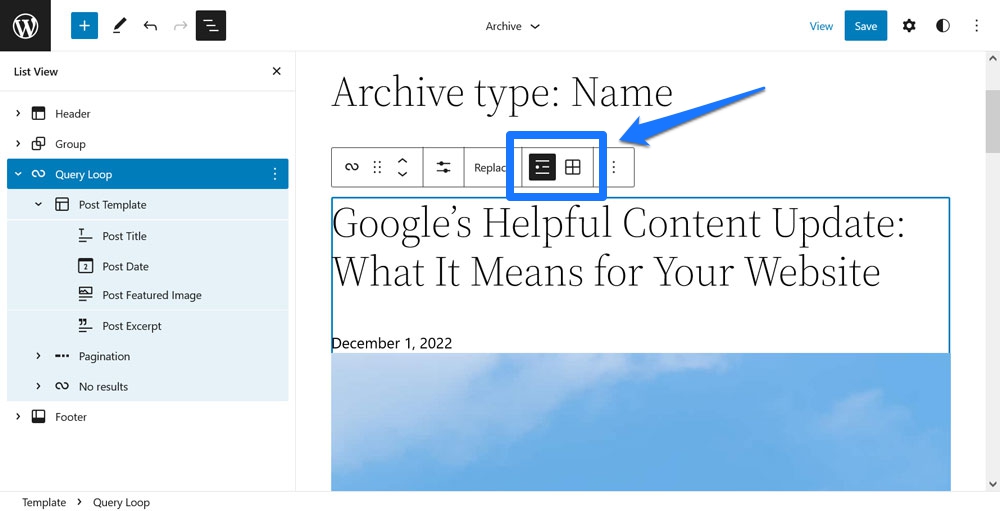
Besides that, you can customize what information shows up for each post in the loop. The easiest way to do that is via list view in the upper left corner. It allows you change the order of the post title, featured image, and date. You can even add things like excerpts (see also the next item in this list). Any change to Post Template will affect every single item in the Query Loop.
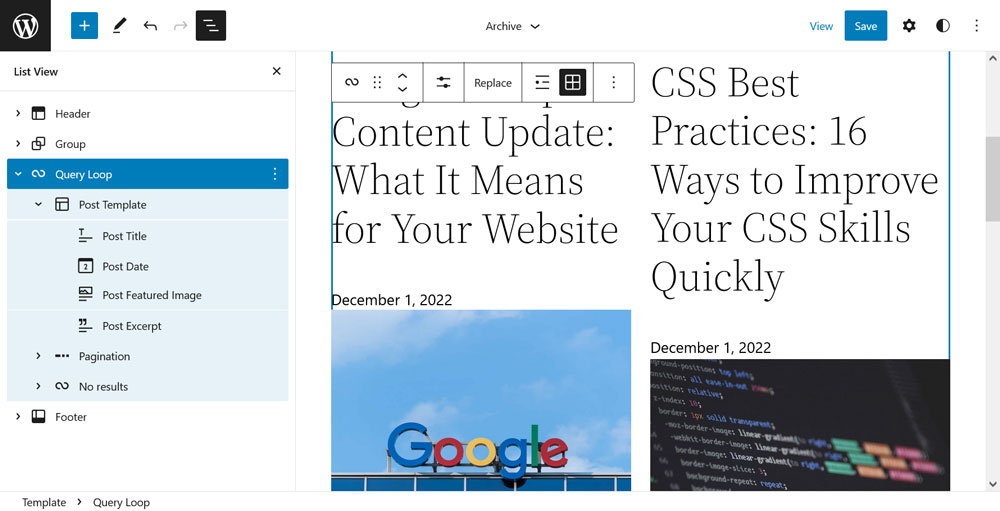
Finally, you are able to change the design of the content very easily. For example, you can switch the loop between list and grid view in the block settings bar on top.
It’s also possible to change the number of columns, modify colors, and more. That doesn’t even take into account the many possibilities to adjust the look via block patterns.
What’s Great About This Block
What makes Query Loop one of the best Gutenberg blocks? The fact that puts power into the hands of everyday users that, in the past, were only reserved for developers and people with good PHP skills. Now anyone can create and customize the WordPress loop and output filtered lists of content anywhere on their site.
Coupled with the Site Editor and its ability to export site customizations, that means that you can create a custom theme and edit page templates without any coding knowledge. Democratization of publishing at work.
Post Title, Excerpt, Content, Featured Image
We already mentioned these blocks in the Query Loop block section above but, as parts of the blocks for theme building and templating, they are worth looking into further.
How It Works
Post Title, Post Excerpt, Post Content, and Featured Image allow you to display important information and content from pages and posts wherever and in whatever order you want. For that reason, you usually don’t use them inside posts or pages but in templates and template parts. You access those in the Site Editor (Appearance > Editor, when using a block theme) by clicking on the logo in the upper left corner.
In the Templates menu, you are able to create custom page templates via the Add New button in the upper right corner.
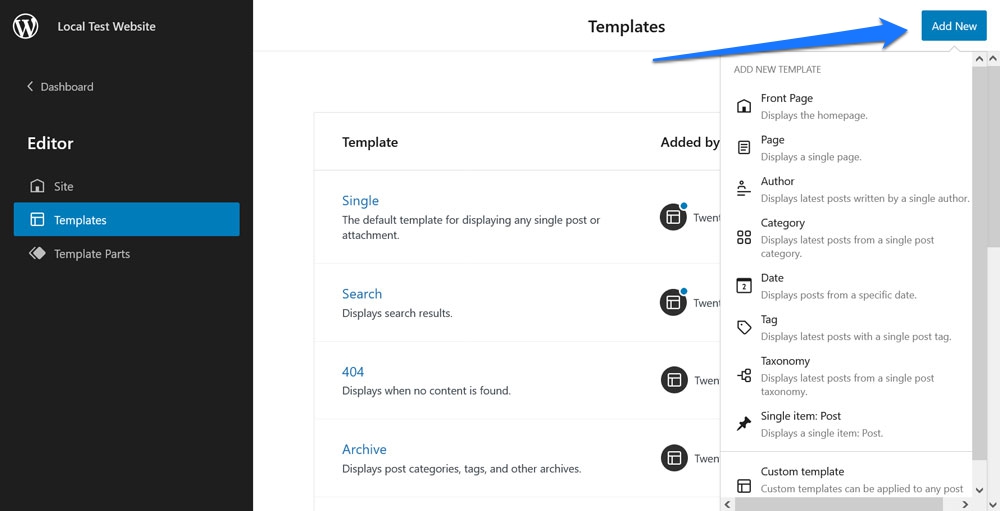
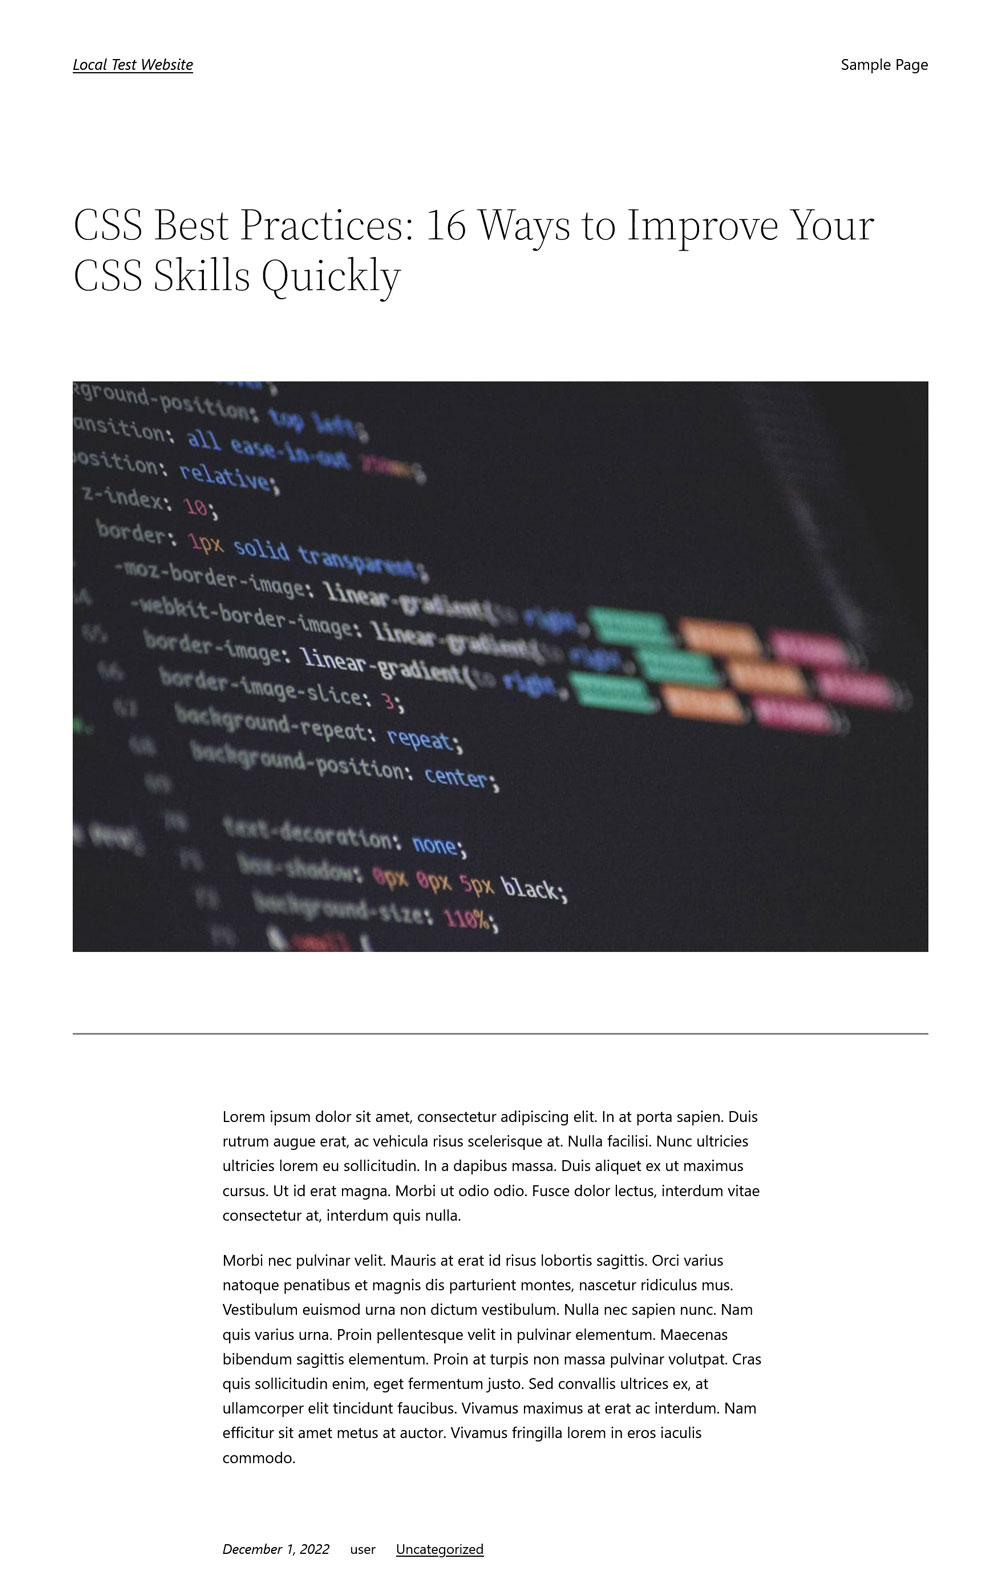
You can assign those to posts and pages or, alternatively, set them up so that they automatically apply to certain kinds of content. Of course, you can also edit existing templates to change their design. For example, this is what single posts usually look like in the Twenty Twenty-Two Theme:
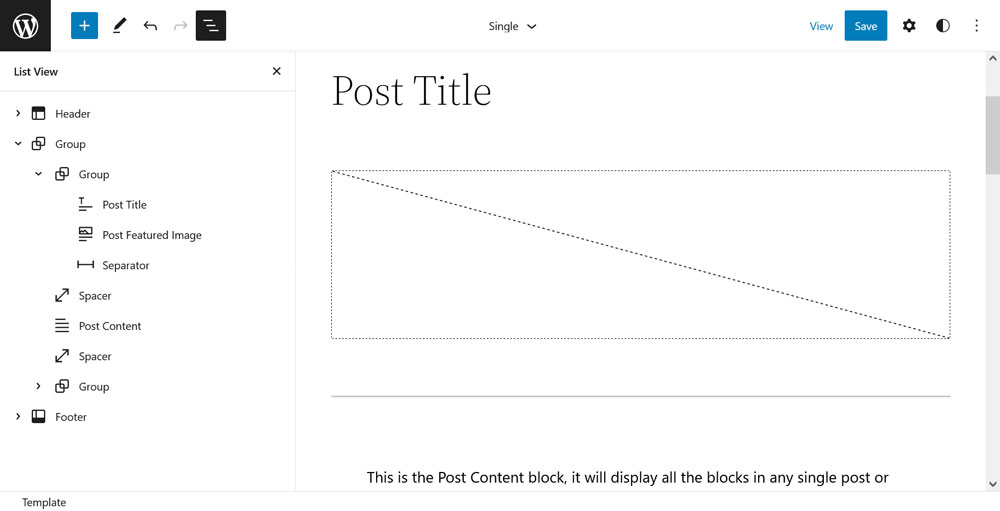
Here is the accompanying template:
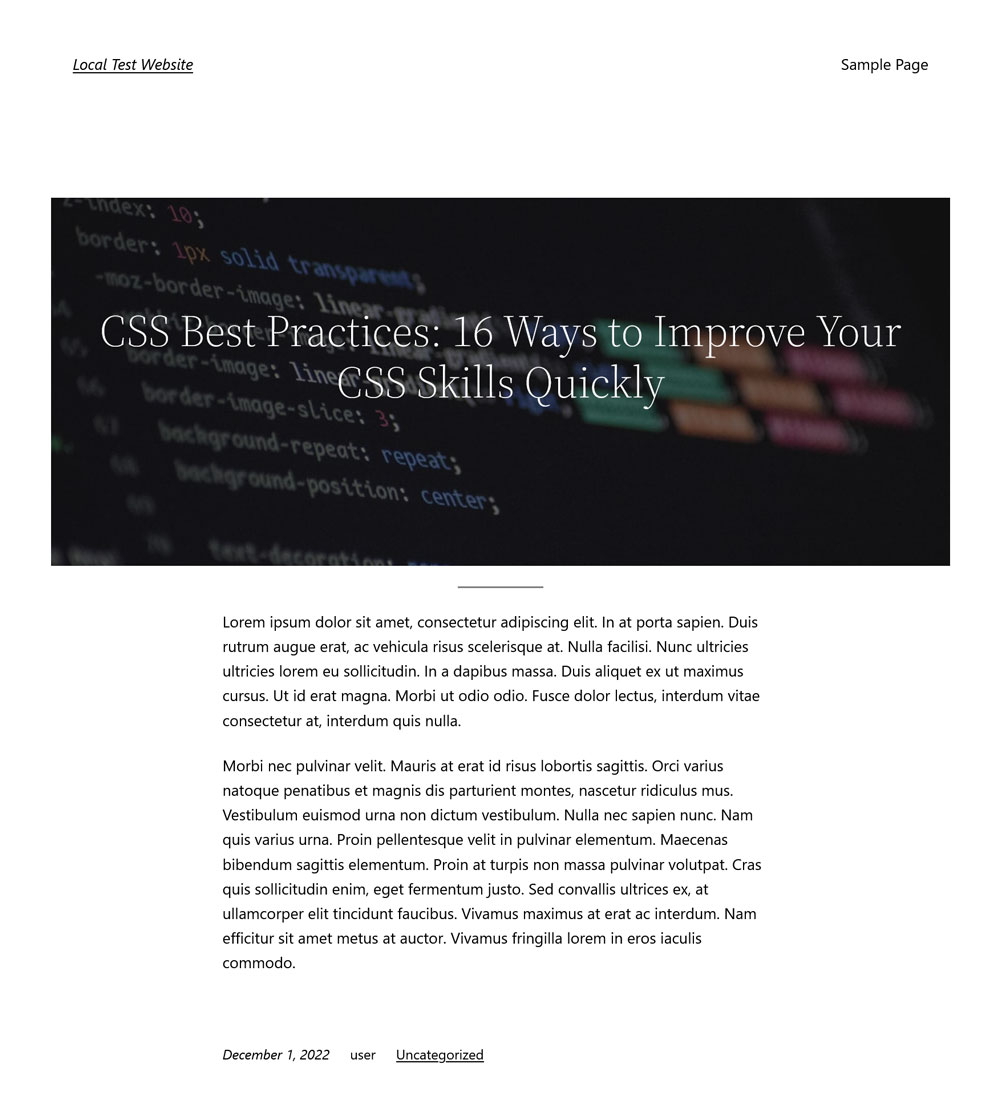
Now, we can do the following changes:
- Replace the featured image with a Cover block that shows the featured image, add a dark overlay, and move it to the same layout level as Post Content.
- Move Post Title inside the Cover block, center it, and change its color to white.
- Remove some of the spacers and change the style of the separator.
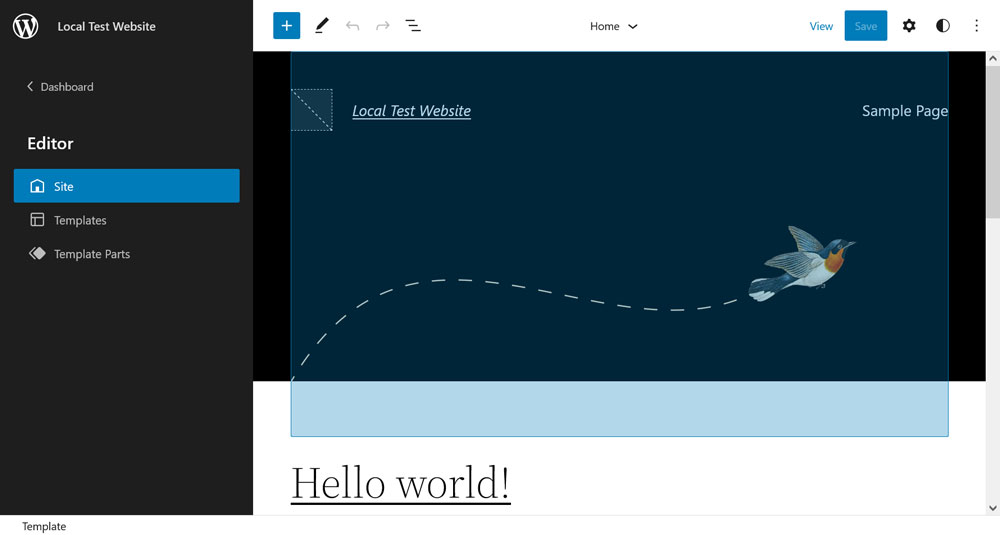
Just with these few steps, the page already looks quite different:
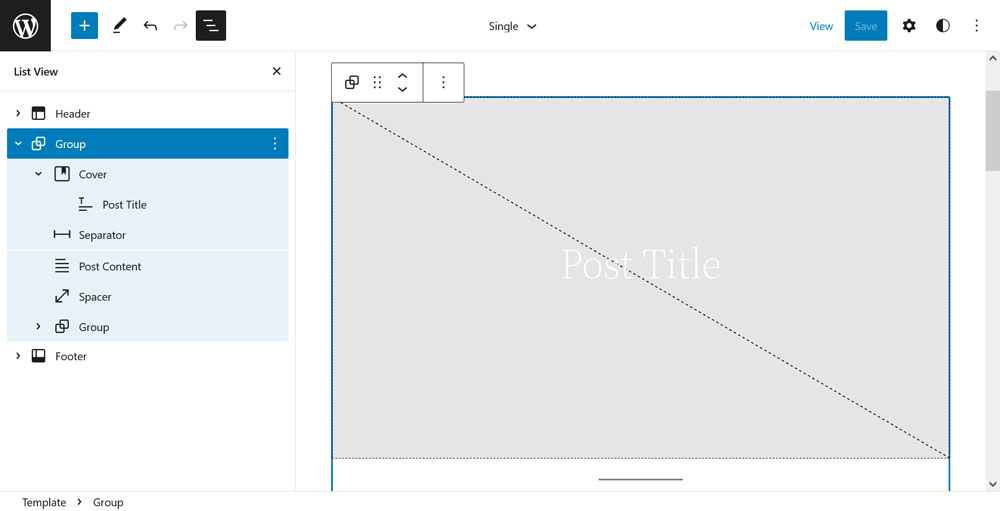
Here’s what the page template looks like in the Site Editor:
What’s Great About These Blocks
As you can see above, these are some of the best Gutenberg blocks because they are extremely potent. They allow you to move around and modify basic elements of your page display. With just a few clicks, you can make fundamental changes to how content appears on your site. Combine it with the Post Date, Categories, Tags, and Post Author Name blocks, and you can build web pages in whatever way you want.
Comments
The Comments block is the last theme block we want to talk about here. As you can probably deduce from its name, it’s responsible for adding the form to leave a comment as well as list existing user opinions on your pages.
How It Works
The important thing to keep in mind here, as will quickly become obvious when opening list view, is that the Comments block consists of several subblocks (note: you might have to click on the prompt to switch the block to editable mode to see these).
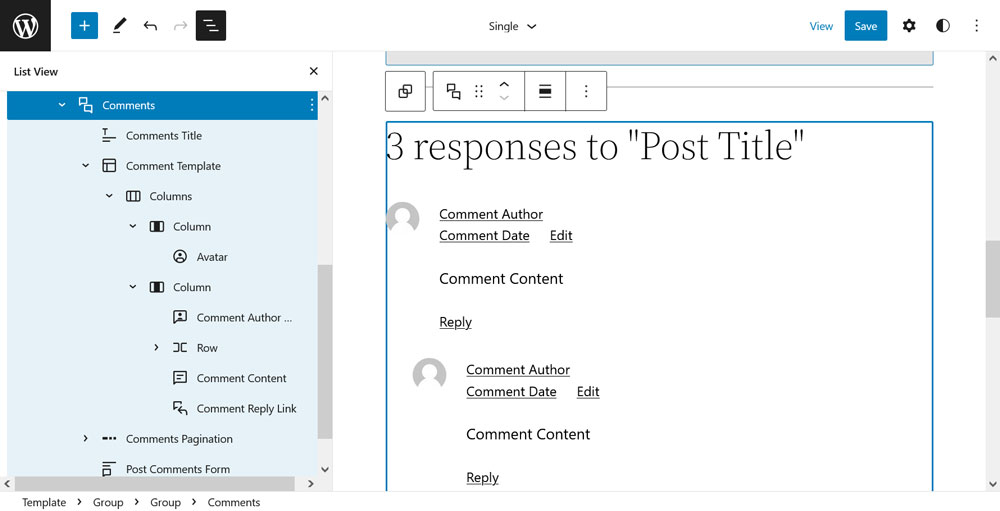
Namely, these are:
- Comments Title
- Comment Template (includes Avatar, Comment Date, Comment Author Name, Comment Edit Link, Comment Content, and Comment Reply Link)
- Comments Pagination (consists of Comments Previous Page, Comments Page Number, Comments Next Page)
- Post Comments Form
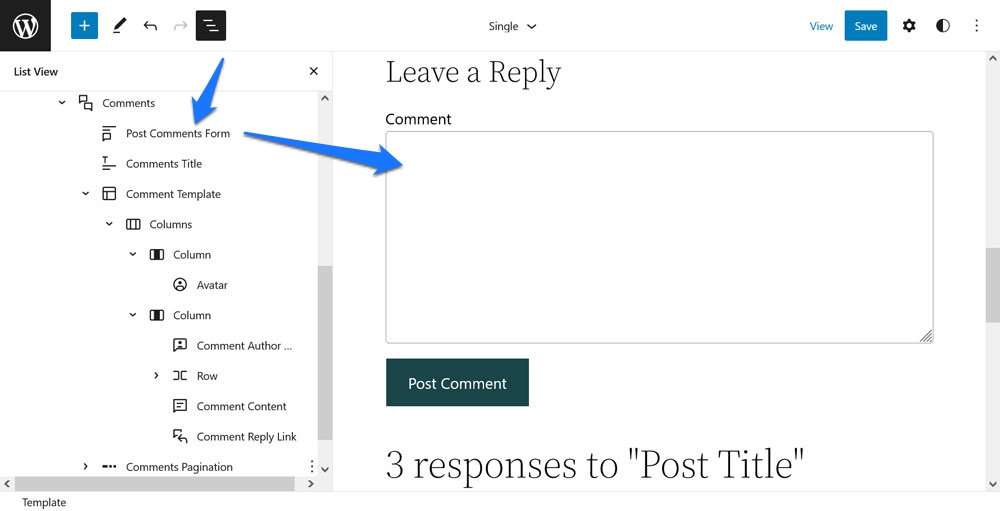
What should be obvious by now is that this compartmentalization allows you to arrange different elements in any desired order. For example, in the default block, the form to add a comment is at the bottom of the comments section. If want to make it easier for visitors to reach, you can simply move it to the top.
Alternatively, do you want to flip the order of the comment date and author name? Nothing easier than that.
In addition, each element comes with sensible design customization options. You can change the size and border radius of the Avatar picture, determine whether the author name should link to the author’s URL (and if it opens in a new tab or not), customize the comment date structure, or simply change text size, colors, and background colors for the elements.
What’s Great About This Block
Be honest, as a normal WordPress user, before Gutenberg, did you have any idea how to make changes to your comments section? Me neither.
Now, with the Comments block, you have almost full control over it! Even more, you can actually add a comments form to pages that usually don’t have them and also remove them on a post-to-post basis (if you create a template without the Comments block and assign it to your posts).
The only thing that’s definitely missing at the moment is the ability to customize text elements, e.g. change Leave a Reply at the top of the comments form to something that might go more with the branding of your site.
Row/Stack
Row or Stack is a formatting block that you encounter a lot but mostly without knowing it. Its sole purpose is to arrange elements horizontally or vertically and control their relation to each other.
How It Works
In order to understand how the Row and Stack blocks works, the best way is to look at template parts like headers and footers (inside the Template Parts menu in the Site Editor).
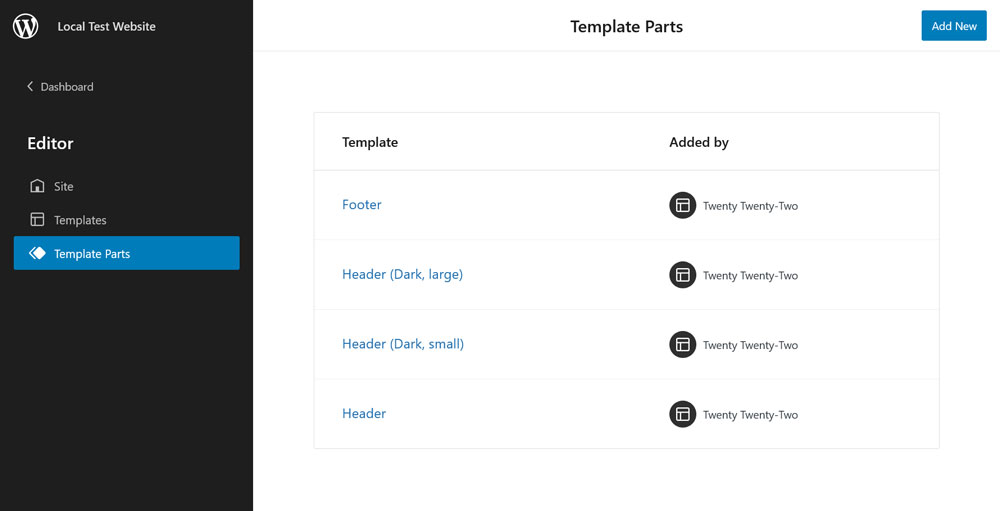
These not only often consist mainly of a Row element but also contain additional elements of the same type to control the look of elements inside the header.
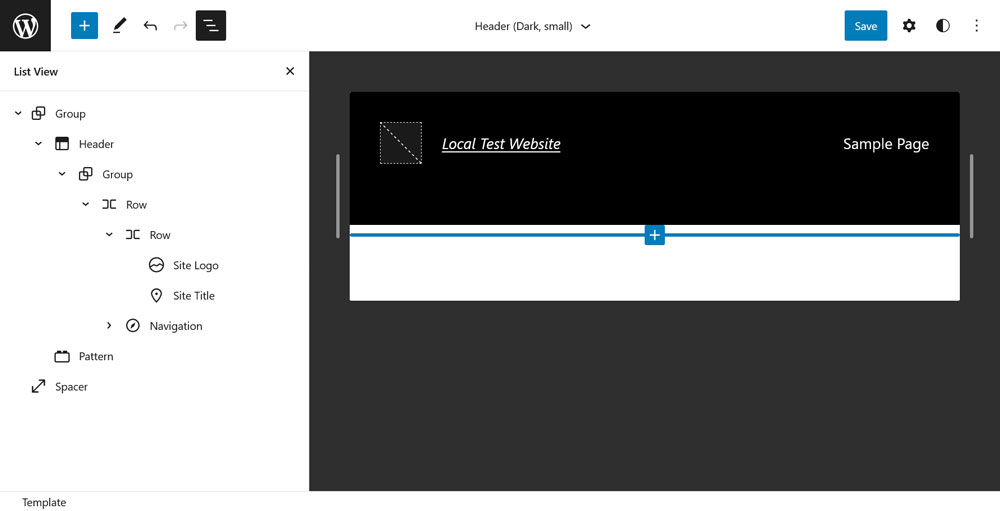
As you can see in the markup above, this header is a Row block that contains another Row element for the site logo and title as well as a navigation block. It’s simple but sufficient.
However, the real magic is in the options that the Row block offers (besides the usual typography and color settings):
- Change the justification of elements (left, middle, right, space between items, and allow wrapping across multiple lines).
- Adjust orientation between horizontal and vertical (the latter turns it into a Stack rather than a Row block).
- Add padding and margin.
- Control block spacing.
This allows you to easily arrange elements in whatever way you need.
What’s Great About This Block
In the past, you needed to work with a lot of floats in order to arrange HTML elements horizontally and vertically. Even after things improved on the technology front, it was still necessary to familiarize yourself with things like flexbox and grid in order to make this happen. Now, it’s all just a few clicks away. Funny enough though, flexbox is the exact technology that the Row block is using, which you can see when you look at the page with browser developer tools.
Table of Contents
This is the only block that falls outside of the premise of this article as it is not yet part of the Gutenberg default blocks. At the time of this writing, it’s only available with the Gutenberg plugin installed and activated. However, it used to take extra plugins to get this functionality in the past and I am just excited that soon it will be a native function and wanted to give it a whirl.
How It Works
Creating a table of contents in Gutenberg is pretty easy. First, write and format your text, including your headings. Then, input the Table of Contents block into your page or post – that’s it. The block will automatically create a clickable table of contents from the headings on your page.
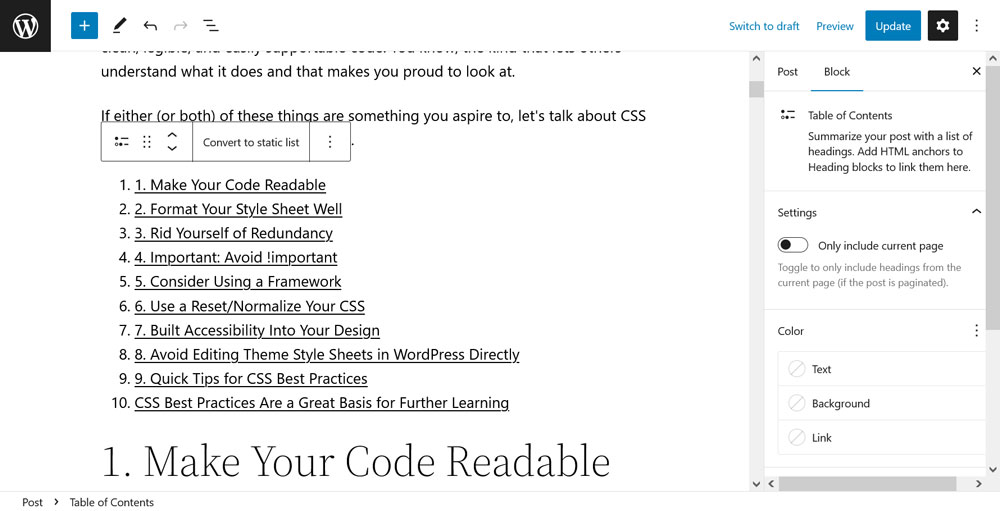
In addition, it adds the necessary HTML anchors so that the page jumps work. That way, when someone clicks on a link in the table of contents, the screen will automatically move to that heading.
What’s a bit thin at the moment are the block’s customization options. It only comes with settings to narrow down the content of the ToC to the current page (for paginated content) and customize things like text and background colors, sizes, as well as margin and padding.
If you want more detailed options (such as the ability to remove the double numbers that are visible above), you can convert it to a static list, which has more settings and makes the list editable.
In that case, the Table of Contents block only works as a shortcut. There is also no way to convert the list back to the original block.
What’s Great About This Block
Creating a table of contents used to be kind of tedious. You had to manually copy the heading text, input HTML anchors, format it, and add the right page links. Now, all of that is done for you – and in seconds!
Sure, there is room for improvement. The current lack of customization options is a bit of a bummer. Page jumps also don’t work in preview because the block uses the URL slug of the finished post. However, it still makes the process of adding a table of contents in WordPress much easier.
What Are Your Best Gutenberg Blocks?
The WordPress editor is constantly evolving and adding new blocks to its repertoire. For that reason, it’s easy to lose track of what exactly it has available.
Hopefully, you have found some inspiration in the article above and maybe the motivation to try out some more blocks. If you discover something you really like, we’d love to hear from you!
What do you consider to be the best Gutenberg blocks? Anything to add to the list? Let us know in the comments!


