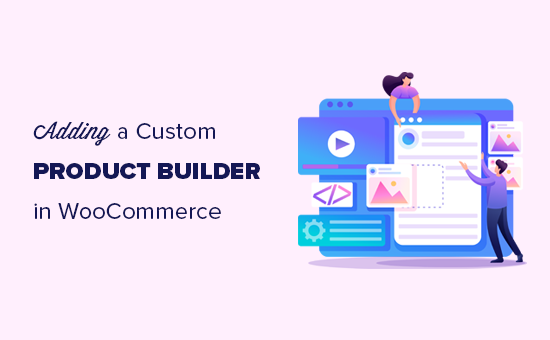
Do you want to add a custom product builder in WooCommerce?
A custom product builder in WooCommerce allows customers to design products and customize them to their own requirements. This interactive way of customizing product orders can boost sales conversions.
In this article, we will show you how to easily add a custom product builder in WooCommerce without hiring any developers or writing any code.

Why Add a Custom Product Builder in WooCommerce?
Adding a custom product builder in WooCommerce allows your customers to customize the products before placing an order.
For instance, you can add print-on-demand products and allow customers to add their logos, images, and text to the products.
A custom product designer for WooCommerce can be used to sell your own products that you can customize for the customers before shipping.
Alternatively, you can also start a dropshipping business and let a third-party vendor take care of customization and shipping.
That being said, let’s take a look at how to add a custom product builder to your WooCommerce store.
Adding Custom Product Builder to a WooCommmerce Store
For this tutorial, we will be using Zakeke. It is a product customizer tool for WooCommerce and offers a seamless product builder experience for your users. The product designer is really easy to use for customers as well as store owners.
First, you need to sign up for a Zakeke account.

After that, you will be asked to choose your eCommerce integration. Simply click on the Next button to continue.

Zakeke works with most popular eCommerce platforms including WooCommerce.
To connect your store to Zakeke, switch back to your WordPress website admin area.
Next, you need to install and activate the free Zakeke plugin. For more details, see our step by step guide on how to install a WordPress plugin.
Upon activation, you’ll be asked to connect your WooCommerce store to your Zakeke account. Simply click on the Connect button to continue.

You’ll be then asked to allow Zakeke access to perform actions on your WooCommerce store. Click on the Approve button to move forward.

This will bring you back to Zakeke website to start your free trial or choose a pricing plan. Click on the next button to continue.

On the next page, you will see pricing options for different plans. Each plan comes with a free 14-day trial and does not require a credit card.
Apart from the Starter plan, all other plans charge an additional 1.9% transaction fee on sold products.

Click to choose your plan and you are good to go.
Adding Your First Customizable Product
You can now click on the Next button to launch the Product configurator and start adding your products.

You can then choose a product from your own store, or you can select a print-on-demand service.
For the sake of this tutorial, we will choose to add products from our own demo store.

Next, Zakeke will load products from your store, and you need to choose the product that you want to configure.

After that, it will choose your product image from your store. If you want to use a different image, then you can upload it. You can also add a back side of the product image or add variations.

Once you are satisfied with the product images, click on the ‘Set print area’ button. This will bring up a popup where you need to set a ruler by simply drawing a line with your mouse and providing a measurement.

Next, you need to select a shape for the print area and then draw it on the product image.

Once you are satisfied with your selection, click on the Save button to continue.
Next, you need to click on the Proceed to preview button to finalize your changes.

You’ll now see your product details. Don’t forget to save your changes as draft or publish it to your store.

Setting The Print Methods
The next step is to set print methods. This is where you can choose how you want the design files to be formatted for printing.
From your Zakeke account dashboard, go to the Printing Methods from the left column and then click on the Add Printing Method button.

From here, you can choose what printing features you want to allow to your customers. You can also choose the file types, resolution, and format.
At the bottom, you can choose the existing products that this method would apply to.
Don’t forget to click on the Save Print Method button to store your changes.
Using The Custom Product Builder in WooCommerce
Zakeke will take care of adding the product customization option to all the products that you have added using the product configurator.
You can simply visit the product in your store, and you will see the option to Customize the product.

This will open up the product designer interface with a preview of the product image design tools on the right. Users can add text or upload images from their devices.

Users can adjust the image or text to the print area by simply dragging the corners. They can choose different fonts, colors, and styles.
The product designer also works on mobile devices and automatically adjusts to match the user’s screen size.

Once finished, they can download a copy of their design as PDF, save it, or simply add it to the cart.
After that, customers can check out as they would normally do with a preview of their customized product in the cart.

Processing the Custom Product Order in WooCommerce
Zakeke makes it really simple to get the customization files for each order.
Simply go to the WooCommerce » Orders page and click on an order for your customizable product.

On the Order details page, you’ll see a preview of the custom design created by the customer with a link to download the customization files.

You can then download the print files and send them for print or to your dropshipping vendor.
Bonus Tip: Selling More Customizable Products in WooCommerce
Customizable products and a sleek product designer would help you make more sales. However, customers may not know that they can customize and design their products.
This is where OptinMonster comes in.
It is the best conversion optimization software on the market and allows you to easily convert WooCommerce visitors into paying customers.
OptinMonster comes with lightbox popups, slide-in popups, notification bars, countdown timers, and more. All these tools help you display the right message to your customers at the precise time.
With its powerful display rules, you can target customers and show them personalized campaigns.

For instance, you can offer free shipping to customers in a particular area, show a slide-in popup for customizable products, or give a limited-time coupon to recover abandoned cart sales.

We hope this article helped you learn how to easily add a custom product builder in WooCommerce. You may also want to see our guide on how to track conversions in WooCommerce to grow your business, and our comparison of best WooCommerce hosting providers.
If you liked this article, then please subscribe to our YouTube Channel for WordPress video tutorials. You can also find us on Twitter and Facebook.
The post How to Add a Custom Product Builder in WooCommerce appeared first on WPBeginner.


