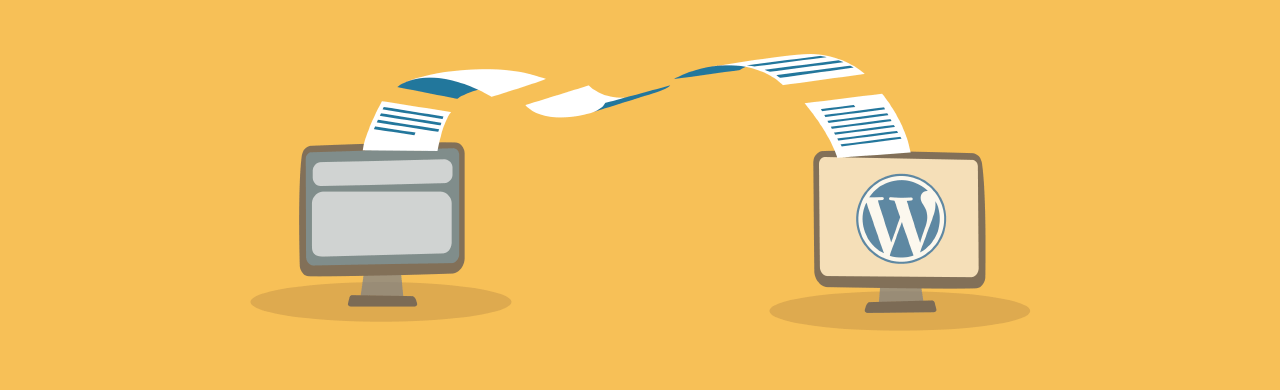
You started your website on a platform that was popular at the time. Perhaps it was the first one that you came across. But now that you’ve used it for a while you’ve decided it no longer does what you need it to. You want to move your website to WordPress. Smart move.
WordPress is an amazing platform. So, good choice there. The problem is you have all of those articles with photos already on that other platform. You have a menu structure that your visitors like. You have categories that make sense for your website. You have subscribers. That’s a lot of items to be concerned about. Plus, you still want your visitors to feel like it’s the same site they love.
You know you want to move your site to WordPress. But the question is, how?
This article doesn’t focus on a specific platform. No matter which platform you’re using, the process is about the same. Instead, this article will show you precisely how to make the move and either keep the structure you have or improve it.
NOTE: I’m assuming you have a basic working knowledge of WordPress. If you do not, then you’ll need to set up a WordPress installation and learn the ropes before converting your old site to WordPress.

The Typical Migration Process
The typical conversion process from a different platform to WordPress looks like this:
- Evaluate Your Current Website. This will tell you what special features you need in your new WordPress website. This includes all of your content types – pages, posts, galleries, links, etc.
- Set Up Your WordPress Installation. You don’t need anything fancy yet – just WordPress installed on your domain.
- Plugins to Migrate from Specific Platforms to WordPress. Migration plugins make moving your site to WordPress a lot easier.
- Import Content Using an XML or CSV File to WordPress. Simple enough, right?
- Set Up Your WordPress Site Design. This includes your theme, colors, logo, menu structure, links, and so forth.
- Test and Debug Issues. It’s important that your site is ready for public use before going live. This includes all links, images, media, content, menus, plugins, widgets, etc., both internal and external. I recommend using a maintenance mode plugin while the site is being tested.
- Go Live. This involves either moving your domain to your new host or pointing your URL to your new site.
- More Tests and Changes. Don’t assume everything will be perfect when your site goes live. It is okay to makes changes.
Evaluate Your Current Website
Knowing what you have will help you figure out what you need.
Start with a Plan
Converting a website is a big project and you want to do it right the first time. I know it sounds cliché, but you need a plan to keep this train on the right tracks. You need to know exactly what your WordPress website should look like and how it should act. You need to know what you have, what you want to keep, what you want to change, and how you want it changed.
You need to know the specifics of what kind of site it is and what it should do. For example, are you moving a forum, paid membership, auction, school, or online store? Obviously, each these require different features. You’ll need to know all the details so you can find the right solution for your site once it’s on WordPress.

To do this go through your old site and take an inventory of its features. Look at and make notes for items such as:
- Menu structure
- Forms
- Ads
- Content types
- Backups
- Security
- Layout
- Branding (logo and colors)
- Special icons
- Slider
- Links
- Images
- Attachments
- SEO
- Multilanguage
- E-commerce
- Social media sharing
- CSS
What Needs to be Converted?
Answering this question will help you determine how to perform the conversion. Go through your site and ask questions then down your answers. This will allow you to build a checklist of items that will help you design your WordPress site. Here are a few more questions you can ask:
Do you have a large site? Will all of your pages and posts be migrated into your new WordPress site? If so, then you’ll need some good tools. If you’re only migrating a few posts and pages you can migrate them by hand.
Do you need a post type other than a post or page? If so then you’ll need to create custom post types.
Are you keeping the URL and link structure? If so, will you have to customize your permalinks? If not, you’ll need to use redirects to point to your new URL’s.
Are you using tools such as stat-counters, contact forms, email and newsletter forms, and maps? Will you need to keep them? Can you keep your current tools, or will you need to find equivalent tools?
Does your site have comments? Do you want to transfer them all over to your new site?
Do you have restricted content for members-only? How do you currently implement this?
Do you have an e-commerce site?
Will you have to migrate to a new e-commerce solution?
Depending on your current e-commerce package, you might have to upload products, choose new shipping methods, and choose a new shopping cart that’s compatible with WordPress.

Does your site have multiple users? Many different authors, administrators, or contributors? If so, you’ll need their information in order to set up user accounts.
Your New Design
You’ll use this information to design and set up your new website. It might end up looking the same (or similar), but you have to know what you need in order to keep it the same. This information will help you create your project’s to-do list.
You’ll need:
- Hosting
- Domain
- Settings
- Theme
- Plugins
- Widgets
- Menu Structure
I don’t recommend trying to make your new site a carbon-copy of your old site. I mean seriously… Why would you bother? Now’s your chance to make something better. Branding it so that it has a similar look and feel is a good idea. That lets your visitors know that it’s you (which is a good thing), but if you’re going to take the time to move it, you might as well improve it, too.
Set Up Your WordPress Installation
Next you’ll need to install WordPress on your domain or on an offline server. If you’re using the same domain you can use a new sub-directory to install WordPress to and then move the site to the original directory or point the domain that the sub-directory once the site is ready. This way your old site can remain active while you work on your new site.
WordPress Settings

Set up your permalinks, navigation structure, and user accounts.
Theme
Choose your theme and then choose your settings for your logo, favicon, and CSS styles. Some themes have lots settings built-in for menus, styles, and ad placement.
Plugins and Widgets
You’ll need new plugins for SEO, security, contact forms, maps, backups, maintenance mode, multiple languages, social sharing buttons, shortcodes, and stats. Specialized plugins, such as auctions, courses, e-commerce, real estate, and events, will require extra setup. If your old versions have export functions, such as exporting via CSV, then you can import your data into the new versions. You might not be able to port all of your content over, so this step might require extra time for setup and debugging.
Import Your Content into Your WordPress Website

Now it’s time to import your content from your old site to your WordPress site. This process takes the content from your articles and imports them into WordPress as posts.
To do the importing, you can use a script or a plugin. It’s possible that the WordPress Codex will have an importing script for your site. In your WordPress dashboard go to Tools and select Import. Here you’ll find the 8 most popular CMSs to import into WordPress. If your CMS is not here you can check the plugin directory. If a plugin is available, install the plugin and follow the instructions to import your old site into your new WordPress installation.
Importers are available for all of the major platforms including CMS and HTML coded platforms. There are also importers for WooCommerce, attachments, comments, users, media, and more.
If your platform is not on the list of plugins then you might have to upload your pages manually. For this you would create pages and posts one at a time by copying and pasting in your content. Make sure to retain your URLs and post titles. I recommend using a spreadsheet to help you keep track of titles and URLs. If you have too many articles to move manually you might consider hiring a developer to move the content for you.
NOTE: Be careful not to run the import process twice. This can cause duplicated or missing data or errors in your new database.
Plugins to Migrate from Specific Platforms to WordPress
If a plugin is available for your specific platform then it’s a good idea to use it. Here’s a quick look at some of the plugins that I recommend for the most popular platforms.
-
Blogger Importer Extended

This free plugin will import published posts, tags, comments, and images. It will also migrate authors over to WordPress. On top of that, it allows you to set up 301 redirects from Blogger to WordPress and fixes the mixed-content issue. It supports 4 languages.
-
Tumblr Importer

This free plugin will import your Tumblr blog into WordPress with correct post formats. It will import posts, drafts, and pages, and it makes sure there are no duplicates. It does media side loading for your image video, and audio posts. It supports 15 languages.
-
FG Joomla to WordPress

This free plugin will migrate Joomla articles (as posts or pages), sections (as categories), categories (as sub-categories), posts (including published, unpublished, and archived), images, media, tags, and page breaks from a Joomla website into WordPress.
This is one of the better migration tools because it does a lot more of the work for you. It modifies the post content and keeps the media links and modifies the internal links. It also has a lot of features for images. It resizes the images according to the sizes defined in your WordPress settings, uses the featured image as the first post image, keeps the image caption, and keeps the alt image attribute.
There’s even a Premium version that migrates your Joomla SEO and adds the use of add-ons.
Import Content Using an XML or CSV File to WordPress
Another way to import is to import file-types such as CSV and XML. This is the best way to import your files if you don’t use a common CMS platform.
-
Import any XML or CSV File to WordPress

This one will import any XML or CSV file to WordPress as posts. It uses a simple drag and drop interface. It’s a solid but basic tool.
To really get the best of this plugin you’ll need the Pro version which adds tons of features. It adds importing data into Custom Fields, importing images to the post media gallery, importing files from a URL, and lots more.
-
Import CSV with Ultimate CSV Importer

This one will import posts, pages, custom posts and custom fields from CSV files from any app, tool, or software. It will import any WordPress post type and associated fields using a mapping feature. You can control the post status (scheduled, published, pending, draft, sticky, private, and protected).
It supports custom post type UI plugin post types, custom fields, categories, tags, users (with roles), author, comments, and eshop.
There’s also a Pro edition for $149.99 that supports WooCommerce with product variation, MarketPress, WP Members, All In One SEO Fields Import, WordPress SEO by Yoast Fields Import, Custom Post Type UI plugin import, and much more.
Set Up Your WordPress Site Design
Once you have all of your data moved over it’s time to set up the design of your new website. This involves getting your look and feel the way you want it.
Header
You can make adjustments to your header in Appearance > Editor >Header. This is a good option for making modifications such as changing the height of the header. If you’re using an image for your header you can insert the URL for the image within the code. An easier option for images is Appearance > Customize, and set your image header in the menu. You might also find a plugin that will modify the header the way you want. There are several in the plugin directory that handle headers as well as footers.
Background
You can upload your own background under Appearance > Background. This might be necessary for your branding. You might consider a plugin with special features if you want more control.
CSS
If you want to keep the same styles you can view the styles on your old site by opening your site in a browser and then right click and select View Page Source. In Google Chrome you can also select Inspect Element. Both of these tools will show you the styles of any element on the screen. You can use the hexadecimal numbers and font names to recreate the same styles in your new website. Make a note of all the styles you want to use.
Once you have your styles you can add them in the frontend or backend. For the frontend go to Appearance > Customize. Then choose Colors and Fonts, and input your numbers. For the backend go to Appearance > Editor > Stylesheet at the bottom of the page. If your theme has controls for styles then you can also input them there. Also, there are plugins to help with your styles.
Footer
You can modify the code for your footer by going to Appearance > Editor > Footer. You can use a plugin to modify your footer if you prefer not to deal with the code. I recommend adding your links to your footer. This can be done in the menu structure under Appearance > Menus on the dashboard.
Homepage
You can choose to have a static homepage or a blog-style homepage. This is done in Appearance > Customize.
Custom Post Types
Some of your content might require a custom post type. You can create these yourself of use a plugin. Once you’ve created them, your importing plugin might be able to use them (it depends on the features of the plugin). If not, then you’ll have to set them manually.
Menu Structure
If you need a specified menu structure you can set it up in the Appearance settings on the dashboard. Go to Appearance > Menus and set up your custom menus for the header, footer, sidebars, and secondary menu. It is possible that you’ll like the default menu structure and won’t have to set up a custom menu, but don’t settle for it if you don’t like it. It only takes a few minutes to make the perfect menu.
Test and Debug Issues
Before you take this puppy to the show it’s crucial that everything works the way you want it to. Go through your site and check everything. Check for broken links, page loading, image loading, the menu structure, buttons, redirects, 404 page, media, user names, social media links, commenting, contact forms, newsletter signups, RSS, restricted access is actually restricted, etc., etc. The more complex your site, such as auctions or e-commerce, the longer you need to spend testing. Perform speed tests and make changes as needed.
It’s helpful to get others in on the fun. Have several beta testers go through the site and make sure there are no surprises.
Build a checklist of items to look for. Make notes of all problems and tackle them one at a time. Prioritize them so the most important items are taken care of first.
NOTE: Despite all your best efforts it’s likely something will be left undone, won’t work in real life the way you imagined, or your readers will prefer something different. Don’t sweat it. This is more common than you might think. Just make note of it and chip away at it a little piece at a time.
Go Live!
Once you’ve fully tested your WordPress site and you’re sure you’re ready to go live, it’s time to make it your official site.
Before going live, make sure your readers know what’s coming. Write a post explaining what you’re doing. Once you go into maintenance mode make a note on the maintenance screen explaining why your site is down, the changes you’re making, and when your site will be back. Use a plugin and capture their email and let them follow you on social media. Communication is crucial.
There are two ways to make your new site your official site. No matter which method you choose, place your site into maintenance mode during the moving process until the site is moved and fully tested.
One method is to move the site to your server, replacing the old one. For example if you have an HTLM site on your own domain you remove the old site and replace it with your WordPress installation.
Another is to move where your domain points to. This is a good choice if you’ve placed your WordPress installation on a sub-domain of your website. You just have your URL to point to the sub-domain.
Move Your Domain to Your New Host
If you’re keeping your current host and just moving from one platform to another (for example, you’re moving from Joomla to WordPress and both are on your current hosting plan), then you won’t need to redirect your URL to a new domain.
Point Your Domain to Your New WordPress Site
This way, when people type in your URL, they’ll be taken to your new site instead of your old site. If your new WordPress site is installed on a different domain or host then you’ll need to change the name servers for your new domain. To do this you need to update your name servers for your domain.
If you used a temporary domain to set up the site make sure to remove the temporary domain after setting up the primary domain.
Importing with Plugins
There are a few plugins available that allow you to migrate your WordPress site from your server or any domain to your new host. Here’s a quick look at the best choices.
-
BackupBuddy

With BackupBuddy you can create a WordPress website on a temporary domain or local server and then move the site complete with its theme, plugins, widgets, styles, and content, over to the live domain. You can keep the test site for development and push or pull changes as needed. It’s also a very powerful plugin for automated backups to various locations and services, so it serves more than one purpose. This is a premium plugin with four different plans.
-
Duplicator

This is a free plugin that lets you migrate, copy, or clone a site from one location to another. You can build the site on a temporary domain or local server and then move the site to your domain when it’s ready. It also serves as a backup plugin making it a good alternative to BackupBuddy.
-
UpdraftPlus Backup and Restoration

The premium edition of this one is a backup and restoration plugin that also works as a site duplicator and migrator (requires migrator add-on). It will copy your site and move it to a new location. One thing that’s interesting is it will restore and migrate backups from other backup plugins. This one also works well as an automatic backup plugin.
Redirecting Your Domain From Free Sites
If your old site was a free site such as Blogger, WordPress.com, or similar, then your old URL will have their name in it. It will look something like this:
http://myexsite.wordpress.com
In this case you don’t want the old URL. You need a new URL. The free host will probably have settings where you can have the URL’s redirected to your new site. Some do this for free while others charge for this service. If neither of these is an option then you simply have to write a post that points to the new site. This can look awkward and unprofessional but it’s better than nothing.
More Tests and Changes
Once your site goes live you’ll need to spend a lot of time making sure there are no issues. Here are some things you need to do:
- Ask for feedback. If you keep getting the same complaints that’s an indication you need to make some modifications.
- Track your analytics. Have you lost traffic? Gained traffic? What’s your bounce rate?
- Perform speed tests. Your server might behave differently now that it’s active and has a heavier load from higher traffic than it did during beta tests.
Wrapping Up
A successful conversion is all about making detailed plans and sticking them. Depending on the type of site you’re migrating from, it can be fairly simple or it can be a painstaking and time-consuming process. Following a good plan and testing your results will ensure that once you convert your website to WordPress, it’ll be better than ever.
Image credits: USFWS Mountain-Prairie
Tags:


