Do you want to start a giveaway and get more email subscribers?
Giveaways are one of the fastest ways to grow your email list, increase traffic, and boost sales. They help you reach new audiences and boost user engagement on your website.
In this article, we’ll show you how to use a giveaway to grow your email list faster.

Why Use a Giveaway to Grow Your Email List?
Did you know that email marketing sees a 4300% return on investment (ROI) on average for businesses in the US?
People who sign up for your emails are already interested in your products and services, making them highly likely to convert into paying customers. However, the hardest part is getting more people to join your email list.
This is where running a contest or giveaway on your WordPress site comes in handy.
It helps you grow your email list while getting more social media subscribers and increasing traffic on your website.
Giveaways give you instant results. They create a sense of urgency, and the fear of missing out encourages your visitors to participate in the contest. Plus, you can reach new audiences using giveaways and get more email subscribers for your WordPress website.
This is why we regularly use giveaways on WPBeginner.
That being said, let’s look at how you can get started with your giveaway.
Select a Prize for Your Giveaway
Before creating a giveaway, you should choose an attractive prize for your giveaway. A good prize will incentivize your website visitors to participate in the giveaway and subscribe to your email list.
A good place to start is by offering a prize based on your business and target audience. For example, at WPBeginner, we usually award free licenses of WordPress plugins and themes to giveaway winners.
On the other hand, if you’re running an eCommerce store, then you can giveaway gift cards, free shipping, or free products as prizes. Similarly, you can also give free gadgets like laptops, smartphones, headphones, etc as rewards to attract more participants.
We run monthly giveaways offering new cool gadgets as giveaways to our WPForms subscribers.
That said, let’s find out how you can create a giveaway in WordPress.
Creating a Giveaway in WordPress
The easiest way to set up contests in WordPress is by using RafflePress. It’s the best WordPress giveaway plugin that’s beginner-friendly and lets you create giveaways in just a few clicks.
We’ll use the RafflePress Pro version for this tutorial because it lets you sync with popular email marketing services and offers more giveaway actions. There’s also a free version of RafflePress you can try.
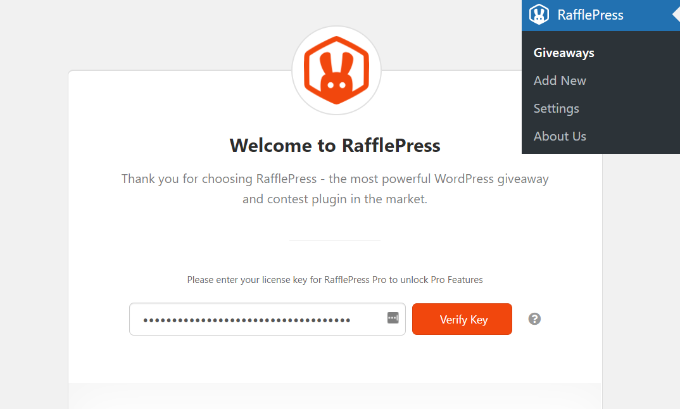
First, you’ll need to install and activate the RafflePress plugin. If you need help, then please see our guide on how to install a WordPress plugin.
Upon activation, you’ll see the RafflePress welcome screen in the WordPress dashboard. Next, enter the license key and click the ‘Verify Key’ button. You can find the license key in your RafflePress account area.
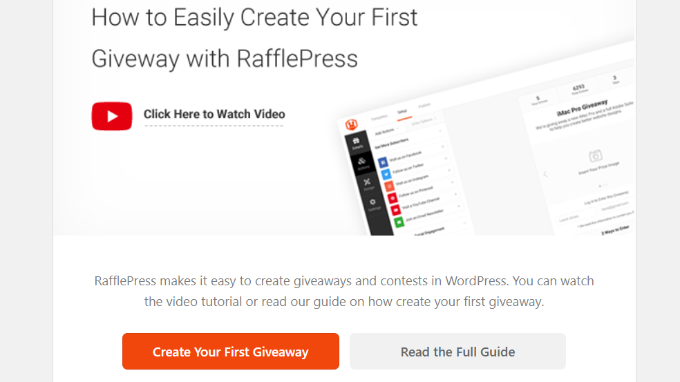
After that, you can scroll down and click the ‘Create Your First Giveaway’ button to launch the RafflePress giveaway builder.
On the next screen, you’ll need to enter a name for your giveaway campaign and then select one of the templates.
Since your goal is to grow our email list, go ahead and click on the ‘Grow Your Email List’ template.

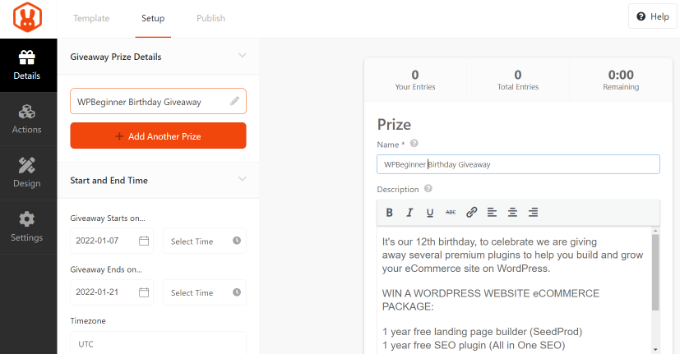
Now, you can add information about your giveaway under the ‘Details’ section that’s located in the left sidebar.
To start, go ahead and enter a name and description for your giveaway. You can also add an image, select the giveaway start and end time and date, and choose a timezone.
Next, head over to the ‘Actions’ section. Here you can select all the ways your users can participate in the giveaway.
RafflePress will add the ‘Join the Email Newsletter’ option by default in the Grow Your Email List template. However, you can choose more actions like getting users to follow you on Twitter or visiting your YouTube channel.
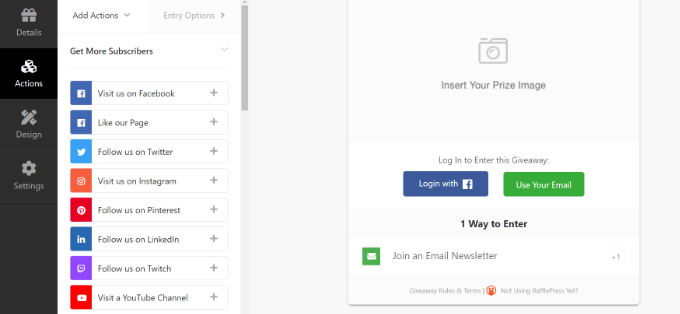
Keep in mind that the more entry options people have, the better engagement you will get. To keep the focus on growing your email list, you can assign more entry points to the Join Newsletter action and make it a required option.
Simply click on the ‘Join an Email Newsletter’ action in the template to further customize it.
From here, RafflePress lets you choose the number of entries a user will get. You can also edit the title text, automatically add people to the email list when they signup for the giveaway, and make the action mandatory.
To encourage more people to sign up, you can assign a higher value. In our example giveaway, we’re assigning a ‘+3’ value so that users get 3 entries when they sign up for the newsletter.
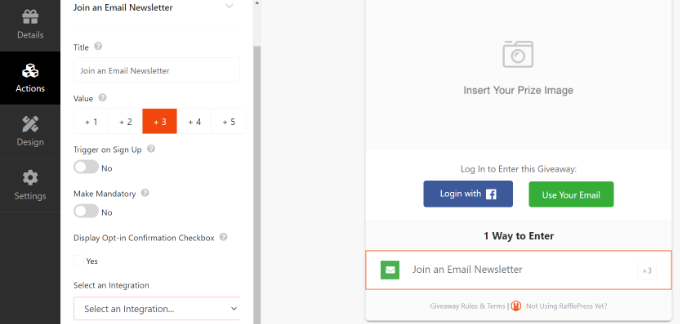
There is also an option to enable opt-in confirmation, which ensures that contestants give permission to add them to your email list. This helps in complying with data regulation laws like GDPR.
Next, you’ll need to select an email marketing service from the ‘Integration’ dropdown menu. RafflePress easily integrates with popular services like Mailchimp, AWeber, ActiveCampaign, Constant Contact, Drip, and SendinBlue, and more.
Once you’ve selected an email marketing service, the next step is to connect it with your giveaway.
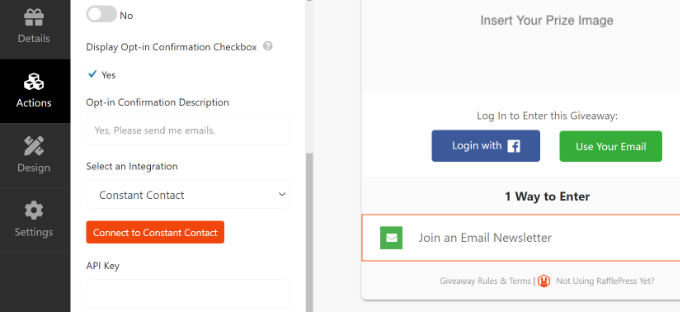
Note: Each email platform will have different settings to connect with RafflePress. Simply follow the onscreen steps and provide any required information like API key, client ID, security keys, or authorization code.
Next, you can switch to the ‘Design’ section from the menu on your left to customize the look of your giveaway.
RafflePress gives you options for changing the layout, fonts, button color, adding a page background, editing the background color, and entering custom CSS.

After that, you can go to the ‘Settings’ section from the menu on your left.
Here, you can edit the general settings of the giveaway like name, page permalink, and more.
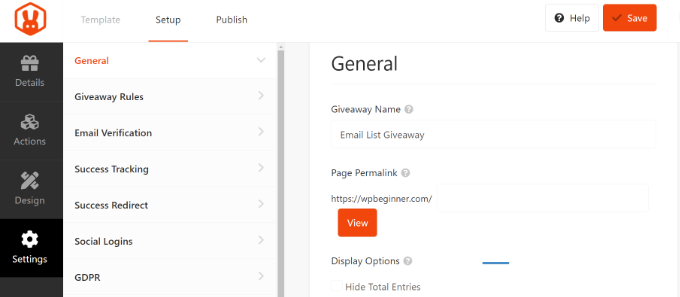
Once you’ve made the changes, simply click the ‘Save’ button at the top.
Next, you’ll need to publish your giveaway. To get started, click the ‘Publish’ tab at the top of the screen.
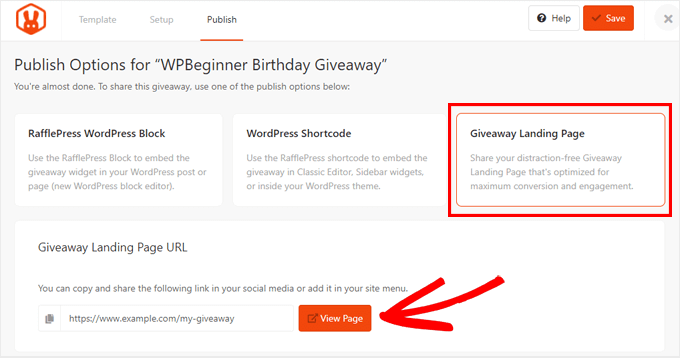
RafflePress gives you the option to publish your giveaway as a block in a page or post, as a widget, or as a standalone landing page.
We’ll choose the ‘Giveaway Landing Page’ option because it’s quick and easy.
Simply click the View Page button to see your live giveaway in action.
Promote your Giveaway
Once your giveaway is live, you should promote it so more people can participate and join your email list.
There are many ways you can spread the word about your giveaway contest. You can start by making your giveaway visible on the website and display it on the homepage, sidebar, and on your most important pages.
For example, displaying a floating bar on your homepage with a link to your giveaway helps improve the visibility of your contest. You can also add countdown timers to create urgency.
Promoting the giveaway on your social media profiles like Facebook, Twitter, and Instagram is also a great way of getting more participants. It lets you add followers to your email list who haven’t subscribed yet.
Besides that, another way of generating excitement around your giveaway is by sharing it in different online communities. You can also reach out to influencers from your industry to promote your giveaway.
Sending web push notifications can also boost engagement around your contest. You can ask your push notification subscribers to join your email list if they haven’t already, or to refer their friends and family members.
Choose a Giveaway Winner
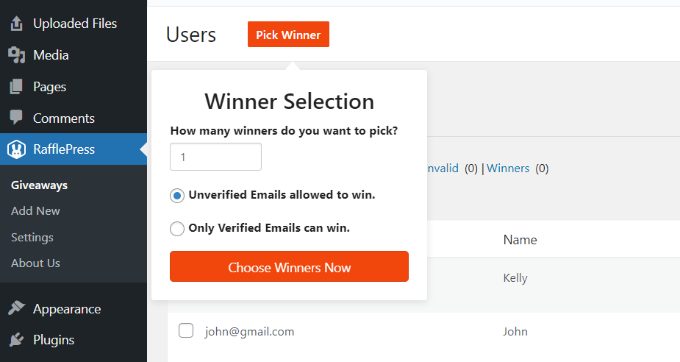
When your giveaway reaches the end time, you can go ahead and choose a winner. RafflePress helps you automatically pick a winner at random.
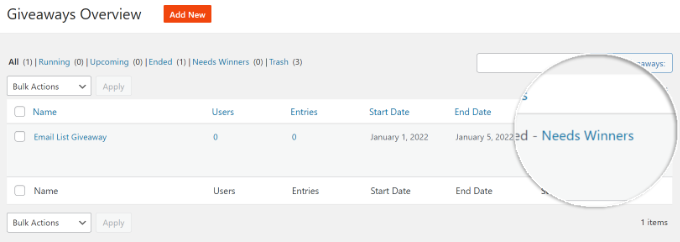
All you have to do is head over to RafflePress » Giveaways page from your WordPress admin area. Next, click the ‘Needs Winners’ option next to your giveaway.
RafflePress will now ask you how many winners you want to pick for the giveaway and whether unverified emails can win. Once you’ve chosen your settings, click the ‘Choose Winners Now’ button.
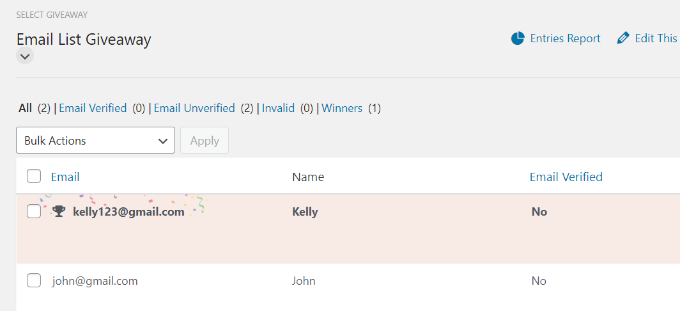
Next, RafflePress will randomly select a winner for the giveaway. You can then email the winner so that they can claim their prize.
That’s it! We hope this article helped you learn how to use a giveaway to grow your email list. You may also want to go through our guide on how to get a free email domain, and see our expert pick of the best identity theft protection services for small business.
If you liked this article, then please subscribe to our YouTube Channel for WordPress video tutorials. You can also find us on Twitter and Facebook.
The post How to Create a Giveaway to Grow Your Email List by 150% first appeared on WPBeginner.


