
Are you looking to add site notes and annotations to Google Analytics and track them in WordPress?
You can record key changes to your WordPress website and other events that impact website traffic using annotations. These notes can help you uncover additional insights and provide context to changes in traffic on your website.
In this article, we will show you how to get GA4 site annotations and notes in WordPress.

What Are Google Analytics Annotations?
Google Analytics annotations are short notes that you can record in the analytics reports. They help you track internal changes that can impact your website traffic.
For example, you can record changes you made on a particular day, like sending out a new email campaign, posting on social media, or running an ad campaign.
You can also record when you make changes to the content on your WordPress blog, such as publishing a new landing page, editing the meta title, updating website designs, and more.
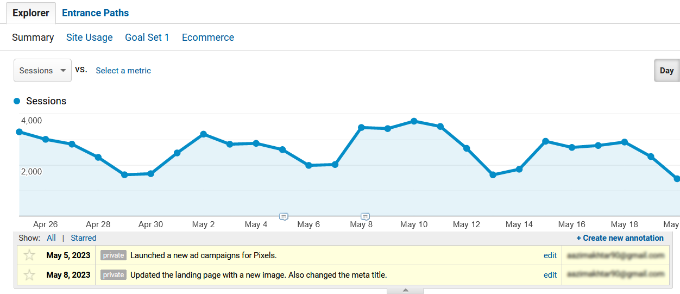
Using site notes and data from Google Analytics reports, you can exactly see what caused your website’s traffic to change.
Let’s say you launched a new ad campaign on a particular day and added an annotation in Google Analytics. The next time you view the traffic stats and see a change, you will know that it could be because of the new campaign.
This also removes the need to backtrack your moves. You don’t need to go through your notebook, social profiles, or update logs to review your changes on a particular day.
Why Get GA4 Annotations and Notes in WordPress?
Sadly, there are no site notes and annotations in Google Analytics 4 (GA4) yet.
GA4 is the latest version of the popular analytics platform by Google. It lets you track visitors from your website and mobile app in the same account. Besides that, the new version also uses a different method of collecting and processing website data.
There are many differences between Google Analytics 4 vs. Universal Analytics. One of these is the lack of site notes and annotations, which was available with Universal Analytics, which no longer can be accessed from July 1, 2023.
After the sunset date, you won’t be able to add more site notes to your Universal Analytics property. This means you will need to manually make your own notes or record key changes to your website from your WordPress dashboard.
That being said, let’s see how you can get GA4 site notes and annotations in WordPress.
How to Get GA4 Site Notes and Annotations in WordPress
The easiest way to get GA4 site annotations and notes in WordPress is by using MonsterInsights. It is the best analytics plugin for WordPress and makes it super easy to configure Google Analytics without editing code or hiring a developer.
The MonsterInsights Site Notes feature lets you add annotations directly to your traffic reports and from the WordPress content editor. Plus, it offers features to easily control and manage your site notes.

For this tutorial, we will use the MonsterInsights Pro version because it includes Site Notes and more features like customizable categories, the ability to add screenshots and media to your notes, and more.
In the Pro version, you will also get advanced features like eCommerce tracking, link tracking, form conversion tracking, advanced dashboard reports, and more.
However, there is also a MonsterInsights Lite version you can use to get started and add Site Notes to your analytics reports.
First, you will need to install and activate the MonsterInsights plugin. If you need help, then please see our guide on how to install a WordPress plugin.
Upon activation, you will see the MonsterInsights setup wizard. Simply click the ‘Launch the Wizard’ button to continue.

From here, you can follow the onscreen instructions to set up Google Analytics in WordPress. For more details, please see our guide on how to install Google Analytics in WordPress.
With MonsterInsights, you can also set up dual tracking. It allows you to track data in a GA4 property and Universal Analytics simultaneously. This way, when Universal Analytics shuts down, you will have historical data in Google Analytics 4 for analysis and comparison.
You can see our guide on how to switch to Google Analytics 4 in WordPress for more details.
Adding Site Notes and Annotations in WordPress
Once you have set up Google Analytics in WordPress, you can now add site notes to your MonsterInsights reports.
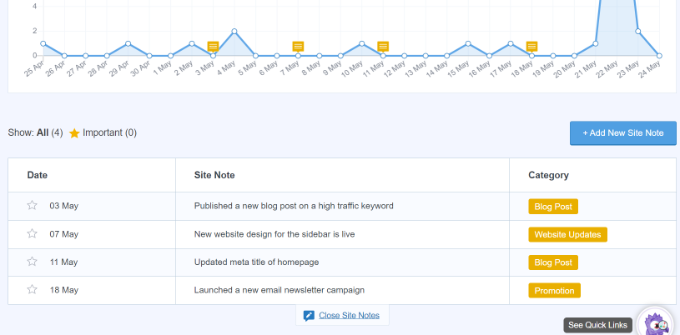
First, you need to go to Insights » Reports from your WordPress admin panel and open the ‘Overview’ report. After that, just click the ‘Site Notes’ option below the graph.
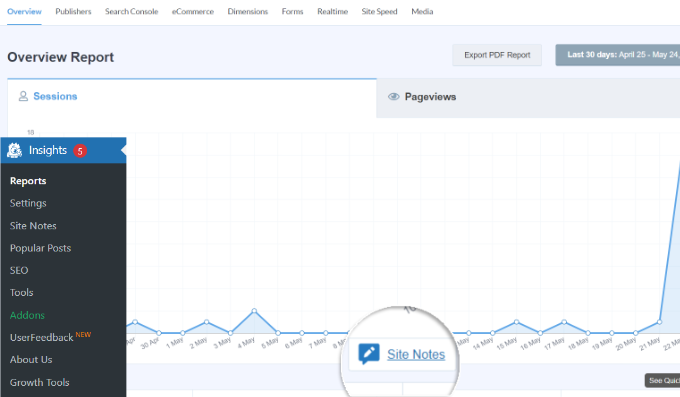
You will now see more options appear.
Go ahead and click the ‘+ Add New Site Note’ button.
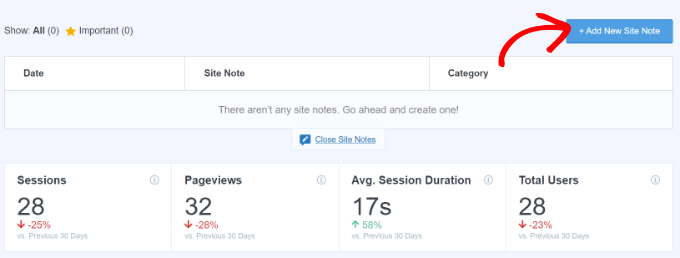
After that, you will need to enter the details of your site note.
You can start by selecting a date. Then, simply type in your site annotation details, like a change you made to a blog post or when you sent an email newsletter.
MonsterInsights also lets you select a media file that you can attach to your site note. For example, this can be a screenshot or video of your campaign uploaded to the WordPress media library.
There is also an option to select a category for your annotation. There are 3 categories offered by MonsterInsights by default, but you can add more. The default categories are Blog Post, Website Updates, and Promotion.
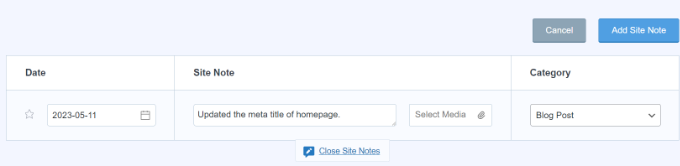
Once you have entered the details, simply click the ‘Add Site Note’ button.
You can then view all your site notes under the graph.
Managing Your Site Notes in MonsterInsights
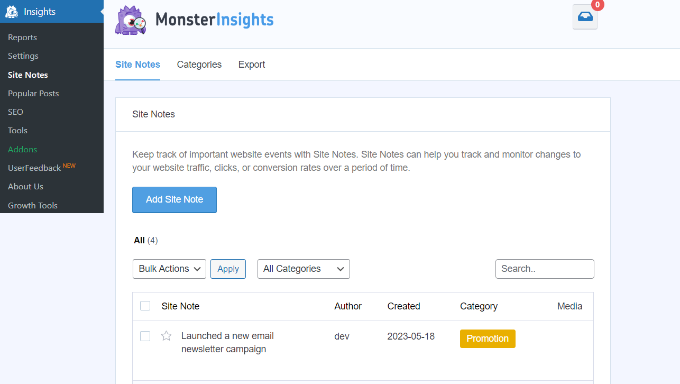
You can also manage your Google Analytics annotations by going to Insights » Site Notes from the WordPress admin panel.
Here, you will see all the site notes you have already added. Plus, you can click the ‘Add Site Note’ button to insert more annotations.
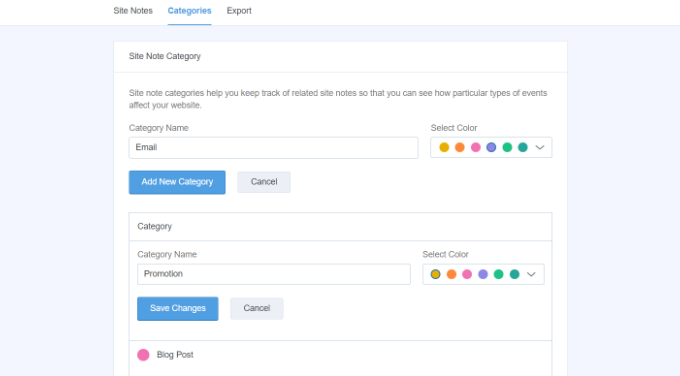
Next, you can switch to the ‘Categories’ tab and customize your site note categories.
MonsterInsights lets you add more annotation categories by clicking the ‘Add New Category’ button. Simply enter a name for your new category and select a color of your choice.
There is also the option to edit existing categories. For instance, you can edit the Promotion category, change its name, and select a new color.
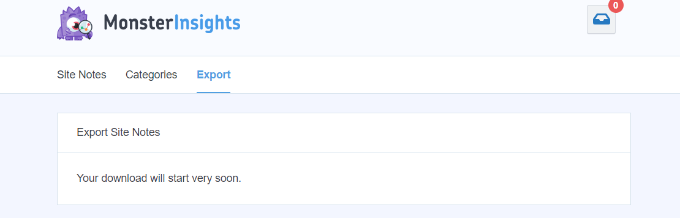
Lastly, you can switch to the ‘Export’ tab in the Site Note settings to save your annotations.
MonsterInsights will create a CSV file to save on your computer. You can then use the exported annotations for future use or analysis.
Adding Site Notes in the WordPress Content Editor
Another advantage of using the MonsterInsights Site Notes feature is that you can add notes from the WordPress content editor.
This is really useful if you are publishing or making changes to a blog post or landing page. You can quickly make a note, and it will appear in the MonsterInsights reports.
First, you will need to add a new post or page or edit an existing one.
From here, simply open the ‘Post’ settings panel on your right and scroll down to ‘MonsterInsights’. From here, you must enable the toggle for ‘Add a Site Note’. After that, you can enter your note and select a categoit.

Once the page or post is published, it will automatically create an annotation in MonsterInsights. You can then view it by heading to Insights » Site Notes in your WordPress admin panel.
We hope this article helped you learn how to get GA4 site annotations and notes in WordPress. You may also want to see our guide on WordPress SEO and our expert picks for the best Google Analytics solutions for WordPress users.
If you liked this article, then please subscribe to our YouTube Channel for WordPress video tutorials. You can also find us on Twitter and Facebook.
The post How to Get GA4 Site Annotations and Notes in WordPress first appeared on WPBeginner.


