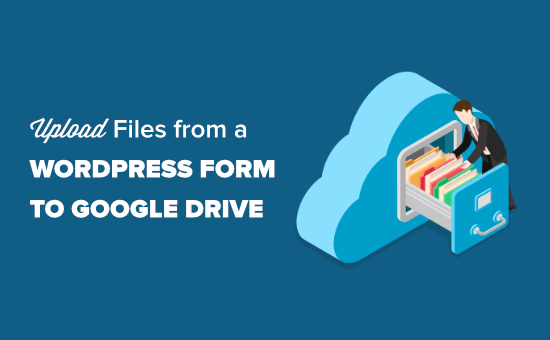
Do you want to send files from a WordPress contact form to Google Drive?
Normally, your form plugins will upload any files directly to your WordPress site. However, you may want to automatically upload them to Google Drive as well for safekeeping and easier sharing.
In this article, we’ll show you how to easily upload files from a WordPress form to Google Drive.

Why Upload Files From Your WordPress Form to Google Drive?
Normally, you can use your WordPress form builder plugin to add a file upload field and keep the uploaded files on your website.
But what if you wanted to share the uploaded files with someone who does not have access to the WordPress admin area?
This is where Google Drive comes in. Google Drive allows you to store files on the cloud and easily share them with anyone. It also allows you to easily access files from any device without logging into your WordPress site.
For instance, if you create a job application form and ask for resumes, then you can automatically upload those files directly to Google Drive and share it with others in your team.
Another scenario is when you run a contest where users upload photos or submit articles to participate.
Sending those submissions directly to Google Drive saves disk space on your website. At the same time, it keeps those files safe in a remote cloud location.
That being said, let’s take a look at how to easily send WordPress form uploads to Google Drive.
Creating and Preparing Your WordPress Form in WPForms
For this tutorial, we will be using WPForms. It’s the most popular contact form plugin for WordPress with over 3 million active installs. It comes with a simple drag and drop interface that lets you easily create any kind of form.
Then, we are going to use a tool called Zapier to connect WPForms with Google Drive.
Zapier acts as a bridge to send data between two different apps, without you needing to use any code. It seamlessly integrates with over 2000 apps.
Note: You need the Pro version or higher to access the Zapier addon for WPForms.
Creating a File Upload Form in WPForms
First, you need to install and activate the WPForms plugin on your website. For more details, see our step by step guide on how to install a WordPress plugin.
Next, you need a form that your website visitors can use to send you files. If you don’t already have a form set up, check out our step by step guide on creating a file upload form in WordPress.
Important: This method will only work with a single file. It will not work with multiple files from one form submission.
Once you have set up your form, you need to add it to your website. To do this, simply edit the post or page where you want the form.
On the post edit screen, click on the button to add a new block. After that, search for the WPForms block and add it to your content area.

Then, publish your page or post to put your form live. Once you’ve done so, go ahead and create a test entry. This will be used to set up and test the connection between WPForms and Google Drive.
Here’s our test entry:
")
Preparing to Connect WPForms with Zapier
We are going to use Zapier as a bridge between WPForms and Google Drive. To do this, you need to install and activate the WPForms Zapier addon.
In your WordPress admin, go to the WPForms » Addons page and find the Zapier addon. Go ahead and click the ‘Install Addon’ link to install and activate it:

Next, you need to visit the WPForms » Settings » Integrations page. Simply click on the Zapier logo to get your Zapier API key. You will need this in order to connect Zapier with WPForms.

Copy the API key somewhere safe or keep this tab open. You will need the API key in a later step.
Creating a Zap to Send Files from Your Website Form to Google Drive
Once you have your form ready, go to the Zapier website. You need to create a free account or log in to your existing account.
In your Zapier dashboard, simply click the ‘Make a Zap’ button to get started. This will open the configuration wizard.
Note: Zapier uses the word ‘zap’ for a process with a trigger and an action. Our trigger will be a visitor filling in the form, and our action will be sending the file(s) attached to the form to Google Drive.
At the top of the screen, you need to choose a name for your zap. Once you’ve done that, it’s time to set up the trigger.
First, you need to select WPForms in the ‘Choose App & Event’ box. Just type ‘WPForms’ into the search bar to find it:

You will now be prompted to select a trigger event. This will default to ‘New Form Entry’ so all you need to do here is click the ‘Continue’ button.

Now, Zapier will ask you to sign into WPForms. Go ahead and click the ‘Sign in to WPForms’ button.

You should then see a popup window. Here, you need to enter the API key that you found earlier.
You also need to add your website’s URL (domain name).

After you’ve entered those details, just click on the ‘Yes, Continue’ button to move on.
Next, Zapier will ask you to select your file upload form from a dropdown list. Go ahead and click on the name of your form:

Once you’ve selected the correct form, you need to click the ‘Test trigger’ button to make sure that Zapier has connected to your form correctly.

After clicking that button, you should see a message that Zapier has found a test entry. You will see the data on the screen:

Click the ‘Continue’ button to move on to the Action part of the Zap. Here, you need to choose your second app, Google Drive.

Next, you will see the dropdown for choosing an action event. Here, you need to select the ‘Upload File’ option and then click to continue.

Zapier will now prompt you to sign into your Google Drive account:

Once you’ve done so, click the Continue button to move on:

Now, it’s time to set up where you want the files to go in your Google Drive. Simply click on the Drive dropdown to select whether you want to use your personal drive or a shared drive.
Then, click on the Folder dropdown to select the folder you want to use.

Next, you need to tell Zapier which file(s) to upload. Under the File dropdown, select the upload field on your form:
 from your form based on the test data")
After that, you can leave the other settings blank and click the continue button to move on.
Zapier will now prompt you to test your Zap by sending an upload file to Google Drive. Simply click the Test and Continue button to do so:

This will send Google Drive the files you uploaded in your test form entry. Go ahead and check your Google Drive folder for the files:

Once you’re confident that your zap is working as intended, simply click the ‘Turn on Zap’ button to make it live:

Now, all files sent through your file upload form will automatically be uploaded to your chosen Google Drive folder.
WPForms will always keep a backup of all files on your WordPress hosting account in case the Zapier API experiences any outages.
Please keep in mind that if you get a lot of form submissions with large files, then this will take up increased storage space in your Google Drive. In our business, we use G Suite Business plan to get Unlimited storage space.
We hope this article helped you learn how to upload files from a WordPress form to Google Drive. You might also like our article on how to use user generated content to grow your business, and our collection of the must have WordPress plugins for all sites.
If you liked this article, then please subscribe to our YouTube Channel for WordPress video tutorials. You can also find us on Twitter and Facebook.
The post How to Upload Files from a WordPress Form to Google Drive appeared first on WPBeginner.


