WooCommerce is a wildly popular plugin. This eCommerce solution provides a simple yet powerful base for your custom online store. However, while millions of storeowners trust it with their sales, you might not know about one of its best built-in tools: WooCommerce blocks.
Fortunately, these hidden gems don’t have to remain in the shadows. By understanding how to use WooCommerce blocks with the modern WordPress editor, you can start upgrading your website in record time.
In this article, we’ll introduce you to the basics of WooComerce blocks. Then we’ll walk you through your options and provide a few tips for using them. Let’s begin!
An Introduction to WooCommerce Blocks
The WordPress block editor segments your content into discrete areas. As such, you can design your website in an organized and intuitive manner. There are lots of block options available, but we’ll be focusing on one group in particular: WooCommerce blocks.
If you’re an active WooCommerce user, you’re probably already familiar with what the plugin has to offer. This customizable, open-source solution provides one of the most effective ways to launch an online store. By dividing its functionality into blocks, you’re free to create your pages with few limitations.
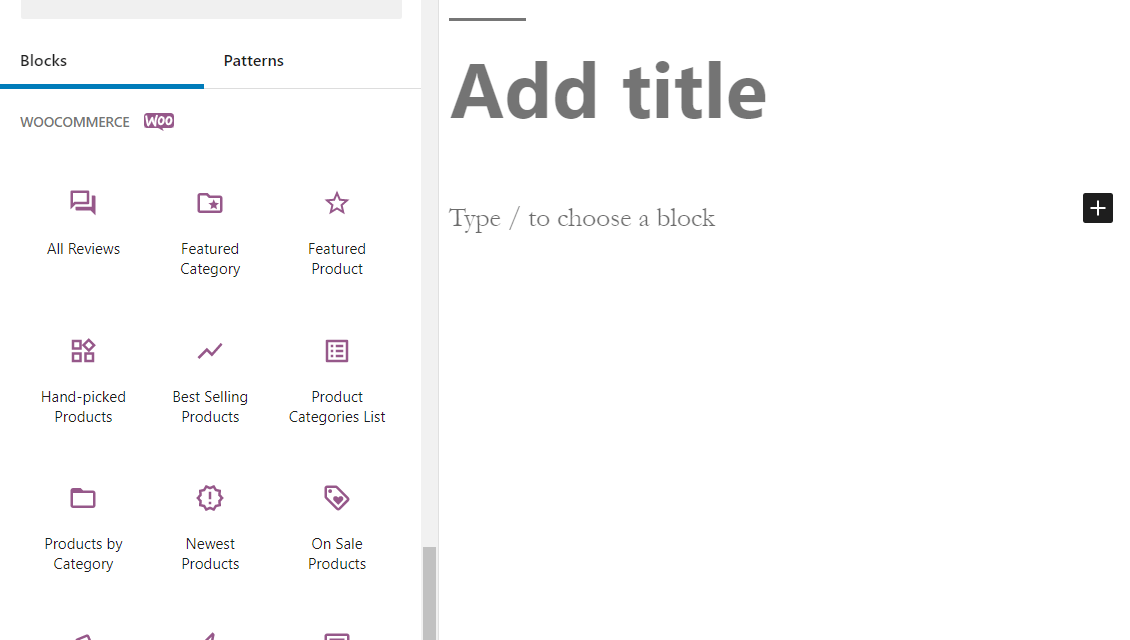
To get started with these blocks, open up the page or post you want to edit. Click the plus icon in the upper-right corner. Then, scroll down until you see the WooCommerce section:

From there, you can click on your desired block to add it to your page. There’s also no limit on how many you can use, so feel to make your content as simple or complex as you want to.
How to Use WooCommerce Blocks in WordPress
Now that you’ve found the WooCommerce blocks in the WordPress editor, you’ll see that you have a lot to choose from. Here’s an introduction to each of your options!
1. All Reviews Block
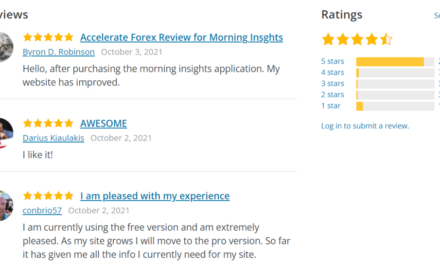
The All Reviews block will display a complete list of reviews from all of your products. Positive reviews can lead to increased conversions, so you may want to consider taking advantage of this block:

With the All Reviews block, you can choose to display a lot of different information. Your options include elements like star ratings, specific products, and user photos.
We recommend that you make good use of the sorting function. For example, consider putting the newer reviews close to the top.
2. Best Selling Products Block
The Best Selling products block provides an easy way to put your most popular items on display:

There are several elements you can choose to highlight. Details such as Product rating and Product price are two smart options to include.
You might also want to consider utilizing the Add to Cart button. That way, users have a quick and easy way to make purchases.
3. Cart Block
The online shopping cart is the foundation of any eCommerce store. Therefore, including the Cart block is likely essential. Simply drag and drop it wherever you want it displayed:

A straightforward and simplified cart is likely best. However, you may want to include the shipping rates in this block. That way, your shoppers will have a better idea of the final price. This increased transparency can build customer trust and may reduce shopping cart abandonment.
4. Checkout Block
The Checkout block is a companion to the Cart block. Instead of showing the items in the cart, it includes the necessary fields to complete a purchase:

You’ll likely want to use this primarily on your Checkout page. However, you might also want to add it wherever you add the Cart block. That way, users can have a more streamlined shopping experience.
5. Reviews By Product and Category Blocks
These are technically two different blocks. However, the main difference is in the filtering: you can either show reviews for certain products or specific categories:

If you have separate shopping pages for categories, consider using this block to refine what information you give to customers. On the other hand, product-specific filtering might be the ideal way to promote a new item.
6. Hand-picked Products Block
The Hand-picked Products block enables you to show off your personal favorite items. You can choose to feature one that you particularly like or several – it’s up to you:

This block may be a great way to highlight certain products, such as popular holiday items. However, try not to pick too many.
This may make the distinction seem unimportant. Keeping this element limited to three or four items emphasizes that they’re truly special.
7. All Products Block
In contrast to the Hand-picked option, the All Products block shows off everything your store has to offer:

It also provides an easy way to generate interest for other content and products. You can even change the layout settings, including the number of columns and rows in your grid layout.
Additionally, there are plenty of content settings. Consider using these to display a sorting dropdown or to edit how much product information you’ll show your shoppers.
8. Products by Category and Categories List Blocks
The Products by Category and Products by Categories List blocks are also very similar. With these tools, you can choose to display certain groups of products. As such, they can be useful for narrowing down what you advertise to your shoppers:

You may also want to use these alongside the Reviews by Category block. This will give your customers a more holistic view of what you have to offer.
9. Product Search Block
Smooth navigation is essential to a well-run website. Therefore, a search bar may be a wise idea:

We recommend using the Product Search bar frequently on your WooCommerce site. If you do, your users will likely have an easier time browsing your offerings.
In fact, we suggest that you add this block to almost every page. You never know when a user might want to search for a term. Making this as easy as possible is a simple way to improve the user experience.
10. Filter Blocks
You can use these blocks to let customers can easily filter the products they’re looking for:
- Filter by Price
- Filter by Attribute
- Filter by Stock
- Active Product Filter
These elements help to organize your products. They enable shoppers to select their desired filters and see the results without even reloading the page. Thus, it’s a fast and easy way to build a modern eCommerce site.
In fact, you may want to consider using all of these filters together. Your customers don’t have to use them all, but giving them multiple choices adds a professional touch:

In the above example, you can see both the price and attribute filter blocks at play. However, keeping track of all of them can be tough for shoppers.
That’s why we recommend that you also use the Active Product Filter block. This is a block that tracks whichever parameters your users have entered. They can quickly review their Active filters if they forget their selections.
12. Featured Product and Category Blocks
These blocks let you highlight a single product and category respectively. They’re also highly customizable. That means you can have full control over how users will view your featured items:

Since the Featured Product block only focuses on a single item, we recommend that you use it sparingly. If you do so, it’ll be more likely to catch your shopper’s attention as it’ll stand out more – especially on mobile devices.
13. Products by Tag and Attribute Blocks
These two blocks offer more ways to filter your items. The first will display products based on tags – in the below example, these products could be tagged as Music:

The attributes block gets even more specific and can filter by elements such as color or size.
You may want to consider using a few of these blocks on one page. Additionally, you could choose related tags to stay organized and on-topic with your sales pitch.
14. Top Rated Products Block
Sometimes, you want to show off the best of what your store has to offer. For this, you can use the Top Rated Products block. It’s an easy way to display your items with the most positive reviews:

This is also a clever tactic to add more social proof to your website. Shoppers tend to appreciate seeing their fellow customers’ input. As such, you may want to consider placing this block somewhere prominent on your site.
15. Newest Products Block
Creating a sense of excitement and anticipation can be an effective sales strategy. The Newest Products block can help you with this, by showing off the most recent additions to your stock:

It will also check for new products consistently, so you don’t have to worry about manually adding new items. You can just focus on updating your inventory and let this block do the rest.
16. On Sale Products Block
Frequent sales can be an effective way to appeal to your customers. They can help drive up conversions. They also build trust, as your shoppers are likely to appreciate the discounts:

We recommend that you place the On Sale block somewhere on your front page. That way, it’s easy for new and returning visitors alike to find it. You might also want to consider placing it in your blog section, as this can be a quick way to entice casual readers.
Conclusion
WooCommerce is an undeniably powerful plugin. While it can be difficult to take advantage of every feature, trying out the straightforward WooCommerce blocks can help you easily improve your eCommerce store.
In this article, we covered what WooCommerce blocks are and why you might want to use them. As you can see there are many options – don’t be afraid to experiment with them liberally to find your perfect fit(s).
Do you have any questions about WooCommerce blocks? Let us know in the comments section below!
The post An Introduction to WooCommerce Blocks in WordPress (And How to Use Them) appeared first on Torque.


