Do you want to add recipe Schema Markup to your WordPress food blog?
By adding a recipe Schema Markup to your webpage, you can display beautiful recipe snippets on your posts and pages whenever it appears on search results.
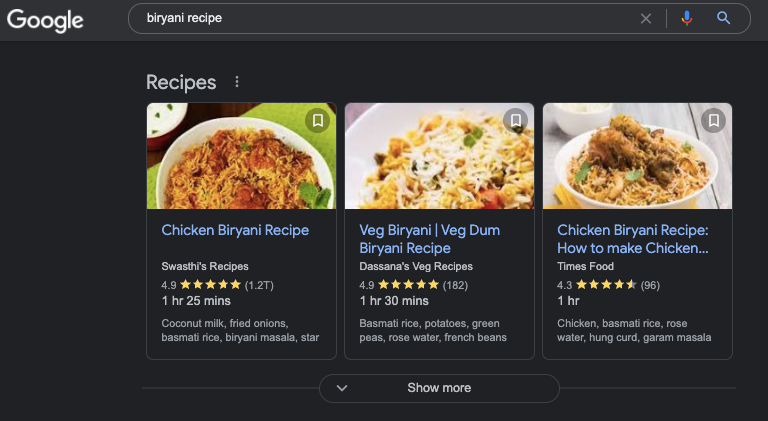
Having information next to your recipe, like a beautiful picture of your recipe, the time needed to prepare it, star ratings, etc., makes it stand out. This encourages more people to click on it.
So it’s a powerful way to attract more leads and boost your website conversions.
But that’s not it.
Schema Markup on your website can also help you improve your SEO. It allows you to add rich information to your website. This changes the way your website information is displayed on search results.
This, in turn, helps Google get more information about your website and see it in a more detailed manner.
So when you add them to your website, Google can better understand what your website is about and how it is relevant for your users.
This improves your chances of ranking higher in search results.
However, for all that to happen, you first need to know how to add Schema Markup to your website. So let’s check out how to do that without writing any codes.
Adding Recipe Schema Markup to Your WordPress Site
Before we begin, let’s start by looking at how a recipe blog with Schema Markup would appear on Google search.

Now let’s look at one without adding the Schema Markup.

Do you see how the Schema Markup can instantly improve the way your recipe appears in search results?
So let’s check out how to add it to your food blog.
Adding recipe Schema Markup to your WordPress website might seem like a tough job. But trust me, with the AIOSEO plugin, it’s as easy as ABC.
All you have to do is install the AIOSEO plugin on your website. AIOSEO is one of the most popular SEO plugins that offers several powerful features to improve your website SEO.
From automatically generating a WordPress XML sitemap and notifying search engines of any new updates on your site, to detecting critical website errors, to offering actionable insights on how to improve your website traffic, and more, this plugin is a all-in-one solution for you to improve your search rankings and boost your traffic.
So let’s look at how to use it to add Schema Markup on your website.
Adding Schema Markup to Your Content
To add Schema Markup to your content with AIOSEO, go to your WordPress dashboard after installing the plugin.
Now go to AIOSEO > Search Appearance > Content Types > Schema Markup

Scroll down in the same window to find the settings for your pages and product. Now, click on the Schema Type option, and it’ll open a drop-down menu with different schema types. Select Recipe from the drop-down menu.

Now click on the Save Changes button on the top right corner of your screen, and you’re all done.
Let’s now check out how to add recipe Schema Markup to your individual posts and pages.
Adding Your Recipe Information to Your Post or Pages
AIOSEO even allows you to add recipe Schema Markup to individual posts and pages on your website. If you, too, want to display your recipe information on your posts and pages, here’s how you can do it.
Go to the particular page or post in which you want to add the markup. Now scroll down to the AIOSEO settings section. Under this, select the Schema tab.

Here select the drop-down arrow under Schema Type and choose Recipe. This will open a few fields in which you need to add your recipe information like the name of the recipe, its description, author name, dish type, etc. You can also upload an image of your recipe, add ratings, the time needed to prepare the recipe, etc., under this section itself.

Go ahead and add the information that you want to display next to your recipe. Once you’re done, save your settings and Publish your post.
That’s how easy it is to add a recipe Schema Markup to your food blog. So go ahead and make your recipes stand out on Google.


