Widgets are a popular way to add extra functionality, features, and information to different locations of WordPress websites. They allow you to put anything from contact forms over calendars to lists of your latest blog posts on your web pages.
However, in order to do so, you first need widget areas — at least in classic WordPress themes. These are special designated parts of WordPress themes where, if you add widgets to them in the back end, they will show up in the front end as well.
Block themes using the WordPress Site Editor, on the other hand, no longer have widget areas. Here, adding widgets works very different than before, which is reason enough to cover this entire topic.
In the following, we take a look at different ways to add widgets to your WordPress theme. We talk about how to use widgetized areas and create new ones in classic themes, as well as how to make widgets show up in your block themes.
What Are Widgets and How Do You Use Them?
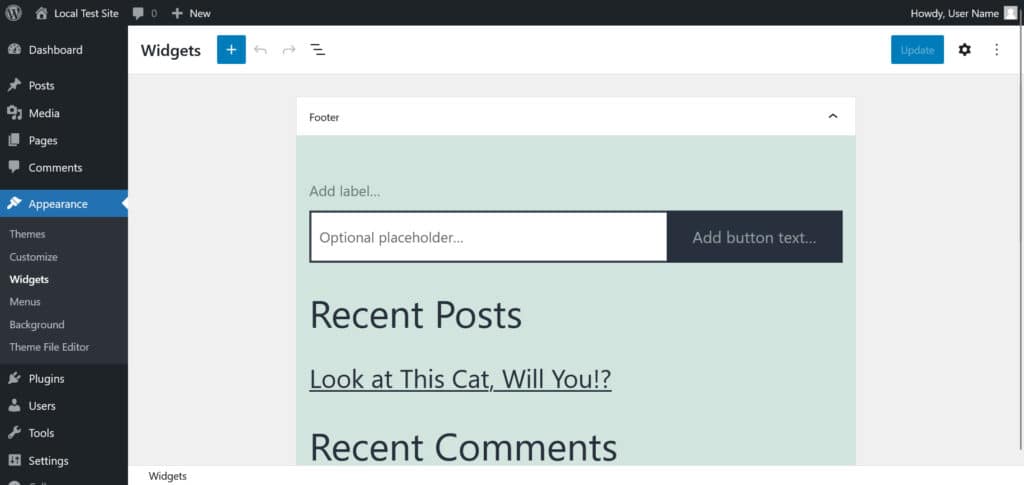
Before getting to the more technical stuff, let’s first settle real quick on what we are talking about when using the term “widget” in relation to WordPress. If you are using a non-block theme like Twenty Twenty-One, you find their settings under Appearance > Widgets.

This shows all the widget areas available in your current theme (here, it’s only the footer) and the widgets they contain. Everything visible here also corresponds to the front end of your website.

Typically, widgetized areas will be in the footer, sidebar, or header. However, you can also place them pretty much anywhere you want (as you will soon see).
How to Display Widgets on Your Site
The widget menu used to have a different user interface, but by now it has been converted to work with the block editor like the rest of WordPress. Therefore, you can use it like any other instance of the WordPress Gutenberg editor.
Add blocks via the block inserter (the blue plus button in the upper left corner) or its smaller version in the widget areas. You can also remove blocks in the usual ways and change their look and behavior in the right sidebar.

The blocks you can use span the usual options. Paragraphs, headings, tables, images — anything is possible.
Typically, widget areas are used for more dynamic sections where the information updates itself. You can still find those under the Widgets category in the block inserter.

As you can see they include things like displaying archives and categories, a list of your pages or the latest posts and comments, RSS feeds, or a search bar. Don’t forget to click Update in the upper right corner so that any changes you make here become permanent.
Alternatively, you find all of these settings also in the WordPress Customizer (Appearance > Customize) and then in the Widgets tab.

The advantage here is that you can preview how everything will look like on the page directly in the editor.
Creating New Widget Areas in Classic WordPress Themes
Ok, so far so good. We have settled on what widgets are and in which part of classic themes you can manage them.
However, what if you are not satisfied with your choice of available widgetized areas? What if you would like to be able to add widgets in other locations of your theme?
In that case, you have to create them yourself, which is what we will go through now.
1. Register Your Widget Area
Creating widget areas in a WordPress theme is a two-step process. The first step is to register them.
You do that using the register_sidebar() function inside functions.php. It looks something like this:
function ns_register_top_banner_widget() { register_sidebar( array( 'name' => 'Top Bar', 'id' => 'top-bar-widgets', 'description' => 'Widgets in this area will appear in a bar at the top of the site.', 'before_widget' => '', 'before_sidebar'=> '', 'after_sidebar'=> '', ) ); } add_action( 'widgets_init', 'ns_register_top_banner_widget' );Note: Like many theme changes, you’d be advised to implement this in the form of a child theme.
Some explanation of the different parts of the code snippet and what they mean:
name— This is the name of the widget area that will appear in the WordPress back end.id— You need to give the widget area an id so you can display it later.description— This used to show up inside the Widgets menu. You can use it to, for example, explain the location of the sidebar to other users. However, it will only appear for WordPress versions not using the block editor for widgets, so you can also omit it.before_sidebarandafter_sidebar— These two parameters allow you to add HTML markup before and after the widget area. That way, for example, you can wrap it in acontainer.before_widgetandafter_widget— Same as above but for any widget that appears in this area.There are other parameters you can use with
register_sidebar(). You can learn more about them in the documentation. However, for our purpose, the above is enough.Once present in
functions.phpand with the file saved, the widget area will already show up in the WordPress back end.
2. Outputting Widget Areas in Your WordPress Theme
While you can already see the widget area in the dashboard, currently putting any blocks or widgets in there will have no effect. That’s because there is not yet any markup that tells the theme to output whatever you add to it.
This happens via the
dynamic_sidebar()function. For example, to output the widget area that you created above anywhere in your theme, you can use this function:Note how the code contains the same id as the widget area created earlier in order to display it.
While the above works, it often makes sense to use a slightly more complex snippet:
The code above first checks if the widget area in question has any widgets in it and adds it to the page only if that is the case. It also contains some more markup like HTML classes and ids to make it easier to customize the output via CSS.
That only leaves the questions, where do you put this markup?
The answer: Anywhere in your theme files where you want the widget area to appear. Typically that is inside page template files like
page.phporsingle.php. However, you can also add it to something likeheader.phporfooter.php. To make a decision, it helps if you know the template hierarchy and understand how themes work.In this case, for the Twenty Twenty-One theme, we place it inside
header.phpright after the opening of the page.
With the code in place, when we now put a widget inside the newly created area, it will show up on the website in the intended place.

Alternative: Use WordPress Hooks to Display Widget Areas
Instead of adding the code snippet directly to your page templates and theme files, you can also achieve the same output using WordPress Hooks.
These are little pieces of code placed in strategic locations inside the aforementioned files that you can use to tell WordPress to execute functions in that very place without physically placing the code there. Instead, you can place the functions in question inside
functions.php. Doing so has the benefit that it’s possible to manage all your widgetized areas from a single place.What would that look like for our case?
Here’s how to place a widget area using a WordPress hook:
function ns_output_top_banner_widget() { if ( is_active_sidebar( 'top-bar-widgets' ) ) : dynamic_sidebar( 'top-bar-widgets' ); endif; } add_action( 'wp_body_open', 'ns_output_top_banner_widget' );The Twenty Twenty-One theme has a hook named
wp_body_open()insider its header file. By hooking into it, we can display the widget area in the same place without modifying the file itself.As mentioned, the code snippet goes inside your (child) theme’s
functions.php. This method is especially suitable for themes that contain a lot of hooks, like the Genesis Framework.How to Add Widgets in Block Themes
So far, we have only talked about how to create widget areas in classic themes. However, what about block themes, which – after all – will likely become the de-facto standard for WordPress themes.
Here, because the Site Editor works very differently, you don’t really have widget areas. You will also notice that the Appearance > Widgets menu does not exist.

However, you can still add widgets, content, and other elements to your theme using similar principles as above.
Enter Page Templates and Template Parts
The first thing to notice here is that you are a lot less constrained in your placement of widgets with the block editor. Since you are not limited to pre-configured widget areas, you can place any page element pretty much where you desire.
However, you can still use blocks like widgets in classic themes by using page templates and template parts. Access them in your block via menu in the Site Editor on the left (click on the WordPress logo in the upper left corner to open it).

This gives you a list of available page templates on your site. They usually range from page over archive templates to the 404 page.

It’s similar to what you would find if you had a look at the theme files in a classic theme.
Under Template Parts, on the other hand, you find templates for parts of your website like the header, footer, or comment section.

Click on any of them to open in the editor. Alternatively, you can also make changes to your templates and template parts via the Template Editor. That is a slightly reduced version of the Site Editor that you can open via the normal page editor. Just open your desired page, click on the template name under Template, and then Edit template.
You can also pick another template from the drop-down editor.
Adding New Elements/Widgets
If you know how page templates work, you probably understand that any changes you make here will affect not just a single page but every single piece of content on your website that uses the page template or template part. Therefore, any page elements that you add to them will appear everywhere on your site where those are active.
For example, you can add a latest post widget to the footer template part.
If you do, and save, it also appears on the front end of the website for every page where this template part is present.

If you think about it, that’s not very different from how classic widget areas work. They are also simply a way to add page elements and content so that they are reproduced in the same place across your entire website.
The only difference here is that there is no need to edit files. Instead, you can do all of it in the visual editor, WordPress creates and modifies the files for you.
Creating New “Widget Areas” in WordPress Block Themes
So, how do you create new widget areas in block themes?
The answer is: You don’t really. However, the closest equivalent to it is creating new page templates and template parts. Doing so allows you to add content that will show up only in limited parts of your website.
Let’s go over an example to make things clearer. Say you want to do the same thing we did manually on top. In the past, you would have to register a widget area and then add the code to output it. With the Site Editor, you can achieve the same thing. Only in this case, it’s much easier.
One possibility is to create a new template part. For that, under the Template Parts menu in the editor, click the plus icon at the top.

In the menu that appears, give it a name (for example, “Header with top bar”) and choose the type (in this case, Header, of course), then start editing. Populate it with any page elements, widgets, and content you need or desire.
When you are done, you still need to assign it to the page template that you want it to appear in.
For that, go to that template (in this case, Home) and find the existing header. Click on it, then on the three dots to open its menu, and choose Replace header.
This will open a menu with available template parts and patterns on your site.
Pick the one you just created to input it, then save the page template. If you now go back to your website’s front end, you see your newly created header live on the page (and only there).

How to add New Widgets/Blocks
The final question that remains when talking about how to create widgets and widget areas in block themes is how to add more widget choices. After all, by default, you are only limited to a handful of options. Luckily, there are different ways to add more.
For one, you can install Gutenberg block plugins, many of which contain different widget blocks such as forms, maps, or carousels.
In addition, you also have the possibility to install singular blocks with widget functionality. For that, first click on the block inserter inside the WordPress Site Editor.

Once open, enter a search term for the kind of block you are looking for in the field at the top. Besides any options already present on your site, the editor will also search the WordPress block directory and show fitting options.

If something sounds like what you are looking for, simply click on the block in question to install it on your site and insert it into the page in the current position. Place it in the page template or template part where you want it to appear and save. Then, admire it on the front end of your site.
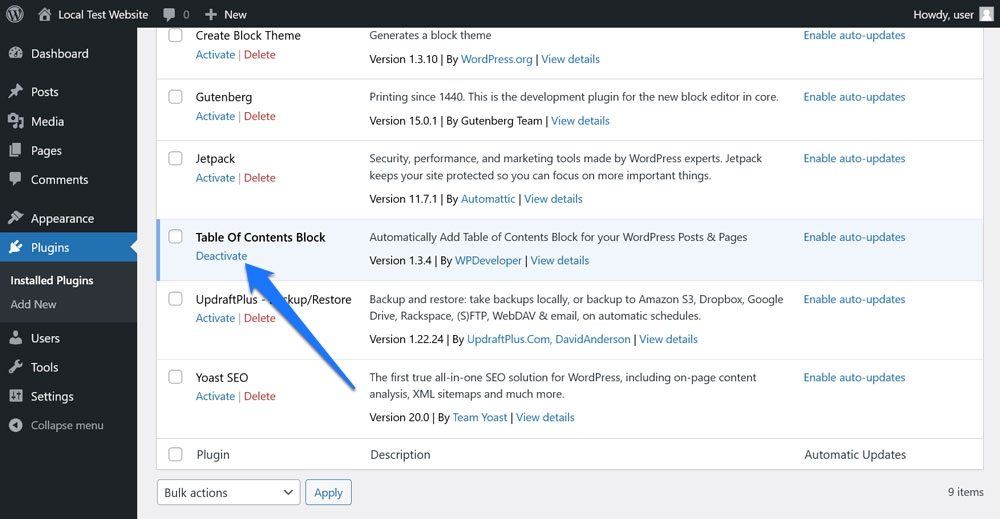
By the way, you can always remove singular blocks that you installed in the Plugins menu in case you don’t need them anymore.

Widgetizing WordPress Themes is Not That Hard
Adding widgets and widget areas in WordPress is an important skill to display a wide array of features and information on your site. They help to make your site more interactive, informative, and usable.
In classic themes, the approach to creating widget areas is a little more technical. You need a rudimentary understanding of WordPress file architecture and feel comfortable with a code editor and making adjustments to PHP code. In block themes, on the other hand, you can do the same with just your mouse cursor.
What’s important to keep in mind is that the principles are the same, only the implementation differs. Now that you know how it’s done, use this knowledge to improve your site!
What is a must-have widget that you like to place on your websites? Are you using a classic or block theme to implement it? Let us know in the comments!


