Serving your website over a secure connection is important for Search Engine Optimization (SEO) and data protection. That’s why it’s a good idea to configure your site to use HTTP/2. However, figuring out how to go about it can be tricky.
The good news is that you can complete the process in a few simple steps. You’ll need to check whether your server currently supports the latest HTTP protocol, then run a few commands to enable it (assuming your service provider hasn’t already done so).
In this post, we’ll explain what HTTP/2 is and its benefits. Then, we’ll discuss how to configure your server to use the protocol if the option is available. Let’s get started!
An Introduction to HTTP/2
HyperText Transfer Protocol (HTTP) is the underlying protocol used by the internet. It defines how messages are formatted and transmitted, and what actions web servers and browsers should take in response to various commands.
For example, when you enter a URL in your browser, this sends an HTTP command to the web server directing it to fetch and transmit the requested web page.
The latest version of HTTP is HTTP/2, which was published as RFC 7540 in 2015. It is designed to improve upon the performance of the original HTTP protocol by providing a more efficient way of transmitting data over the internet.
The Benefits of Using HTTP/2
HTTP/2 is an optimized, binary (rather than textual) protocol that allows for multiplexing of requests and responses, as well as header compression. It offers several advantages over previous versions of the protocol.
First, it facilitates reduced latency between servers and clients. This means that sites are able to load more quickly and efficiently. With it, web servers can “push” resources to clients before they even request them, further reducing any delay.
Another benefit of HTTP/2 is that it provides significant performance improvements over HTTP/1.1. For instance, the new header compression algorithm reduces the size of headers to enhance efficiency. All of these advancements in speed and performance can improve your site’s Core Web Vitals scores and boost your site’s search rankings.
However, if you want your site to reap these benefits, your server must be configured to support HTTP/2. It’s also worth noting that most major browsers, including Chrome, Edge, Safari, and Firefox, support HTTP/2.
How to Configure WordPress to Use HTTP/2 (In 4 Steps)
In order to take advantage of HTTP/2, your web server must support it. If you are using Apache or Nginx, you will need to upgrade to the latest version to enable support. Let’s take a look at how to go about this in four steps.
Step 1: Check to See If Your Server Supports HTTP/2
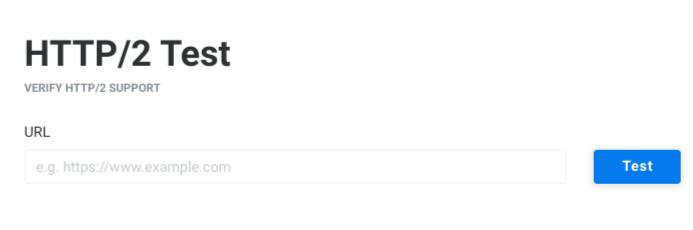
To start, it’s a good idea to determine whether your current server supports the new protocol. To check if your web server already supports HTTP/2, you can use the KeyCDN online HTTP/2 Test tool:

Simply enter the URL of your website, then click on the Test button.
If your server’s current configuration supports the HTTP/2 protocol, a green notification bar will appear underneath the URL field to confirm this. Alternatively, you will see a red notification bar that says “HTTP/2 protocol is not supported.”
Step 2: Ensure You’re Serving Your Site Over a Secure TLS/SSL Connection
As we mentioned, the majority of browsers support HTTP/2, but only when the connection is encrypted. While HTTP/2 doesn’t technically require encryption to work, all major web browsers have made it a prerequisite.
Therefore, if you haven’t already, you’ll need to install a Secure Sockets-Layer (SSL) certificate on your WordPress site. The process for doing this will vary depending on your hosting provider.
Fortunately, though, most web hosts include an SSL or Transport Layer Security (TLS) certificate for free in their hosting plans. Both are acceptable for your needs. If your provider doesn’t offer either option you can also get one from Let’s Encrypt.
Step 3: Enable HTTP/2
Before you move forward, it’s also important to note that many online service providers that run servers on-premise (or in the cloud) update their servers to automatically add support for HTTP/2. Therefore, it would be wise to check with your host to determine whether you need to do anything to ensure your WordPress site supports HTTP/2.
Once you’ve confirmed that your server supports the protocol and you’re serving your site over a secure connection, you can enable it for use on your WordPress site. The process for doing so will depend on whether you’re using an Apache or Nginx server.
Nginx servers include native support for HTTP/2. On the other hand, Apache servers use their own mod_http2 module.
To enable the module in Apache, you can start by running the following command in your terminal:
$ sudo a2enmod http2The above is for Ubuntu distributions. However, there are different variations for retrieving the Apache configuration page based on your Linux distribution:
/etc/apache2/httpd.conf /etc/apache2/apache2.conf /etc/httpd/httpd.conf /etc/httpd/conf/httpd.confLocate the following, then remove the pound symbol (or hashtag) from the beginning of the line:
#LoadModule http2_module modules/mod_http2.soThis will load and activate the module for you to use. Next, enter the following line to your Apache configuration file:
Protocols h2 http/1.1This directive ensures that the secure protocol will be preferred. Next, wherever you put this directive (such as inside the virtual host for your server configuration), you can nest the following:
Protocols http/1.1 ServerName test.example.org Protocols h2 http/1.1 Finally, you can run the following:
# service httpd restart OR # systemctl restart httpd OR # sudo service apache2 restartThis will restart Apache.
Alternatively, if you want more control over HTTP/2 implementation for WordPress specifically, you can install the HTTP/2 Server Push plugin:

The free tool lets you leverage the Server Push mechanisms introduced with this protocol. For instance, you can use it to determine which resources, such as JavaScript and CSS files, are server pushed to the browser.
Step 4: Test To Confirm HTTP/2 Is Working
When you’re finished, regardless of the pathway you took to enable HTTP/2, you’ll probably want to run a test to check whether your efforts were successful. This way, you can be sure that everything is properly configured and working as it should.
To do so, you can use the same KeyCDN Test Tool that we discussed in Step 1. If everything is in order, your test results should show the green notification bar that says “HTTP/2 protocol is supported.” That’s it!
Conclusion
When you manage a WordPress site, it’s important that you implement certain measures to ensure it runs securely and at its maximum potential. One of the ways you can do that is by enabling the latest HTTP protocol.
As we discussed in this post, you can configure WordPress to use HTTP/2 in four simple steps:
- Determine whether your server is currently using or supporting HTTP/2.
- Ensure your site has an active SSL or TLS certificate installed.
- Enable HTTP/2 on your Apache server by running a series of terminal commands.
- Test to make sure HTTP/2 is working.
Do you have any questions about configuring WordPress to use HTTP/2? Let us know in the comments section below!


