
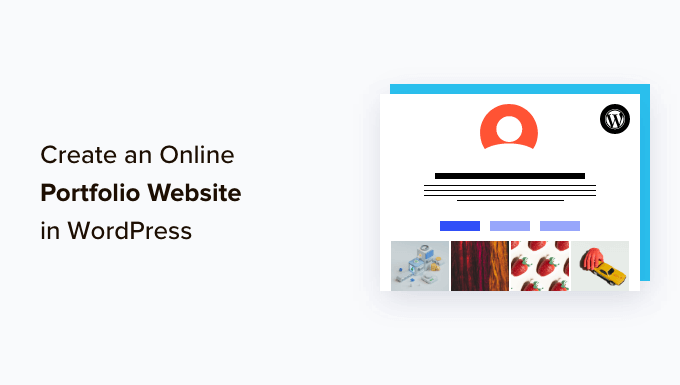
Looking to create an online portfolio website in WordPress?
The freelance market has grown rapidly. Resumes and LinkedIn profiles are important, but to beat out the opposition, you’ll need a portfolio website to showcase your best work and land more clients.
In this article, we will show you how to easily create an online portfolio website in WordPress, step by step.
Why Do You Need an Online Portfolio Website?
Think of your online portfolio website as your digital business card.
Portfolios are assets for everyone, including freelancers, job seekers, and small businesses.
While you may think a portfolio is only for artists or creatives, that’s simply not true. They work for any profession, whether you’re a graphic designer, writer, or developer.
It’s a chance to put your best foot forward in your industry. In a nutshell, your website portfolio helps you to stand out from the crowd and build trust. When you design a professional portfolio website, you instantly gain credibility and show off your experience.
Plus, you can optimize your site for search engines based on specific keywords so that more people can find you.
How to Create an Online Portfolio Website in WordPress with SeedProd
You don’t need to learn how to code or write HTML to build your portfolio site. Simply follow our step by step instructions, and you’ll have your website up and running in minutes.
1. Choose a WordPress Host
To start with, you’ll need a domain name and web host. The web host stores your website files and is your site’s home on the internet.
A good web host should be scalable enough to handle demanding sites, offer support in case anything goes wrong, take web security seriously, and have features to keep you safe.
You should also be looking for the fastest WordPress hosting providers, which helps to get your site loading quickly.
Hostinger is the best choice for small businesses that want affordable, beginner-friendly hosting.
Fortunately, Hostinger has agreed to offer our readers a free domain name and up to 78% off on WordPress hosting. You can get started for just $2.69 per month.
To get set up with Hostinger in a few minutes, simply click this button:
If you need help signing up for Hostinger, check out our post on how to get a free domain name, where you find a step by step tutorial.
Once you’ve registered and set up your hosting plan, you can just go into your dashboard and select the ‘Domains’ tab.
From there, you’ll need to enter a new domain name.

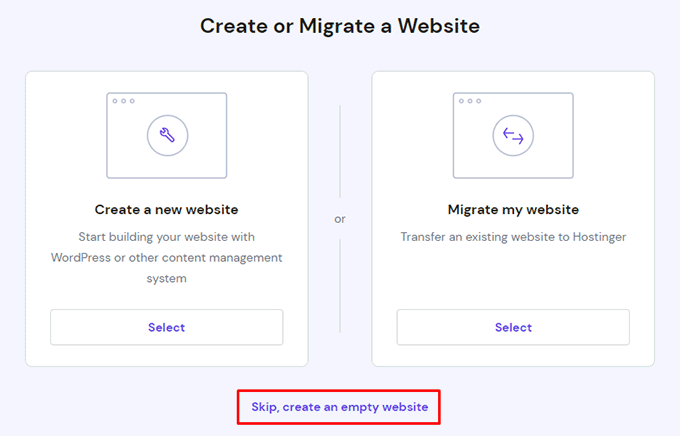
You’ll be prompted to create a new website or migrate an existing website.
For the sake of this tutorial, you can click the ‘Skip, create an empty website.’
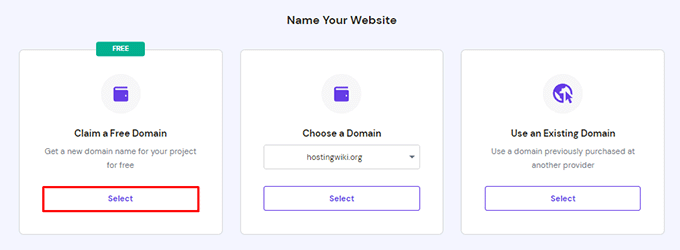
Next, click on the ‘Select’ button under ‘Claim a Free Domain.’
You can simply enter the domain name that you want to use for your portfolio website.
If you need help deciding on a domain name, WPBeginner offers a free business name generator to help you find a company name that is easy to read and promote online.
Of course, if you’re creating a personal portfolio, the easiest thing to do would be to use your first and last name as a domain name. If it’s taken, you can add your profession along with your first name.
For example, if johndoe.com is taken, you might find johndoephotography.com or janedoewriter.com.
Ideally, you should stick to a .com domain extension since it’s the most recognizable and trustworthy for small businesses.
2. Install WordPress
One of the most common mistakes most beginners make is choosing the wrong website platform. Many freelancers or small business owners gravitate towards Squarespace or Wix.
While those are easy to use, they lack tons of functionality, customization, and control.
Using a content management system like WordPress gives you much more flexibility with thousands of designs and addons for your portfolio site. WordPress is free, open-source, and has thousands of pre-built extensions and website designs.
With the right WordPress plugins and themes, you’ll also get the same drag-and-drop builder that makes platforms like Squarespace or Wix so easy to use.
Whether you use Hostinger or another WordPress hosting service like WPEngine or Bluehost, you can follow our guide on how to install WordPress for detailed, step by step instructions.
Next, in your Hostinger dashboard, click on the ‘Admin Panel’ button with the WordPress logo to go to your WordPress website’s dashboard.
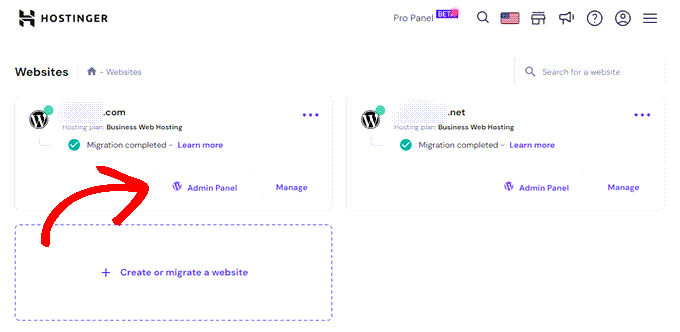
You can also go to yoursite.com/wp-admin directly in your browser.
3. Choose a Portfolio Theme
Once you have your WordPress set up, you’re ready to customize your website design by choosing a theme and creating new pages.
For this tutorial, we’ll be using SeedProd to create a theme specifically for portfolio websites.
SeedProd is the best WordPress page builder on the market. It lets you quickly and easily create any type of page without writing a single line of code.
Whether you want to make a portfolio website to land potential clients, start a WordPress blog, or an online store, SeedProd is a one-stop solution that gives you templates tailored to your needs.
You’ll want to install and activate the SeedProd plugin. For more help, see our in-depth guide on how to install a WordPress plugin.
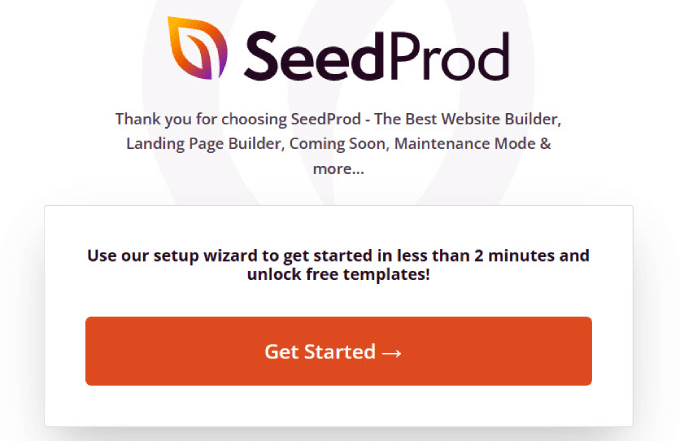
Upon installation, you’ll be prompted to complete the setup wizard. You can click ‘Get Started’ and just follow along the step by step instructions so that SeedProd can configure the plugin to best suit your needs.
When you’ve completed the setup wizard, head over to SeedProd ≫ Settings and enter your license key. You can find your license key under your accounts page on the SeedProd website.
After entering the information, click on the ‘Verify Key’ button.

You will now have access to all of SeedProd’s features.
4. Build Your Portfolio Landing Page
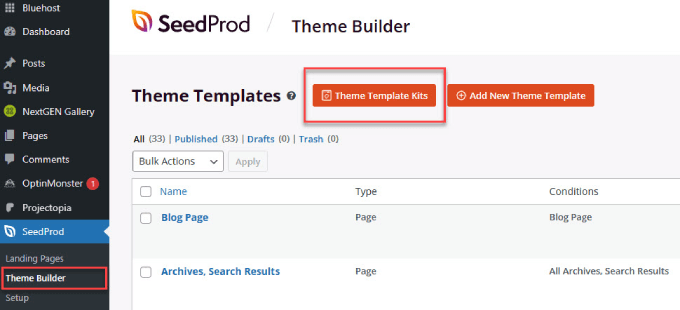
Next, go to SeedProd ≫ Theme Builder.
From there, select the orange button that says ‘Theme Template Kits.’
You’ll land on a page with a searchable library of WordPress themes to choose from. Type in ‘portfolio’ in the search bar and select the theme template that best fits your website idea.
Also, you may want to search other keywords if you’re in a specific niche. For example, if you are a realtor, you can find real estate WordPress themes on SeedProd.
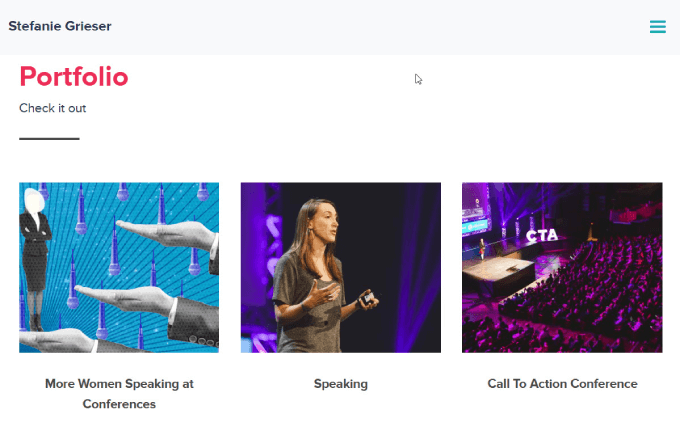
We’ll be choosing the ‘Freelance Portfolio’ theme, but feel free to pick any theme that fits your needs.

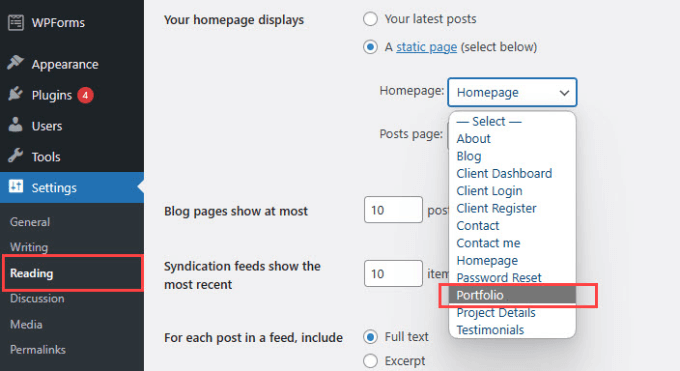
We’ll be creating a one-page portfolio site, where your portfolio page is on the Homepage of your website. This lets you have your portfolio site up and running fast without the hassle of designing multiple pages.
In the WordPress dashboard, head over to Settings ≫ Reading. Next to the Homepage, select the ‘Portfolio’ dropdown to make your portfolio page your Homepage.
Then head back to SeedProd ≫ Theme Builder, and you’ll see a list of all the pages within the theme.
Scroll down and hover over the ‘Portfolio’ page. Then click on ‘Edit Design.’

5. Edit the Portfolio Website
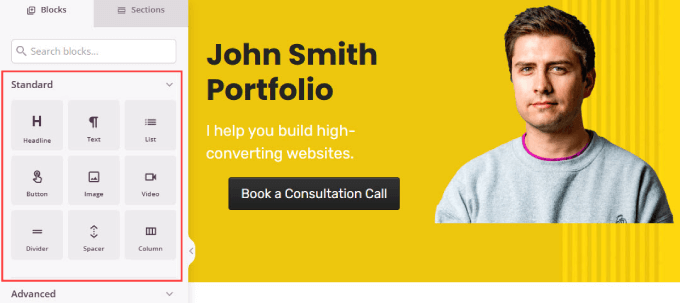
Now it’s time to edit the content and make it your own. You’ll be sent to SeedProd’s visual, drag-and-drop page builder. There are plenty of Standard and Advanced widgets to choose from, such as a headline, text, list, header, featured image, and so on.
Simply drag the widget you want and move it to the exact location you want that element.
You can also customize the background to your liking by choosing a solid color, gradient color, or background image.
Just click on the outer layer box, and under ‘Content’ in the sidebar menu, you’ll see options to customize your background.

If you need help working with the SeedProd interface, you can watch our SeedProd video tutorials.
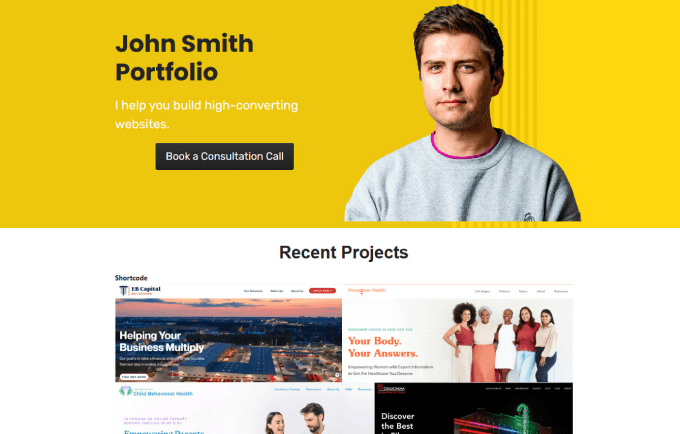
When editing the contents of your main portfolio page, there are several key components you want to include, such as:
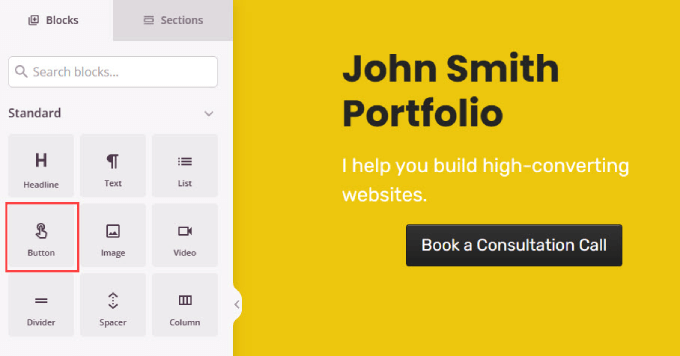
Strong Call to Action (CTA): Portfolio sites should have a clear call to action to allow visitors to hire or get in touch with you. The CTA button should be placed both above the fold and at the bottom of your page.
Just find the ‘Button’ box in the left-hand menu and drag it to your page on the right.
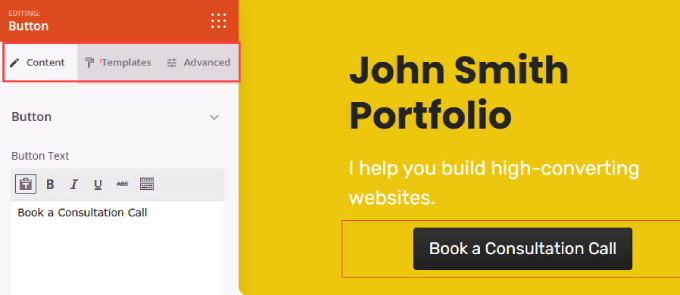
When editing any element, you must click on the specific element or area you want to customize.
Then, the options for that block appear to the left. As you can see below, the Content tab lets you edit the button text and link it to your contact page or even to an embedded form lower in this same page.
The ‘Templates’ tab lets you choose the button style, and the Advanced tab lets you change the padding, fonts, and more.
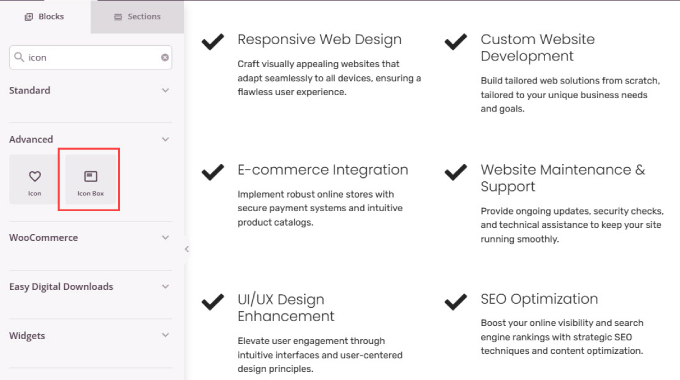
Services you offer: Visitors want to know what you offer so they can be sure you can do what they’re looking for. For instance, as a WordPress developer, do you code custom plugins, offer website customizations, or build websites from scratch?
To create a services section, just add a Column widget and insert an Icon Box for each service we offer.
Then, you can customize the text and icons as needed by clicking on the element and using the sidebar.
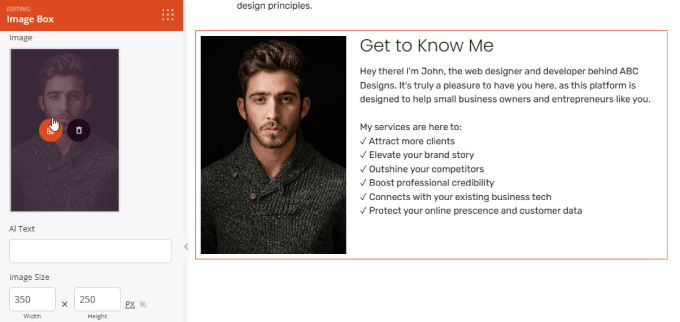
About Me section: Potential customers and clients also want to know more about your background and experience. This is a chance to build a connection with people and showcase why you’re passionate about what you do.
To create an About Me section, all you need to do is add the ‘Image Box’ widget to the page. Then, add a portrait photo of yourself and write a description that tells people more about you.
If you are creating a portfolio for a business or brand, you could use your custom logo here instead.
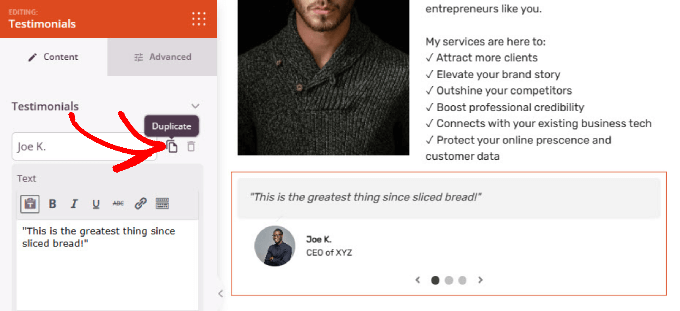
Testimonials: Providing testimonials from previous clients helps to build trust, especially if you’ve worked with reputable brands. Seeing that other people are satisfied with your work gives others the confidence that you can also do a great job.
Simply add the Testimonials widget to your page. Then, you can add a photo of the client and edit their name and testimonial. If you want to add more reviews, click on the ‘Duplicate’ icon next to the person’s name.
6. Add a Gallery to Showcase Examples of your Work
Creating a portfolio website gives you a chance to showcase all of the awesome work you’ve done. When potential clients see what you can do, they’ll trust that you’re the right person for the job.
To do that, we’ll be using Envira Gallery, which is the best WordPress gallery plugin. While you can use the ‘Advanced Gallery’ widget on SeedProd, Envira Gallery gives you more functionality.
For example, it comes with Lightbox images, meaning when someone clicks on a photo, it automatically displays the full dimensions without needing to crop or resize them. You can even add slideshows and organize your galleries into albums to better categorize your work.
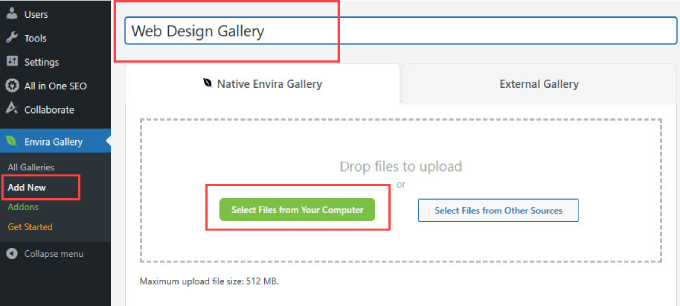
First, install and activate the Envira Gallery plugin. You can follow our guide on how to install a WordPress plugin for detailed instructions.
Head over to Envira Gallery ≫ Add New in the WordPress dashboard. Then, name your gallery in the title bar. From there, click ‘Search Files from Your Computer’ to add images of your portfolio projects.
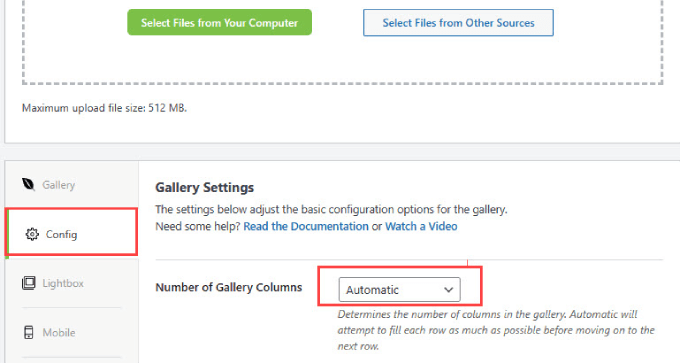
Once you’ve uploaded the portfolio items, scroll down and select the ‘Config’ tab.
Here, you can change the number of gallery columns you want to display. Setting it to ‘Automatic’ will set the number of images to automatically fill each row.
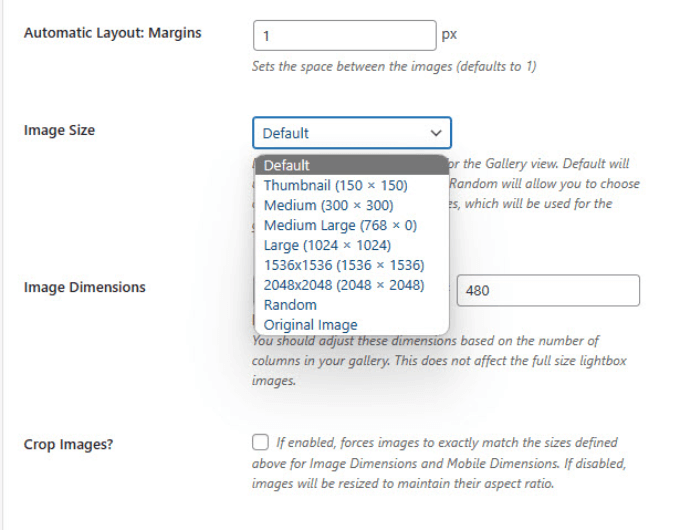
If you want to change the image sizes, scroll down in the ‘Config’ tab and find the Image Size option.
Select the size that best showcases your portfolio items.
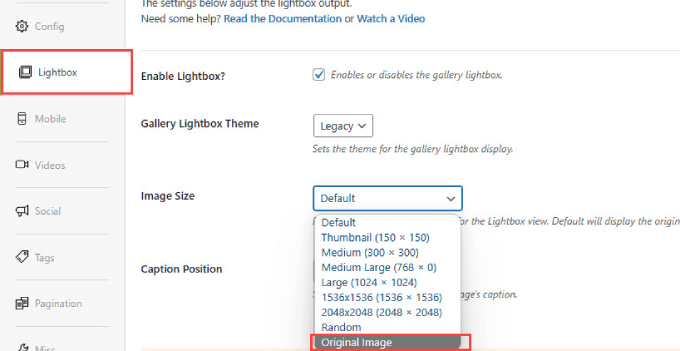
You can also adjust the Lightbox image size so that it displays the original size image when someone clicks on the picture.
Go to the ‘Lightbox’ tab and adjust the Image Size to ‘Original Image.’
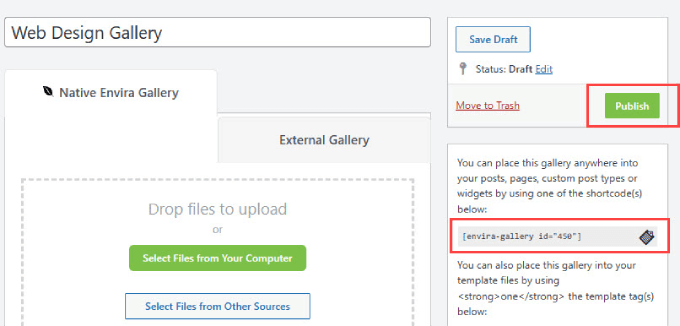
Scroll up to the top of the page and hit ‘Publish.’ Underneath the publish button, you’ll see a shortcode.
Copy the shortcode so that we can add the gallery to our WordPress portfolio page.
Go back to your portfolio page in SeedProd. Drag and drop the Shortcode block anywhere you’d like on the page.
Then, simply paste the shortcode into the ‘Shortcode’ box in the sidebar menu.
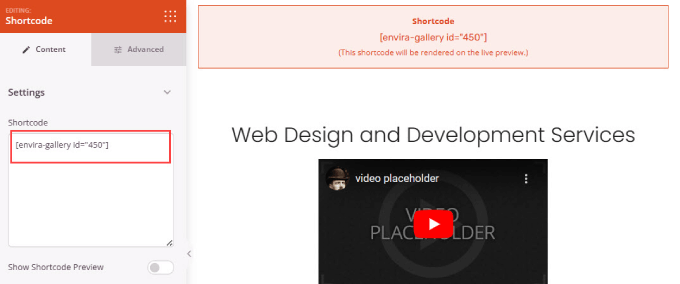
If you want to preview the shortcode, click on the ‘Preview’ button on the top right corner of the page.
This will show you what the entire page looks like.
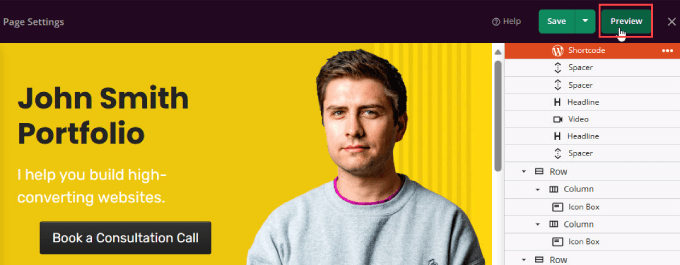
Here, you should be able to see that your Envira Gallery is embedded in your portfolio site.
With the lightbox feature from Envira Gallery, you can click on each item to see the full image.

7. Add a Contact Form
Now that you’ve reeled in your potential clients, it’s time to get them to contact you. Sure, you can just drop an email in there, but contact forms let them send you a message directly without opening up their email app.
The best way to create a simple and professional contact form is with WPForms.
WPForms is the best WordPress form builder that lets you create online contact forms.
To learn how to create a simple contact form for your website so that potential clients can contact you, just follow our step-by-step tutorial on how to create a contact form in WordPress.
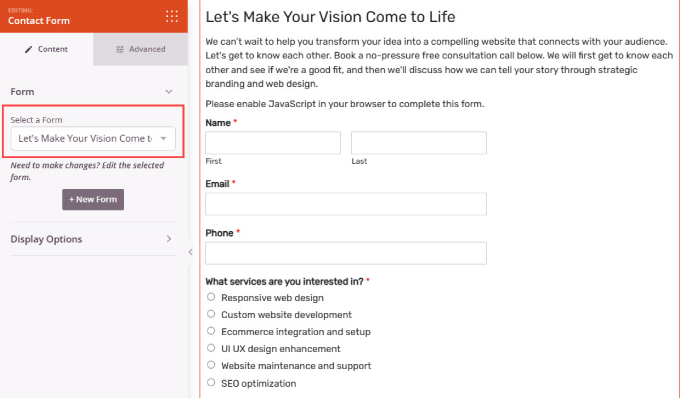
Once you’ve completed your form, go back to your portfolio page. You can use the ‘Contact Form’ widget to add a form from WPForms. Under ‘Select a Form,’ choose the one you’ve created.
8. Make It Live
If everything looks good, you’re ready to launch your website.
All you have to do is click the arrow under the green ‘Save’ button on the top right corner. Then click ‘Publish.’
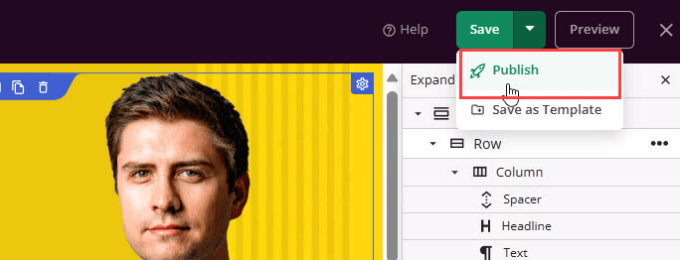
Go ahead and check the live site.
Everything should appear, including the portfolio gallery, buttons, and contact form.
Once you have a professional-looking portfolio website made, you’re ready to start sending more traffic to your site or nurture interested prospects.
We hope this article helped you learn how to create an online portfolio website in WordPress. We also recommend that you check out our post on how to start a WordPress blog or our guide on how to create an email newsletter.
If you liked this article, then please subscribe to our YouTube Channel for WordPress video tutorials. You can also find us on Twitter and Facebook.
The post How to Create an Online Portfolio Website in WordPress first appeared on WPBeginner.


