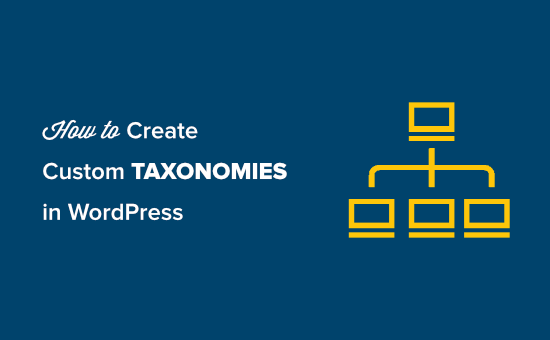
Do you want to create custom taxonomies in WordPress?
By default, WordPress allows you to organize your content with categories and tags. But with custom taxonomies, you can further customize the way you sort your content.
In this article, we’ll show you how to easily create custom taxonomies in WordPress with or without using a plugin.

While creating custom taxonomies is powerful, there’s a lot to cover. To help you set this up properly, we have created an easy table of content below:
- What is a WordPress Taxonomy?
- How to Create Custom Taxonomies in WordPress
- Creating Custom Taxonomies With A Plugin (The Easy Way)
- Creating Custom Taxonomies Manually (with code)
- Displaying Custom Taxonomies
- Adding Taxonomies For Custom Posts
- Adding Custom Taxonomies to Navigation Menu
- Take WordPress Taxonomies Further
What is a WordPress Taxonomy?
A WordPress taxonomy is a way to organize groups of posts and custom post types. The word taxonomy comes from the biological classification method called Linnaean taxonomy.
By default, WordPress comes with two taxonomies called categories and tags. You can use them to organize your blog posts.
However, if you are using a custom post type, then categories and tags may not look suitable for all content types.
For instance, you can create a custom post type called ‘Books’ and sort it using a custom taxonomy called ‘topics’.
You can add topic terms like Adventure, Romance, Horror, and other book topics you want. This would allow you, and your readers to easily sort books by each topic.
Taxonomies can also be hierarchical, meaning that you can have main topics like Fiction and Nonfiction. Then you’d have subtopics under each category.
For example, Fiction would have Adventure, Romance, and Horror as sub-topics.
Now that you know what a custom taxonomy is, let’s learn how to create custom taxonomies in WordPress.
How to Create Custom Taxonomies in WordPress
We will use two methods to create custom taxonomies. First, we’ll use a plugin to create custom taxonomies.
For the second method, we’ll show you the code method, and how to use it to create your custom taxonomies without using a plugin.
Create Custom Taxonomies In WordPress (Video Tutorial)
If you prefer written instructions, then continue reading.
Creating Custom Taxonomies With A Plugin (The Easy Way)
First thing you need to do is install and activate the Custom Post Type UI plugin. For details, see our guide on how to install a WordPress plugin.
In this tutorial, we’ve already created a custom post type and called it ‘Books.’ So make sure you have a custom post type created before you begin creating your taxonomies.
Next, go to CPT UI » Add/Edit Taxonomies menu item in the WordPress admin area to create your first taxonomy.

On this screen, you will need to do the following:
- Create your taxonomy slug (this will go in your URL)
- Create the plural label
- Create the singular label
- Auto-populate labels
Your first step is to create a slug for the taxonomy. This slug is used in the URL and in WordPress search queries.
This can only contain letters and numbers, and it will automatically be converted to lowercase letters.
Next, you will fill in the plural and singular names for your custom taxonomy.
From there, you have the option to click on the link ‘Populate additional labels based on chosen labels’. If you do this, then the plugin will auto-fill in the rest of the label fields for you.
Now, scroll down to the ‘Additional Labels’ section. In this area, you can provide a description of your post type.

These labels are used in your WordPress dashboard when you’re editing and managing content for that particular custom taxonomy.
Next up, we have the settings option. In this area, you can set up different attributes for each taxonomy you create. Each option has a description detailing what it does.

In the screenshot above, you’ll see we chose to make this taxonomy hierarchical. This means our taxonomy ‘Subjects’ can have sub-topics. For instance, a subject called Fiction can have sub-topics like Fantasy, Thriller, Mystery, and more.
There are many other settings further down your screen in your WordPress dashboard, but you can leave them as-is for this tutorial.
You can now click on the ‘Add Taxonomy’ button at the bottom to save your custom taxonomy.
After that, go ahead and edit the post type associated with this taxonomy in the WordPress content editor to start using it.

Creating Custom Taxonomies Manually (with code)
This method requires you to add code to your WordPress website. If you have not done it before, then we recommend reading our guide on how to easily add code snippets in WordPress.
1. Creating a Hierarchical Taxonomy
Let’s start with a hierarchical taxonomy that works like categories and can have parent and child terms.
Add the following code in your theme’s functions.php file or in a site-specific plugin (recommended) to create a hierarchical custom taxonomy like categories:
//hook into the init action and call create_book_taxonomies when it fires

add_action( 'init', 'create_subjects_hierarchical_taxonomy', 0 );

//create a custom taxonomy name it subjects for your posts

function create_subjects_hierarchical_taxonomy() {

// Add new taxonomy, make it hierarchical like categories
//first do the translations part for GUI

  $labels = array(
    'name' => _x( 'Subjects', 'taxonomy general name' ),
    'singular_name' => _x( 'Subject', 'taxonomy singular name' ),
    'search_items' =>  __( 'Search Subjects' ),
    'all_items' => __( 'All Subjects' ),
    'parent_item' => __( 'Parent Subject' ),
    'parent_item_colon' => __( 'Parent Subject:' ),
    'edit_item' => __( 'Edit Subject' ),
    'update_item' => __( 'Update Subject' ),
    'add_new_item' => __( 'Add New Subject' ),
    'new_item_name' => __( 'New Subject Name' ),
    'menu_name' => __( 'Subjects' ),
  );

// Now register the taxonomy
  register_taxonomy('subjects',array('books'), array(
    'hierarchical' => true,
    'labels' => $labels,
    'show_ui' => true,
    'show_in_rest' => true,
    'show_admin_column' => true,
    'query_var' => true,
    'rewrite' => array( 'slug' => 'subject' ),
  ));

}
Don’t forget to replace the taxonomy name and labels with your own taxonomy labels. You will also notice that this taxonomy is associated with the Books post type, you’ll need to change that to whatever post type you want to use it with.
2. Creating a Non-hierarchical Taxonomy
To create a non-hierarchical custom taxonomy like Tags, add this code in your theme’s functions.php or in a site-specific plugin:
//hook into the init action and call create_topics_nonhierarchical_taxonomy when it fires

add_action( 'init', 'create_topics_nonhierarchical_taxonomy', 0 );

function create_topics_nonhierarchical_taxonomy() {

// Labels part for the GUI

  $labels = array(
    'name' => _x( 'Topics', 'taxonomy general name' ),
    'singular_name' => _x( 'Topic', 'taxonomy singular name' ),
    'search_items' =>  __( 'Search Topics' ),
    'popular_items' => __( 'Popular Topics' ),
    'all_items' => __( 'All Topics' ),
    'parent_item' => null,
    'parent_item_colon' => null,
    'edit_item' => __( 'Edit Topic' ),
    'update_item' => __( 'Update Topic' ),
    'add_new_item' => __( 'Add New Topic' ),
    'new_item_name' => __( 'New Topic Name' ),
    'separate_items_with_commas' => __( 'Separate topics with commas' ),
    'add_or_remove_items' => __( 'Add or remove topics' ),
    'choose_from_most_used' => __( 'Choose from the most used topics' ),
    'menu_name' => __( 'Topics' ),
  );

// Now register the non-hierarchical taxonomy like tag

  register_taxonomy('topics','books',array(
    'hierarchical' => false,
    'labels' => $labels,
    'show_ui' => true,
    'show_in_rest' => true,
    'show_admin_column' => true,
    'update_count_callback' => '_update_post_term_count',
    'query_var' => true,
    'rewrite' => array( 'slug' => 'topic' ),
  ));
}
Notice the difference between the 2 codes. Value for hierarchical argument is true for category-like taxonomy and false for tags-like taxonomies.
Also, in the labels array for non-hierarchical tags-like taxonomy, we have added null for parent_item and parent_item_colon arguments which means that nothing will be shown in the UI to create parent item.

Displaying Custom Taxonomies
Now that we have created custom taxonomies and have added a few terms, your WordPress theme will still not display them.
In order to display them, you’ll need to add some code to your WordPress theme or child theme.
This code will need to be added in templates files where you want to display the terms.
Usually, it is single.php, content.php, or one of the files inside the template-parts folder in your WordPress theme. To figure out which file you need to edit, see our guide to WordPress template hierarchy for details.
You will need to add the following code where you want to display the terms.
ID, 'topics', 'Topics: ', ', ', ' ' ); ?>
You can add it in other files as well such as archive.php, index.php, and anywhere else you want to display the taxonomy.

By default your custom taxonomies use the archive.php template to display posts. However, you can create a custom archive display for them by creating taxonomy-{taxonomy-slug}.php.
Adding Taxonomies For Custom Posts
Now that you know how to create custom taxonomies, let’s put them to use with an example.
We’re going to create a taxonomy and call it Non-fiction.
Since we have a custom post type named ‘Books,’ it’s similar to how you’d create a regular blog post.
In your WordPress dashboard, go to Books » Subjects to add a term or subject.

On this screen, you’ll see 4 areas:
- Name
- Slug
- Parent
- Description
In the name, you’ll write out the term you want to add. You can skip the slug part and provide a description for this particular term (optional).
Lastly, click the ‘Add New Subject’ button to create your new taxonomy.
Your newly added term will now appear in the right column.

Now you have a new term that you can use in your blog posts.
You can also add terms directly while editing or writing content under that particular post type.
Simply go to the Books » Add new page to create a post. On the post edit screen, you’ll find the option to select or create new terms from the right column.

After adding terms, you can go ahead and publish that content.
All your posts filed under that term will be accessible on your website on their own URL. For instance, posts filed under Fiction subject would appear at the following URL:
https://example.com/subject/fiction/

Adding Custom Taxonomies to Navigation Menu
Now that you have created custom taxonomies, you may want to display in your website’s navigation menu.
Go to Appearance » Menus and select the terms you want to add under your custom taxonomy tab.

Don’t forget to click on the Save Menu button to save your settings.
You can now visit your website to see your menu in action.

For more detailed, see our step by step guide on how to create a dropdown menu in WordPress.
Take WordPress Taxonomies Further
There are a ton of things you can do with custom taxonomies. For instance, you can show them in a sidebar widget or add image icons for each term.
You can also add enable RSS feed for custom taxonomies in WordPress and allow users to subscribe individual terms.
If you want to customize the layout of your custom taxonomy pages, then you can check out Beaver Themer or Divi. They’re both drag and drop WordPress page builder that allows you to create custom layouts without any coding.
We hope this article helped you learn how to create custom taxonomies in WordPress. You may also want to see our guide on how WordPress works behind the scenes, and how to create a custom WordPress theme without writing any code.
If you liked this article, then please subscribe to our YouTube Channel for WordPress video tutorials. You can also find us on Twitter and Facebook.
The post How to Create Custom Taxonomies in WordPress appeared first on WPBeginner.


