Do you want to create your company org chart in WordPress?
Organizational charts can help visitors, clients, and potential customers learn more about your business, and find the right person to contact. If you have lots of employees, then an org chart can also help different teams communicate and work together more easily.
In this article, we will show you how to create a company org chart in WordPress.

Why Create Your Company Org Chart in WordPress?
An organizational chart shows how a company is structured, from the CEO right through to the different teams and individual employees within each team.
A helpful organizational chart can help employees understand how other teams are structured, and who they need to contact in any situation.
A chart may also be useful to third parties. For example, if you’re creating a client portal then an org chart can help clients find the best person to contact.
You might even add a company org chart to your public WordPress website, to show the human side of your business and improve your brand’s reputation.
That being said, let’s take a look at how to easily create and manage a company organizational chart in WordPress.
How to Create Your Company Org Chart in WordPress
The easiest way to build an employee chart is by using Organization Chart.
With this free plugin, you can create charts using a simple visual editor, and add images, links, text, and popups to your company org chart.

The first thing you need to do is install and activate the Organization Chart plugin. For more details, see our step-by-step guide on how to install a WordPress plugin.
Upon activation, go to Wpdevart Chart » Charts. Then, click on the Add New button.
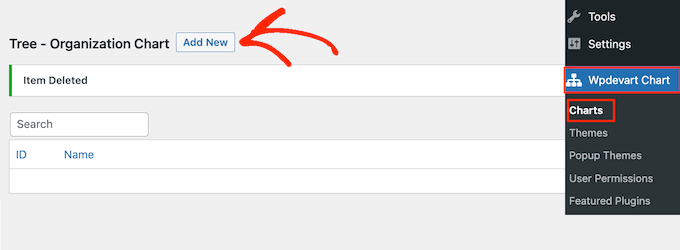
This launches the user-friendly visual editor.
To start, type in a title for the company org chart. This is just for your reference so you can use anything you want.

By default, Organization Chart adds one element to the chart. Typically, you’ll turn this into the head of your organization, such as the team leader or CEO.
To add more people to the chart, simply hover over the default element. You’ll now see two small icons: a pencil and an arrow.
Go ahead and click on the arrow, which adds one element directly below the first one.

Now, simply hover your mouse over this new element and you’ll see three arrows.
This allows you to add another element to the right or left of this person. Typically, people on the same level in an org chart have the same job title or similar responsibilities.
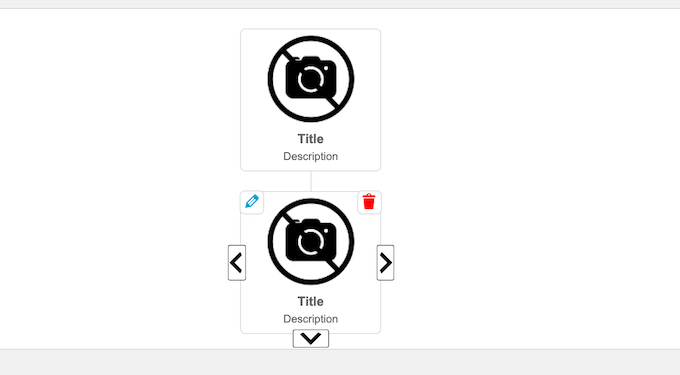
You can also click on the downwards-pointing arrow to create a new level below this person. Usually, people will report to the person above them in an org chart.
By hovering over each element and clicking on the different arrows, you can easily create your company’s structure. This includes multiple different branches or teams.
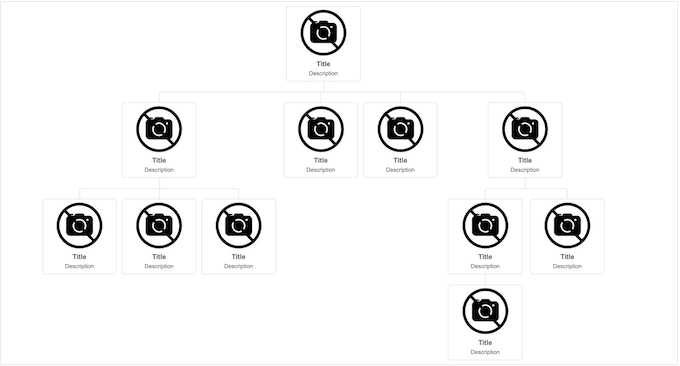
The next step is adding content to each element, such as the person’s name, author photo, or email address.
To get started, hover over any element and then click on the small pencil icon.

In the popup that appears, you’ll need to add a photo of the person.
Go ahead and click on the ‘Upload’ button and then either choose an image from the WordPress media library or upload a new file from your computer.
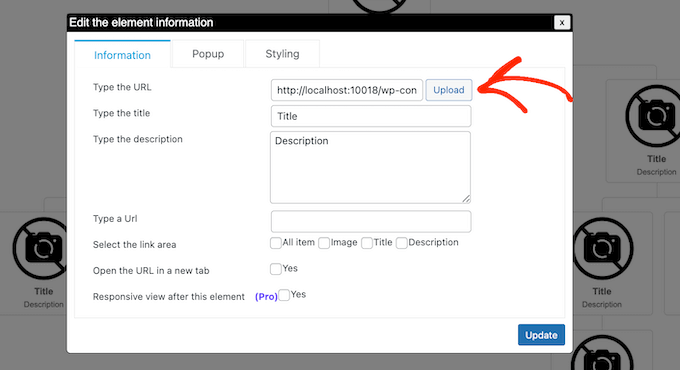
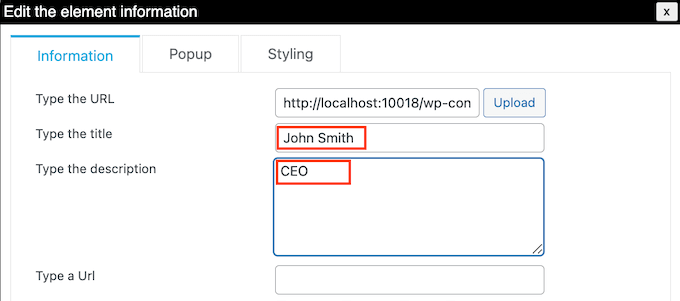
After that, type in a ‘Title,’ which will appear directly below the person’s picture. Typically, you’ll want to use the person’s name.
You can then add a ‘Description,’ which will appear beneath the title. Usually, you’ll want to type in the person’s job title, but you can also add a short sentence about their role.
Next, you may want to add a link to the image, title, or description. For example, you might link to a contact form for the person or maybe a page where potential clients can see the employee’s design or photography portfolio.
To do this, simply type in the URL you want to use. Then, choose the area where you want to add the link using the settings in the ‘Select the link area’ section. For example, you might add a link to the person’s image or description.
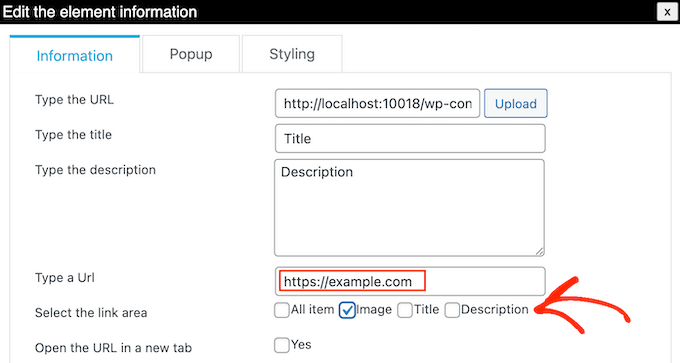
By default, the link opens in the same tab. You may prefer to open the link in a new tab, particularly if you’re using an external URL. To do this, simply check the box next to ‘Open the URL in a new tab.’
You may want to show more information about each person in the company org chart. For example, you could add their business email address and phone number, bio, a more detailed job description, or any other information you want.
This plugin lets you create a popup for each person. In this way, you can show detailed information without making the chart look complicated or text-heavy.
To add a popup, simply click on the ‘Popup’ tab.
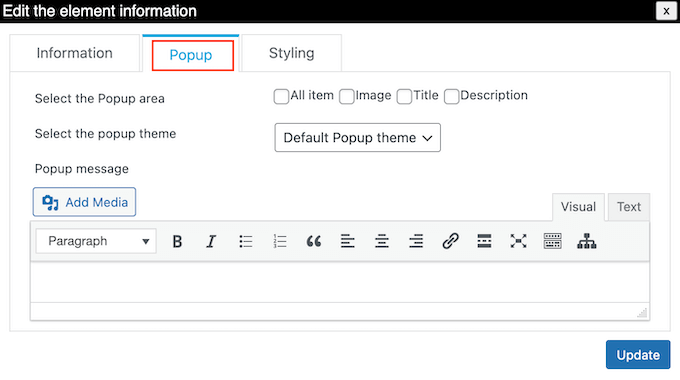
You can now type your messaging into the small text editor. This editor has all the standard WordPress formatting, so you can add links, create a bullet point list, use bold and italic text formatting, and more.
When you’re happy with the information you’ve entered, you can specify how visitors will open the popup using the settings next to ‘Select the Popup area.’
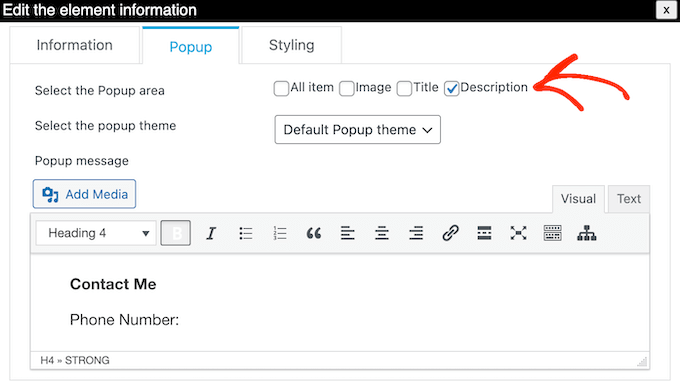
With that done, click on ‘Update.’
Now, simply repeat this process for every person in the company org chart.
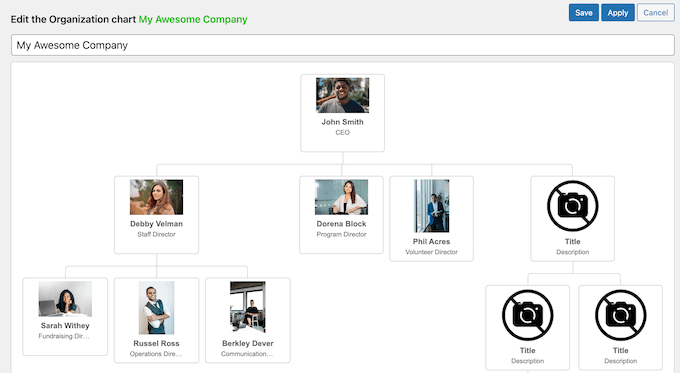
When you’re happy with how the chart looks, click on the ‘Save’ button.
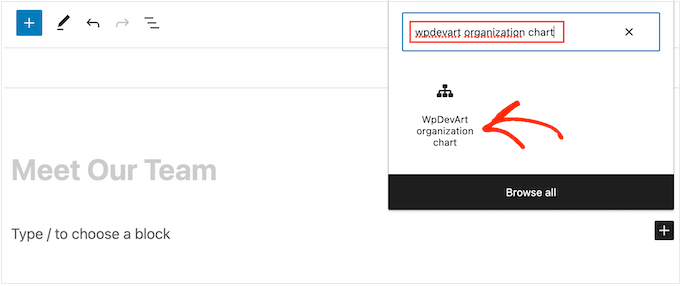
After that, it’s time to add the chart to your WordPress blog or website. Simply open the page or post where you want to show the company org chart, and then click on the ‘+’ icon.
In the popup that appears, type in ‘WpDevArt organization chart.’ When the right block shows up, give it a click to add it to the page.
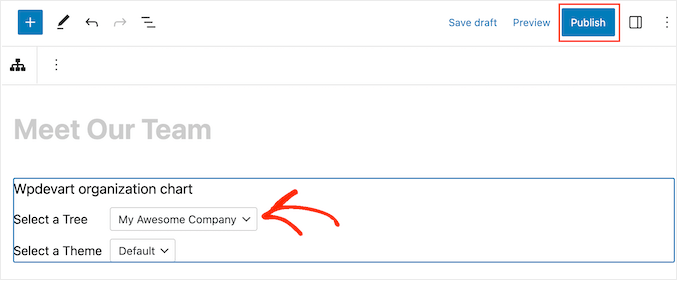
That done, open the ‘Select a Tree’ dropdown and choose the org chart you created earlier.
When you’re ready to make the org chart live, click on either the ‘Update’ or ‘Publish’ button.
Now, you can visit your business website to see the company org chart in action.
We hope this article helped you learn how to create your company org chart in WordPress. You may also want to see our guide on how to create automated workflows in WordPress, and our expert pick of the best live chat software for small businesses.
If you liked this article, then please subscribe to our YouTube Channel for WordPress video tutorials. You can also find us on Twitter and Facebook.
The post How to Create Your Company Org Chart in WordPress first appeared on WPBeginner.

