While using custom web fonts is a great way to make your site more unique and distinguish your branding, it can also come with certain problems — from privacy to performance. The solution: host your fonts locally on your WordPress website instead.
To help you do so, in this post, we will tell you everything you need to know about this topic. Below, we discuss why it’s a good idea to host fonts locally in WordPress in the first place and then give you a rundown of code and no-code solutions to make it happen in both classic themes and WordPress block themes.
Hosting Web Fonts Locally vs Remotely
So, the first thing we probably have to talk about is what hosting fonts locally even means.
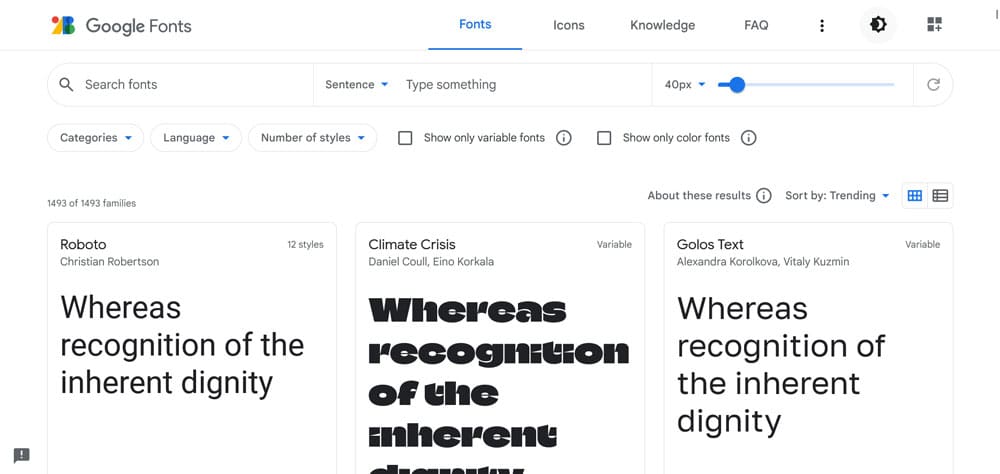
These days, a lot of people use so-called web fonts to change the typography on their websites. Those are font files that typically load from a third-party service, the most popular of which is Google Fonts.

It has a huge library of free fonts that you can use on your website by simply adding a special link to it. Then, when someone requests to see your site, they load remotely so that you can display them to visitors. Google Fonts is also integrated into many themes so that users can switch their font face very easily.
In contrast to that, when you host fonts locally, your font files don’t load from a remote server like Google’s but instead reside on your own server and visitors receive them from there. In the end, both achieve the same thing just in different ways.
Why Should You Locally Host Fonts in WordPress?
There are many good reasons to put font files on your own server instead of using a third-party solution:
- Privacy concerns — Especially if you are subject to European privacy laws, using web fonts particularly from Google can be problematic. The company collects visitor IP addresses and other information, which you need to mention in your privacy policy if you want to use them. Otherwise, you risk being fined. To avoid issues like this, many people simply opt to host fonts locally instead.
- Fond availability — The problem with using third-party hosted fonts is that you make yourself dependent on the service that provides them. If they go out of business, have a server breakdown, or if their URL changes for some reason, all of a sudden your site is without the typeface you chose. While that’s not likely in the case of Google, you never know, and crazier things have happened.
- Wider selection — While established libraries offer a wide range of different fonts, there is a lot more available that’s not in web font form. Consequently, knowing how to host fonts locally gives you many more possibilities to purchase and use premium fonts.
- Performance — When hosting your own fonts, you have full control over how they load. You can configure their caching and fix any issues on your own server. In addition, hosting your own fonts results in fewer HTTP requests as you don’t need to pull in data from another connection. All of the above is good for site performance.
Disadvantages and Caveats
At the same time, there are also some factors that speak against hosting fonts on your local server:
- Performance, again — Google Fonts especially are set up in way that offers high performance. They have a CDN to serve font files from the nearest server. In addition, many of the most popular fonts are already in most browsers’ caches. As a consequence, they load faster than your premium custom font. It’s the same reason why you shouldn’t host your own videos. For all the reasons above, it’s a good idea to use your own CDN if you are going to use local fonts.
- Higher complexity — Setting up your font files locally is more difficult than, say, going with the Google Fonts installed in your theme. However, as you will see below, unless you are going the completely manual route, it’s not that much harder. In fact, there are some one-click plugin solutions.
A Quick Word About File Formats

One thing you should know is that fonts are available in different formats, the most common of which are:
- TrueType Fonts (.ttf) — This is a font standard developed in the 1980s by Apple and Microsoft. It’s the most common format for operating systems and also usable on the web. While not the recommended file format, it’s a good fallback for older versions of Safari, iOS, and Android.
- OpenType Fonts (.otf) — Built on TrueType and developed and trademarked by Microsoft, the
.otfformat is for scalable computer fonts. - Embedded OpenType Fonts (.eot) — This is a legacy format of OpenType for rendering on the web. It is required by older versions of Internet Explorer.
- Web Open Font Format (.woff) — WOFF was explicitly developed for use in web pages. It’s the OpenType/TrueType format with compression and extra metadata. This format is recommended for use by the W3C and supported by all major browsers.
- Web Open Font Format 2.0 (.woff2) — An improved version of
.woffwith better compression for faster download. Developed by Google and compatible with very modern browsers. - SVG Fonts (.svg) — It’s also possible to use SVG shapes for fonts but this method is currently only supported by Safari.
So, which format should you choose? Of course, performance wise WOFF/WOFF2 makes the most sense. However, in order to be compatible with older browsers, including other formats is also useful. Plus, some providers, such as Google Fonts, only provide .ttf or similar formats for download. Luckily, there are ways around that, which we will show you momentarily.
However, keep the above in mind when procuring custom fonts for your website from a provider.
Hosting Fonts Locally in WordPress (Manually, Classic Themes)
At this point, we are finally going to talk about how to practically host fonts locally on your WordPress site. We have a bunch of different scenarios to cover and we are starting off with classic themes and the manual method.
This is the most technical approach, so you’ll learn the hardest method first before we go over easier solutions. Doing the whole thing by hand will help you understand the mechanics behind it and also improves your WordPress skills in the process.
1. Get Your Font Files
The first thing you need to host fonts locally is font files. Google Fonts allows you to download them but, as mentioned above, doesn’t yet provide the latest file formats. While you can theoretically turn their files into your desired format yourself, it’s much easier to use the Google Webfonts Helper instead.
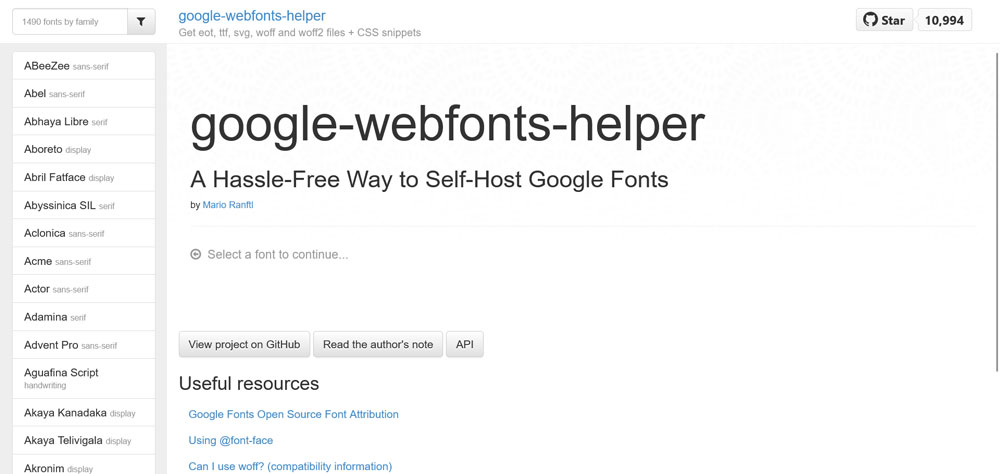
Not only have they done the conversion work for you, the site also provides you with the necessary code for embedding your fonts.
The first thing you need to do here is choose a font of your liking. For that, you can either use the list on the left or the search field above it. When you have found your desired typeface (for this example we going with Advent Pro), it’s time to choose your character set and styles on the right.

First, check if you need Cyrillic, Greek, or Latin Extended characters. Below that, check the boxes for all the font styles you need. Be sure to pick only those you will actually use on your website so you don’t make visitors load stuff that they won’t even see.
Under Copy CSS, you can choose which file formats you will download.
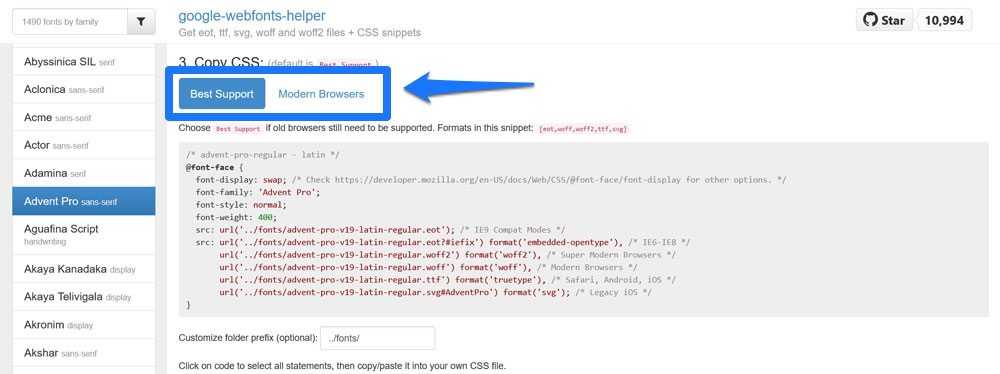
Best Support setting includes .eot, .ttf, .svg, .woff, and .woff2 files while Modern Browsers only include the latter two. It’s usually a good idea to leave it at the default setting.
Once you are happy with your choices, scroll all the way down and click the big blue button to download your files.

2. Upload the Font Files to Your WordPress Site
Once you have the font files on your hard drive, the first step is to unzip them. After that, you need to get them up to your server.
For that, connect to it via an FTP client and navigate to your theme directory (inside wp-content > themes). Here, it makes sense to place the files inside their own directory, e.g. fonts. Therefore, first create the directory, then drag-and-drop your font files into your FTP client to upload them.

The files are small so this shouldn’t take very long and you can move on to the next step.
3. Load the Local Fonts in Your WordPress Theme
Next up, if you want to use the local fonts on your website, you need to load them first. For that, Google Webfonts Helper kindly already provides the necessary markup. You have probably seen it earlier.
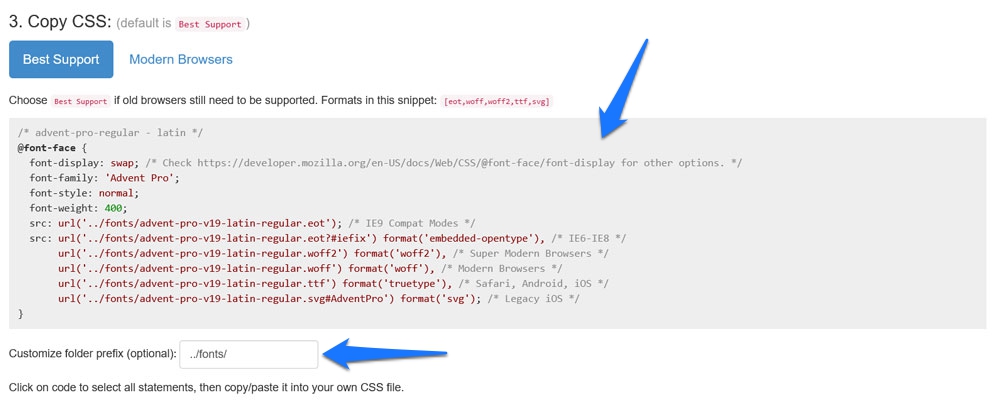
At the bottom, you can customize the folder name, in case the one you have placed your files into is not called fonts. You should already have made your choices about whether you are using the code for highest compatibility or only for modern browsers earlier. Therefore, now it’s time to simply click into the field with the markup to mark it all, then copy it with Ctrl/Cmd+C.
After that, go to your theme’s folder on your server and open the style sheet (style.css). Here, paste the markup you copied earlier at its beginning.

Quick note: In order to use relative paths with @font-face, meaning if you want WordPress to access your local font files inside the fonts directory in your theme folder, you need to delete ../ in front of the URLs above. So, in my case, each line would look like this:
url('fonts/advent-pro-v19-latin-regular.woff') format('woff'), /* Modern Browsers */This is assuming that your style.css file resides directly in your theme folder.
After you have made any necessary changes, save and re-upload the file and you are ready to use your local fonts on your WordPress site.
4. Eliminate Fonts Already Loading on Your Site
This step only applies if your theme already pulls in third-party fonts. You want to eliminate that for the aforementioned reasons as well as in order to not load the same font twice and also see if your local fonts have taken effect.
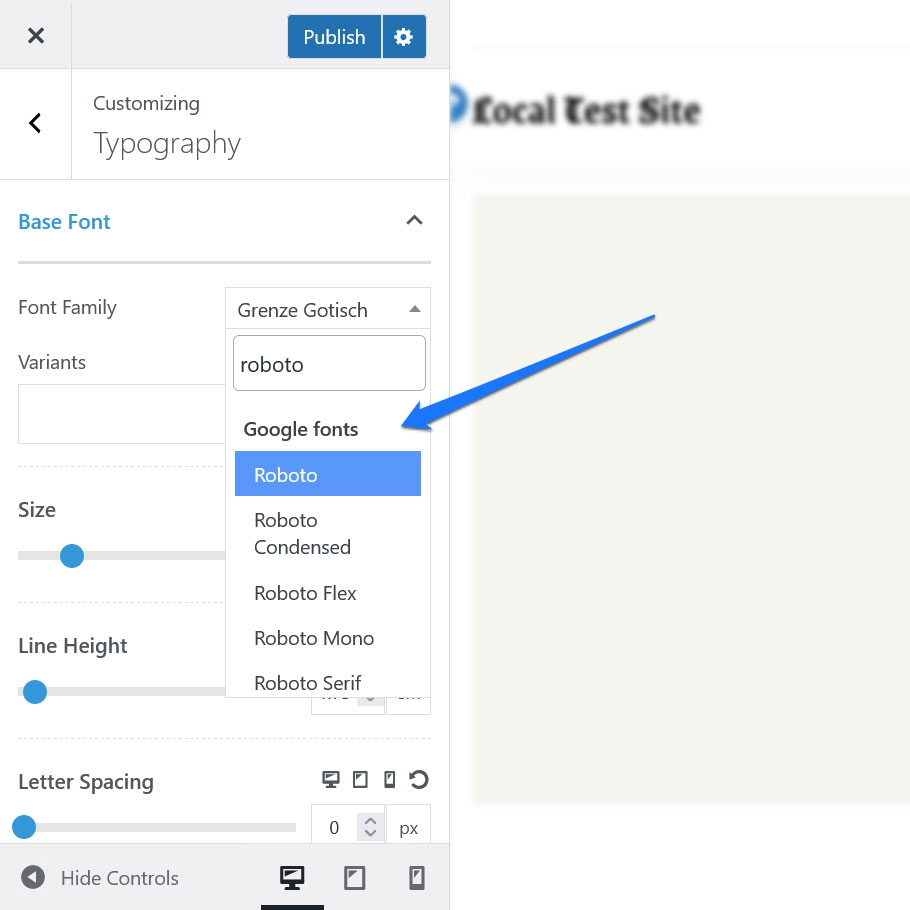
How to switch off third-party fonts depends on how they load in the first place. Some themes have dedicated options where you can switch to a system font or similar.

If, for some reason, they are hardcoded into your header.php file, you need to remove it from there (use a child theme for that). If they load via functions.php, you can remove the call from there. Do this in a child theme as well.
Finally, there is the Disable and Remove Google Fonts that you can try out. Autoptimize also has an option for removing Google Fonts, you can find it under the Extra tab.

4. Use Your Local Fonts
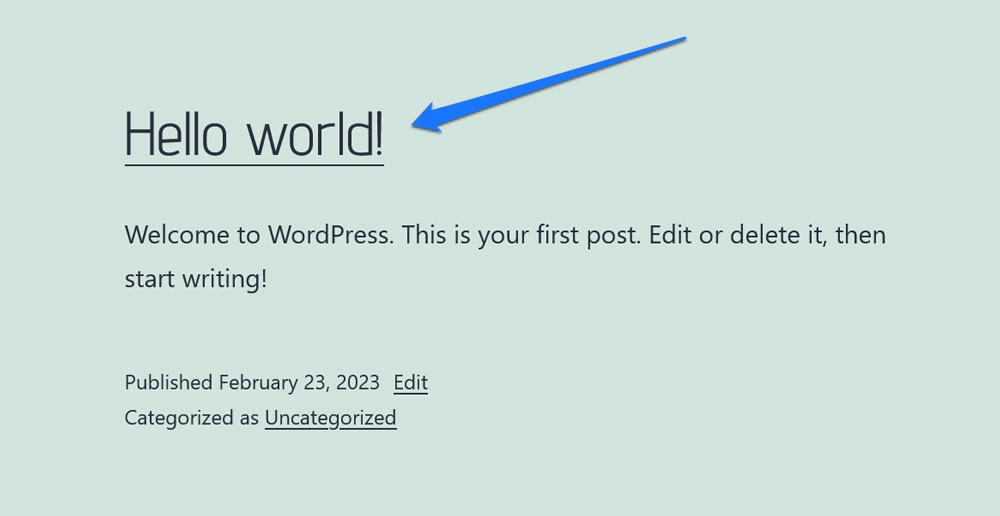
The last step is to actually assign your local fonts to elements on your site. For example, in the Twenty Twenty-One theme, you can use the following markup:
.entry-title { font-family: Advent Pro; }This results in your blog post titles appearing in the new Advent Pro font:
Hosting Local Fonts in Classic Themes: Plugin Edition
If the above is too complicated for you and your already have Google Fonts on your website (e.g. through a theme) you can also use a WordPress plugin solution to locally host your fonts. One of the best options for that is the OMGF or Optimize Google Fonts plugin that’s available for free in the WordPress directory. Install it in the usual way via Plugins > Add New.

Once you have done so, you find a new menu item under Settings, called Optimize Google Fonts. Click it to get to this menu:

Usage is pretty simple. In most cases, all you have to do is click Save & Optimize at the bottom. The plugin will then automatically find all Google Fonts style sheets on your site and replace them with local versions. You can see all of them at the bottom of the screen.
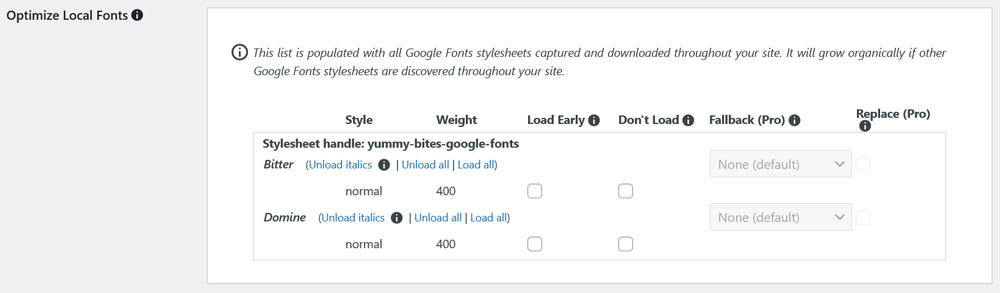
Here, you also have the option to configure the plugin not to load some of the fonts or font styles or pre-load them, which is important for typography that appears above the fold. There are some more settings but they are mostly for cases when something is not working.
OMGF also has paid a addon for installing more Google Fonts on your site. It’s very fairly priced and worth checking out. Other plugin options include Perfmatters and the Pro version of the aforementioned Disable and Remove Google Fonts plugin.
Manually Hosting Fonts in WordPress Block Themes
WordPress block themes also allow you to use local fonts. In fact, at the time of this writing, that’s all they do, you currently can not host third-party fonts in a block theme (though an API for that is in the making).
For that reason, the first few steps, acquiring font files and uploading them to your server, is the same as for classic themes. From there, the differences begin.
Loading Fonts Inside theme.json
In block themes, theme.json is the central file for styling and it is there that you set up the fonts. To do so, look for fontFamilies under settings and typography.

In block themes, new fonts are added using the following values:
fontFamily— The name of the new font as it will be used in CSS. That means it can include fallback fonts.name— Name of the font that will appear in the WordPress back end.slug— A unique identifier that WordPress uses in the CSS custom property.fontFace— This corresponds to the CSS@font-facerule and is what really enqueues the font.
In order to work, fontFace includes several other pieces of information:
fontFamily— The name of the font (again).fontWeight— A list of available font weights separated by spaces.fontStyle(optional) — You can set thefont-styleattribute here, e.g.normaloritalic.fontStretch(optional) — For example, for font families that have a condensed version.src— Path to the local font file.
You can include several font files in fontFace, e.g. to load different styles. Separate them with curly brackets and a comma to do so. Here’s what this looks like for the same font example as above:
"fontFamilies": [ { "fontFamily": "Advent Pro", "slug": "advent-pro", "fontFace": [ { "fontFamily": "Advent Pro", "fontStyle": "normal", "fontWeight": "400", "src": [ "file:./fonts/advent-pro-v19-latin-regular.woff" ] }, { "fontFamily": "Advent Pro", "fontStyle": "italic", "fontWeight": "400", "src": [ "file:./fonts/advent-pro-v19-latin-italic.woff" ] } ] } ]With the Gutenberg plugin active, you can also use wp_register_webfonts() inside functions.php instead, which is a new PHP function for this purpose that is not yet in Core. It takes the same arguments as above but in PHP format.
Local Fonts in Block Themes: Plugin Solution
Finally, it is also possible to locally host fonts in WordPress block themes with the help of plugins. One of them is the Create Block Theme plugin. After you install and activate it, it adds a new Manage theme fonts option to the Appearance menu.

Here, you can preview the font families included in your current theme as well as remove entire font families or single styles.
What’s even more interesting are the buttons saying Add Google Font and Add Local Font at the top. Let’s start with the Google Font option.
Using it is really easy. Click on its button and select your desired font from the drop-down list at the top. After that, tick the boxes for the font weights and styles that you want to add to your theme. Finally, click Add google fonts to your theme at the bottom.
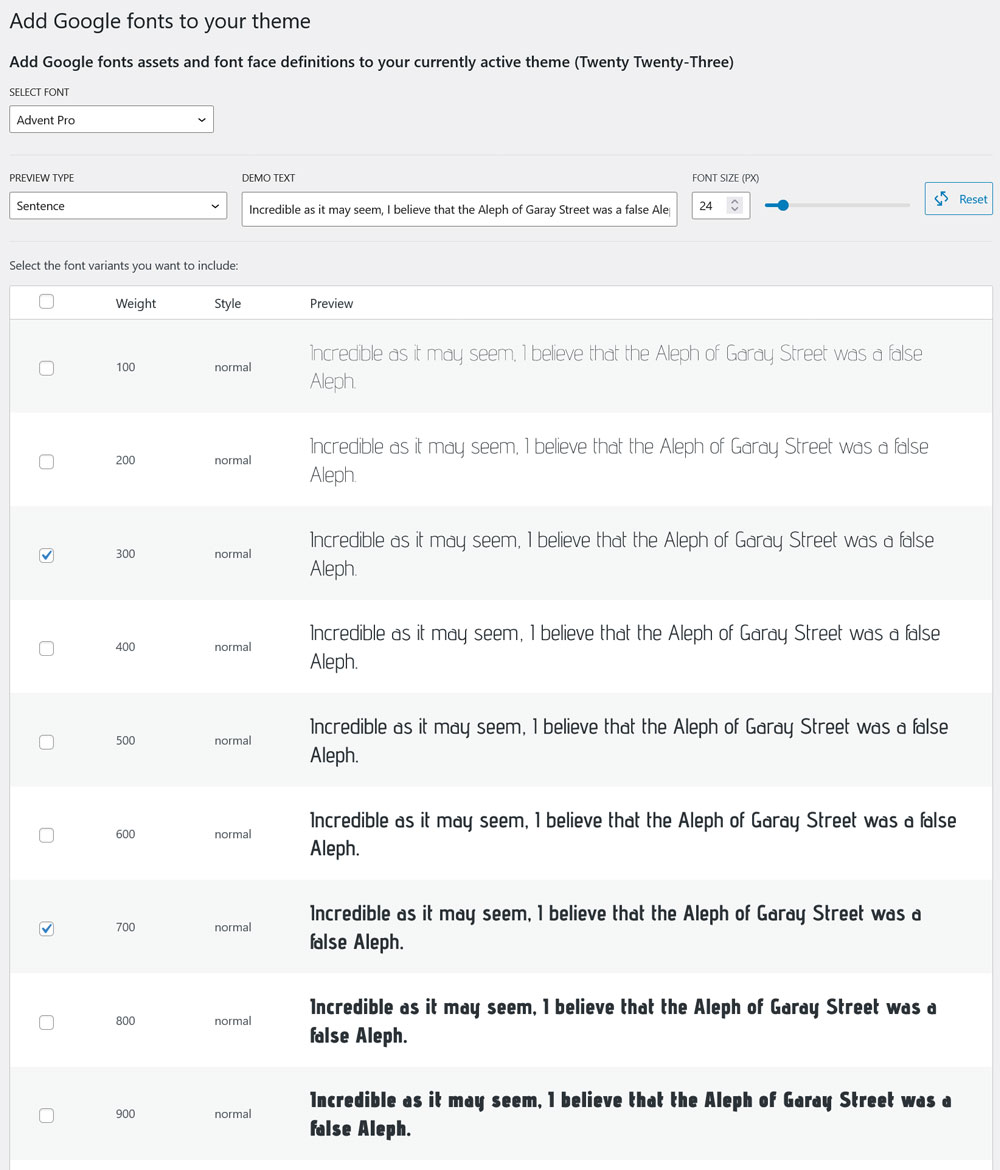
The plugin will then automatically download and embed your chosen fonts so that they are available in the block and Site Editor.

The local font option works very similarly.

The difference here is that you upload a font file from your hard drive and have to provide the font’s name, style, and weight so that the theme knows what’s what (the plugin also automatically tries to recognize this information). That also means you need to upload your font files one by one. However, overall it’s super simple.
Are You Ready to Host Fonts Locally in WordPress?
Custom fonts are a popular way to spruce up your website. However, the ability to locally host them in WordPress is something that’s becoming more and more important because of performance, legal, and other reasons.
Above, we have gone over several ways to do so. You can either achieve it manually or using a plugin. There are also differences when using a block or classic theme though overall the principles are very similar. We hope you now feel up to the task.
How did you choose to locally host your fonts in WordPress? Let us know in the comments section!


