
XAMPP is a popular, free, open-source web server you can install on your computer and use to power local WordPress installations. This makes XAMPP a great option for developers who want to develop sites and test plugins and themes locally before pushing those changes to a live website.
Using a local development environment is a good idea in many different situations. For example, anytime you install a new plugin you can test it locally to avoid errors producing the white screen of death. Or, if you’re redesigning your site or adding a major new feature, developing the changes locally will allow you to launch them all at once rather than making them incrementally and producing a poor user experience during the transition. Another situation best handled locally is switching themes, which can produce some unattractive results that need to be cleaned up one page and post at a time; testing and cleaning up theme changes locally can avoid this unpleasantness.
These are just a few scenarios best handled using a local WordPress installation with the finished product being uploaded back to the webserver. In this tutorial, I’ll demonstrate three different ways of moving a copy of a WordPress website that is live on the web to a local XAMPP-powered development environment.
- Before You Get Started
- XAMPP Migration Three Ways
- A Demonstration Test Subject
- Wrapping Up and Conclusions
Before You Get Started
Before we jump into the process of migrating a site, you should have XAMPP installed on your computer and know how to set up a local WordPress installation. If you’ve never done that before, read our previous article How to Install XAMPP and WordPress Locally on PC/Windows. With XAMPP set up on your computer and at least one local WordPress installation process complete, you’re ready to dive into this tutorial.
XAMPP Migration Three Ways
Each of the three options I’m going to cover may be the right choice for your situation. To help you decide which method to follow, here’s a quick explanation of when each of these options might be your best choice.
Method 1: Using Built-in WordPress Export
If you just want to move your website content (posts, pages, and media) without moving any themes or plugins, the built-in WordPress Tools > Export tool is easy to use and works well for this purpose. Read more.
Method 2: Manually Move Files and Database
If you want to move your entire website (content, themes, and plugins), don’t mind working with databases and PHP files, and want to learn more about how WordPress works under-the-hood, you can move your website files and database manually. Read more.
Method 3: Using a plugin
If you want to create a carbon-copy of your website as quickly as possible with minimal hassle, you can use a plugin to move all or part of your WordPress website. Read more.

A Demonstration Test Subject
My personal website is badly overdue for a redesign, so I’m going to demonstrate the three methods using my own site as a test subject. It’s hosted by Siteground on the GrowBig shared hosting plan, which is a fairly standard Linux environment. My local development platform is a Windows 10 PC running the latest version of XAMPP, 7.0.4.
If you’re moving a website from a different hosting environment, such as a Windows server or a VPS, using a different version of XAMPP, or using a computer with a different OS, things may look a little bit different, but the fundamental steps will remain the same.
Backup, Backup, Backup
Before getting started, create a complete backup of your WordPress website files and database. Store the backup files somewhere that you won’t accidentally delete them or forget where you put them. Anytime you are going to dig into your website files or database, it’s a good idea to create a complete backup of your entire site. That way, if something goes wrong, you’ll have a clean copy of your website files and database which you can use to restore your website.
If you need some tips on backing up your WordPress site, check out How to Backup Your WordPress Website (and Multisite) Using Snapshot.
Method 1: Using the WordPress Export/Import Tool
Of the three methods covered in this tutorial, this is the easiest. It may also be your best option if you’re planning on a complete website redesign and just want to grab your website’s content. Using this method will copy all website content, including media files, posts, pages, comments, menus, and custom post types, but will not grab your WordPress installation, themes, or plugins.
We can break this process into three major steps:
- Export your content;
- Install WordPress locally; and
- Import your content.
Export Website Content with the Export Tool
To grab your website content, head to your WordPress website. From the Dashboard, navigate to Tools > Export. If you’re moving all of your website content, leave the All Content radio box selected and click Download Export File.
That’s it! You’ve successfully exported your website content.
Create a New Local WordPress Installation
Before you can import your website content you’ll need to have a new, clean, local installation to import the data into. Go ahead and install a new copy of WordPress to avoid fouling your transferred content and brand new development environment with leftover data from previous development projects.
If you’ve never installed WordPress locally before there’s a tutorial for that.
Import Website Content with the Import Tool
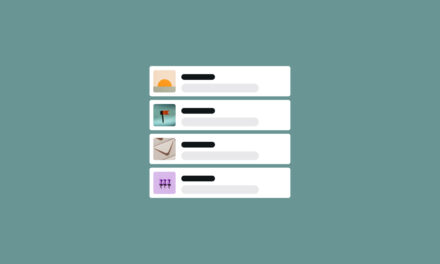
From the Dashboard of your local WordPress installation, navigate to Tools > Import. From the bottom of the list of available import plugins, select WordPress, and then select Install Now. Finally, select the option to Activate Plugin & Run Importer.

At this point, if your experience is anything like mine, you may see an error message at the top of your screen that says something like this:
Warning: Declaration of WP_Import::bump_request_timeout() should be compatible with WP_Importer:: bump_request_timeout($val) in C:xampphtdocsstandardwpwp-contentpluginswordpress-importerwordpress-importer.php on line 38.
If you don’t see the message, great! Skip the next paragraph.
If you do see this message, deactivate and delete the plugin from Plugins > Installed Plugins. Then download and manually install the version of the plugin that contains a patch to fix this issue. With the patched version of the plugin installed, navigate back to Tools > Import, select WordPress, and proceed to import the XML file that contains your website contents.

It’s important to realize that the export file you previously downloaded doesn’t actually contain your website’s media files. Your media files will be downloaded directly from your website during the import process. After selecting the XML file and clicking on Upload File and Import, to import media files select the checkbox to Download and import file attachments.
If you selected the option to download and import file attachments, once you click Submit it make take a few minutes for the import to be completed. The reason for this is that the local WordPress installation is downloading media files from your live website and importing them into the Media Library.
With any luck, you’ll see a success message letting you know that all content was imported successfully.
In my case, that isn’t what happened. I saw a list containing a few different error messages.

If you see error messages, take a minute to review them and try to understand which items failed to import.
Each error message will identify a specific item that failed the import process. Lots of plugins and themes use custom post types. If you haven’t recreated these custom post types or installed and activated the associated plugins on your local installation, they will fail the import process.
If you want these custom post types to import successfully, what you need to do is either install the plugins and themes that created them originally or create the custom fields manually.
In my case, the items that failed to import include:
- Three font controls created by the Easy Google Fonts plugin;
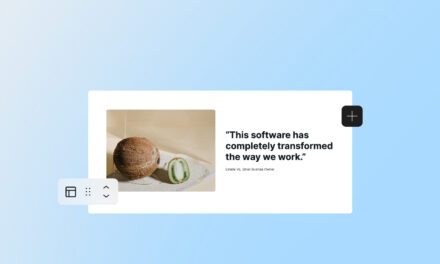
- Two custom testimonials post types created by the theme I’m using on my site;
- A contact form created with Contact Form 7.
If I wanted all of these items to import successfully, I would need to install the Easy Google Fonts and Contact Form 7 plugins and create a testimonials custom post type. Then I would use the Export tool on my live website to export just the specific items that had failed to import and then retry the import process.
I don’t need the font controls or the contact form, I don’t plan to use either plugin after I redesign my website. But I would like to save the testimonials. To import those posts, I installed CustomPress (Custom Post Types UI would also get the job done), created a Testimonials custom post type, exported just the Testimonials from my live website, and used the Import tool to pull in the testimonials.
Note: I didn’t use the same XML file to import the testimonials. Doing so would have reinitiated the import process for all of my website content, potentially creating a duplicate content issue. Instead, I created a new export file by selecting just the testimonials using the Tools > Export interface on my live website.
Worked like a charm.
A Limited Tool, but the Right Choice for Some Situations
This is a fairly straightforward method of moving website content. If your WordPress installation includes just the standard post and page types, and you pre-install any plugins that you plan to continue using on your local site, the import process should work flawlessly. If you want to completely redesign your WordPress website, this method may be your best option. You keep all of your content, but don’t have to deal with plugins and themes you don’t plan on using after the redesign is complete.

Method 2: Moving an Entire WordPress Website Manually
If you want to copy your live site to a local development environment you can do so by manually moving your files and database tables. It’s a three-step process:
- Set up a local copy of your website database;
- Set up a local copy of your website files;
- Configure the website files to communicate with the database and assign a local URL; and
- Load your website carefully and run a database search and replace plugin.
A Word of Caution
This is the most complex and error-prone method of the three described in this article. If your primary concern is moving your website quickly and with the fewest errors possible, use one of the other methods. However, if you want to learn more about how WordPress works, moving a WordPress installation manually does provide some hands-on experience dealing with hosting, databases, FTP, and PHP, and quite likely the opportunity to put your googling skills to the test to troubleshoot any issues that might crop up along the way.
Set up a Local Copy of Your Website Database
Log in to your hosting account (or cPanel) and export a copy of your database. If you’re on shared hosting, there’s a high probability you’re hosting provider has installed phpMyAdmin, which you can use for this purpose. Log in to your account control panel and launch phpMyAdmin.

Once phpMyAdmin is running, on the left-hand side of the screen click on the appropriate database.
If you aren’t sure which database you need, one tool you can use to identify the appropriate database is the WPMU DEV Dashboard plugin.
With the dashboard plugin installed and activated navigate to WPMU DEV > Support. Select System Info and then click on the MYSQL tab. Now scroll down until you see the Database line. It should be the fifth item down, more or less. This is the database you will want to select in phpMyAdmin.

With the appropriate database selected, click the Export menu item. You’ll find it in the ribbon along the top of the window displaying phpMyAdmin.

On the following screen, leave the Quick radio button selected unless you know that you only want to export specific database tables. Then select Go to download a copy of the database.

Next, launch XAMPP if it isn’t already running on your computer, and start up both Apache and MySQL. Once they’re up and running, select MySQL Admin to launch phpMyAdmin locally.
Alternatively, you can type the URL http://localhost/phpmyadmin into the address bar of your browser to access the application.

Create a new database in phpMyAdmin by clicking on Databases and entering a database name in the Create database prompt. You can name the database anything you like. I created a database called jplocal.

Once the database has been created you can import the database tables you downloaded from your hosting account. To do this, open up the local version of phpMyAdmin (http://localhost/phpmyadmin) and select the new database you just created from the list of databases on the left side of the application. With the database selected, click Import, which you’ll find in the menu along the top of the application. Use the Choose File button to select the SQL file you previously downloaded from your hosting account, then scroll to the bottom of the page, and click Go.
With any luck, your database will be successfully imported.
However, that isn’t what happened when I clicked Go. Instead, I saw this message.

The problem is that the database file I attempted to upload is larger than the maximum upload size allowed by the settings in the copy of php.ini running on XAMPP. I was able to confirm that this was the problem by clicking back to the Import screen where a maximum upload size of 2,048 KB was indicated. Since my database is approximately 5 MB in size, this limit needs to be increased.
To increase the limit, I adjusted the upload_max_filesize value in the php.ini file. This file can be found by locating your XAMPP root folder, opening the PHP directory, and looking for the file name php.ini.

Once I located the file, I opened it in a text editor and searched for upload_max_filesize and bumped the limit up from 2M to 8M.
Rather than changing the original value, what I did was comment out the original line with a semicolon, adding a comment explaining the original value, and then created a new line with the new value. This way, if I ever have to edit this value again, the comment will remind me of the original value and the edit I made. Leaving a comment like this will ensure that I can return the file to its original state if I ever need to.

After saving the changes to php.ini, I stopped and restarted both Apache and MySQL from the XAMPP control panel, and then reloaded phpMyAdmin. I then reattempted the import and was greeted with a success message.

Set up a Local Copy of Your Site Files
The fastest way to copy your website files from your hosting account to your computer is to use an FTP client like Filezilla. If you’ve never used an FTP client before, consider reading through our tutorial on using FTP properly with WordPress before diving in.
Download errors are common when using FTP to download a large volume of files. Sometimes FTP clients will download the same file twice and ask you if you want to overwrite the first file with the second (I typically choose to overwrite if the source file is newer). It’s also possible that some files will simply fail to transfer and you may need to reattempt those downloads. Keep an eye on the messages your FTP client produces, and make sure you get all of your website’s files properly downloaded.
To get started, access your hosting account over FTP and locate the directory that contains your website files. In the vast majority of cases, you will find it in the public_html directory.
If you only have one website hosted on your account, you may need to copy the entire public_html directory. In my case, my personal website is contained in a directory called jonpenland within public_html directory. So I copied the entire jonpenland directory.
When you copy your website files to your computer, copy them to the htdocs directory inside of the xampp directory. Simply drag the directory you want to copy from the server to the directory where you want to copy it.

Depending on the size of your website files and internet connection speed, it may take several minutes for all of the website files to be copied.
Keep an eye on the messages produced by your FTP client. If any files fail to download, add them back to the download queue after the process completes.
Configure Your Website to Work Locally
At this point, your website files and database are both located on your computer. However, they haven’t been configured to talk to each other. The final step in the process is to get your website files and database talking to each other.
You will need to manually edit your website’s wp-config.php file to tie your WordPress website database to the website files and set your website up to resolve using a local URL.
Navigate to the folder where you copied your website files and look for wp-config.php.

Open the file in a text editor and make the following changes:
- Change the database name to match the name of the local database you created previously;
- Change the database username to root;
- Delete the database password;
- Change the
WP_HOMEdefinition (or add it if you don’t see it) to identify the location where WordPress is installed in your website files; and - Change or add the
WP_SITEURLdefinition (or add it if you don’t see it) to identify the address that should be typed into the browser address bar to load WordPress.
I changed WP_HOME and WP_SITEURL to reflect the directory that contains my website’s files. If you have WordPress installed in a subdirectory, your WP_HOME URL will include that subdirectory while the WP_SITEURL URL will not.
Here’s how my wp-config.php file looked after making these changes.

After making edits to identify your database and installation location, save changes, and close the file.
Load Your Site and Clean Up Your Database
Before trying to load your website locally, it’s a good idea to disconnect from the internet. If you attempt the next step while still connected to the internet, any plugins activated on your local site will attempt to connect to any associated services.
In my case, I did attempt to load the website locally while connected to the internet and broke the connection between Jetpack and my live website as a result. It was an easy problem to fix, I simply deactivated Jetpack on both the local and live websites and then reactivated it only on the live site, but the problem would have been avoided if I had first opened the website locally while disconnected from the internet and deactivated Jetpack.
After disconnecting from the Internet, with both Apache and MySQL running locally with XAMPP, open up a web browser and type in the local URL for your website. If all is well, you’ll see your WordPress website staring back at you.
Once your website is loaded, head to Plugins > Add New and install a database search and replace plugin. My personal favorite is Search & Replace, but several others are available to do the job if have a different preference. If you choose to use this plugin, once you have it installed and activated, navigate to Tools > Search & Replace. In the Search & Replace tab enter your live website URL in the Search for: prompt and your local website URL in the Replace with: URL.

To run the search and replace operation, scroll down, select the option to save changes to the database, and click Do Search & Replace. Note that I would not recommend making changes directly to the database when working on a live website. However, since you already have a clean copy of your database on hand (the copy you downloaded just a few minutes ago and imported into your database), and since you’re working in a development environment, you aren’t really risking anything by making the changes directly to the database.
With the search and replace operation complete, you’ve completed the website migration process and can begin working on your website.
Keeping it Real
In the narrative above, I describe a pretty orderly process. However, that’s not how things went when I transferred my site manually. After moving the database and website files, and modifying wp-config.php, I tried to load my website only to be greeted by the white screen of death. Thankfully, the login screen was accessible and I was able to login to my website dashboard.
From the dashboard, I navigated to Plugins > Installed Plugins and deactivated any plugins that didn’t need to run on the local version of my site including Jetpack, Google Analytics, two caching plugins, and a few security plugins. That didn’t fix the issue, so I switched themes, and my website frontend finally loaded.
I was pretty confident the issue had something to do with my theme and suspected it might have something to do with the visual website builder, Visual Composer, that is packaged up with the theme. What I did next was make sure that my theme and all plugins were up to date. I found that both my theme and Visual Composer were due for an update. After updating both, and switching the theme back on, I found myself looking at a locally-hosted carbon copy of my live website.
Hopefully, things will go more smoothly if you move your website manually. However, if you do run into problems, deactivating unnecessary plugins, switching themes, and updating everything should be the first steps you take in attempting to resolve the issue.

Method 3: Move an Entire Website with a Plugin
If your goal is to move your entire website – themes, plugins, content, and all – as quickly as possible with the fewest number of issues, use a good plugin. There is simply no easier way to move your website than with the right plugin.
There are several different plugins you can use to create a complete copy of your website. WordPress Duplicator, WP Clone, and BackUpWordPress are a few options you’ll find in the WordPress Plugin Directory. However, in this tutorial, we’re going to use our own Snapshot Pro plugin.
Using Snapshot Pro to move a website is easier than either of the methods we’ve covered so far and is a simple three-step process:
- Create a fresh local WordPress installation;
- Take a Snapshot of your live site and download it to your computer; and
- Import the Snapshot to the local site and use it to restore your website.
Since you’ve made it this far I am going to assume you’ve heeded my previous warnings to install XAMPP and WordPress locally. Go ahead and create a brand new WordPress installation now.
Next, install the plugin you plan to use to move your website. If you’re going to use Snapshot Pro, you need to install it on both your live site and your local WordPress site. The easiest way to install Snapshot Pro is to install and activate the WPMU DEV Dashboard, navigate to WPMU DEV > Plugins, and then locate and install Snapshot Pro.
With Snapshot Pro or the plugin of your choice installed, you’re ready to start moving data.
Take a Snapshot of Your Live Website
Access the admin area of your live website and create a backup of all of your website files and the complete database. If you’re using Snapshot Pro and you’ve never created a backup before, you can find detailed instructions in our article How to Move a WordPress Site Without Hassle with Snapshot. Keep in mind, that article was written with a site migration between two web servers in mind. Since you’re copying the site to a local XAMPP installation, you won’t want to copy the wp-config.php or .htaccess files.
To create a Snapshot backup go to Snapshots > Add New. From the Add New screen, give your Snapshot an easily identifiable name, select the radio button to Include common files, verify that the radio button to Include all blog database tables is selected, and click Create Snapshot.
Import a Snapshot Backup to Your Local Website
Once a Snapshot has been created, use an FTP client to download a copy of the backup file into the snapshots directory of your local installation. You’ll find the backup you just created on the server that hosts your site in the directory public_html/wordpress_directory/wp-content/uploads/snapshots, where wordpress_directory is replaced with the directory containing your live website.
Copy the Snapshot to the corresponding location in the hierarchy of files that makes up your local WordPress installation. The correct place to copy the file is to the directory found at xampphtdocswordpress_directorywp-contentuploadssnapshots, with wordpress_directory replaced to reflect the folder where you’ve installed WordPress.

If you’d rather not mess with an FTP client, you can configure Snapshot Pro to backup your website to Dropbox, Google Drive, Amazon S3, or a web server accessible over FTP. You can then paste in a URL at the Snapshots > Import screen to locate and import the Snapshot. Configuring these connections requires a few additional steps, but the plugin will walk you through the process.
If you used FTP to transfer the backup file, go to Snapshots > Import and click on the Scan / Import Snapshots button at the bottom of the page. If the file is located in the correct directory, the plugin will locate and import it.

The last thing to do is to use the imported backup file to restore your website. To do this, go to Snapshots > All Snapshots, locate the appropriate snapshot, hover over the file name, and select Restore to load Snapshots backup restoration tool. On the next screen, select the backup file for a second time.

Since we’re moving a complete website, select the radio buttons to Restore all blog database tables and Restore all files. Also, select the checkbox to Turn off all plugins. After you have your site running, you can switch plugins on one-at-a-time, only activating the plugins that you need for your local development purposes.
After taking these steps and turning on a few critical plugins, I had a local copy of my website up and running that was a carbon copy of my live website. Interestingly, my theme survived this transfer process completely intact, unlike the manual migration process.
Wrapping Up and Conclusions
XAMPP is a popular, free, and relatively simple tool you can use to create a local WordPress development environment on your computer. However, there isn’t a one-size-fits-all approach to migrating a WordPress website from a web server to a local XAMPP environment. We’ve covered three popular methods in this tutorial, each with its own merits.
Once you’ve moved your website to a local XAMPP environment, you have complete freedom to develop your website without worrying about affecting your site visitors’ experience or damaging critical website files and data.
In an upcoming article, I’ll cover the best ways to reverse the process and move a WordPress website from a local XAMPP development environment back onto a web server.
Tags:


