Headless WordPress gives you greater control over your content and the freedom to build a completely custom front end. However, the process of configuring and designing this presentation layer isn’t always easy.
That’s where having a solid development framework comes into play. A framework such as Next.js can help you create a beautiful, high-performing front end for your WordPress content, even if you have no previous web development experience.
In this article, we’ll introduce you to headless WordPress, and then explain what the Next.js framework is and its benefits. We’ll also show you how to use Next.js to run WordPress as a headless CMS in three simple steps. Let’s get started!
An Introduction to Headless WordPress
A typical Content Management System (CMS) has a front end and back end. However, it is possible to run a CMS as ‘headless’.
With headless WordPress, you remove the head (front end) from the body (back end). This means you can continue using WordPress’s admin panel and familiar content management tools.
However, unlike a traditional ‘monolithic’ CMS, headless WordPress doesn’t provide a way to display your content. Instead, the headless CMS offers your content as data using a RESTful Application Programming Interface (API).
To access your content, you can send a network request to an API endpoint. WordPress has a REST API built in – which is one reason it’s so popular among the headless CMS community.
Accessing your data via an API endpoint leaves you free to design and build your own front end independent of WordPress’s usual constraints. You might even use the WordPress back end in new contexts, such as a Single Page Application (SPA) or mobile app.
This freedom does come at a cost, though. Configuring your own front end can be a time-consuming and complicated process, especially if you have limited web development or design experience. Therefore, many headless CMS owners choose to enlist the help of a framework such as Frontity, Gatsby, or Next.js.
An Introduction to Next.js (And Why You Might Want to Use It)
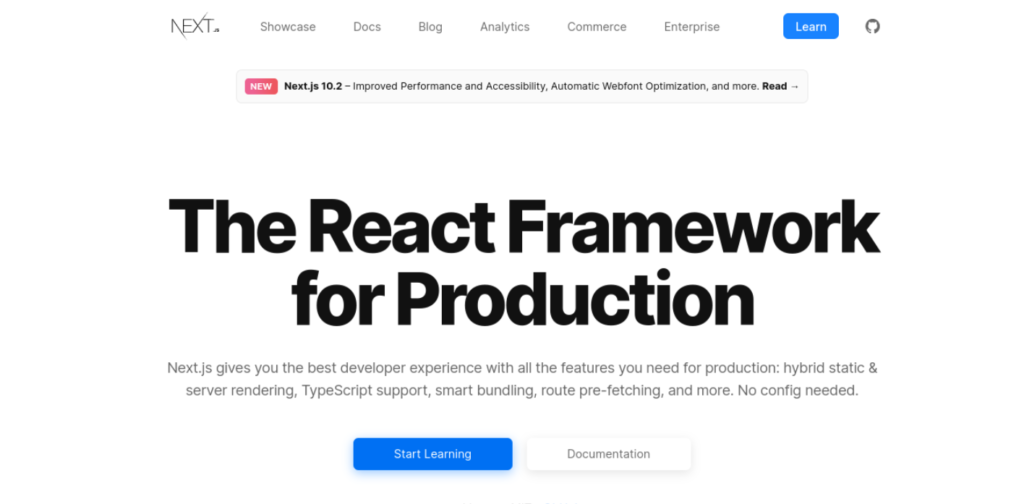
Next.js is a minimalistic React framework that prioritizes performance:

Studies suggest that 40 percent of people are unwilling to wait longer than three seconds for a site to load. If you’re going to appeal to impatient visitors, performance-focused tools such as Next.js may prove vital.
The Next.js framework uses automatic code-splitting to only load the JavaScript and CSS required for the current page. Eliminating the need for the browser to download unnecessary scripts can significantly improve page load times.
Next.js can also boost perceived page load times by initially rendering its user-facing components on the server-side. Once the HTML has been delivered to the browser, the visitor can immediately access this content, which is great for the User Experience (UX).
Performance is another major factor in Search Engine Optimization (SEO). Google has confirmed that it uses page speed as a ranking factor, and now Core Web Vitals is poised to become another performance-focused ranking signal. With over 53 percent of all web traffic coming from organic search, Next.js can help you climb those all-important search rankings.
Learning any new technology requires time and effort, and some frameworks are notorious for having steep learning curves. However, as an ‘opinionated’ framework, Next.js is designed for ease of use. It also features automatic compilation and bundling with zero configuration.
It’s worth noting that Next.js prioritizes user-friendliness over flexibility. If you’re unsure if Next.js is right for you, it’s wise to consider whether you might need to make significant changes to your project in the future. For example, you may face an uphill struggle if you decide to use a different router with your Next.js setup.
How to Run WordPress as a Headless CMS With Next.js (In 3 Steps)
To build a front end for your headless WordPress CMS, you’ll first need a WordPress installation. You can either host this on a web server or host it locally.
Also, because Next.js uses GraphQL, we recommend installing the WPGraphQL plugin. This free tool lets you query WordPress data with GraphQL faster than the WordPress REST API alone.
Once you have the back end in place, you can get to work on building a front end. Let’s take a look at how to do so in three easy steps.
Step 1: Prepare Your Development Environment
To help us get up and running with Next.js as quickly as possible, we’ll use the Create Next App starter project, also known as ‘create-next-app’. This generates a bootstrapped Next.js application with the necessary project files and configurations already in place.
You can install create-next-app using the npx tool, which is bundled with Node Package Manager (npm). The easiest way to download these components is to use the Homebrew package manager:

To install Homebrew, open the Terminal or Command Prompt application on your computer. Next, run the following command:
/bin/bash -c "$(curl -fsSL https://raw.githubusercontent.com/Homebrew/install/HEAD/install.sh)"You can now install Homebrew by following the Terminal’s instructions. Once Homebrew is up and running, you can install Node.js and Node Package Manager (npm) using a single command:
brew install nodeDepending on how your computer is configured, you may need to edit your file permissions. If you need to make some changes, Terminal should display all the necessary information. Simply follow the onscreen instructions, then attempt to run the brew install node command again.
Step 2: Create a Next.js Project
Now, we can set up Next.js using create-next-app. To start, open your computer’s Terminal or Command Prompt window and run the following command:
npx create-next-app headless-wp-demoThis will create a wp-demo project in your local users directory. Once this process is complete, the Terminal will prompt you to enter the following commands in order to build, run, and start your Next.js application:
cd headless-wp-demo npm run devNext, you can verify that the setup process was successful by entering these commands:
cd headless-wp-demo yarn devIf you see a “compiled successfully” message, congratulations – Next.js is now operating on your local machine! To take a look at your project, you can open a new tab in your web browser and head over to http://localhost:3000.
You should see the Next.js starter site:

This is a solid start. However, Next.js is currently only displaying dummy content. Let’s connect it to your WordPress back end.
Step 3: Connect Next.js to Your WordPress CMS
Unless you specified otherwise, npx creates your headless-wp-demo project in the users directory. Go ahead and navigate to this folder. You can locate your project’s /pages/index.js file, which is the main entry point into your Next.js app:

Next, open this file in any compatible text editing application. We’re going to create a simple landing page featuring a welcome message and add a link to our latest posts.
In this file, find the tags and delete everything inside them. You can then replace it with the following:
Welcome to the Next.js demo app!
Check out our{' '} latest posts
Make sure you replace with the URL to your WordPress back end. At the top of this file, add the following:
import Link from 'next/link';In your web browser, refresh the http://localhost:3000/ link. It should now display the basic landing page and the welcome message we created earlier:

If you click on the latest posts link, it should show your WordPress content. This is a simple setup, but now that you’ve made this connection, you can start adding and removing content. To continue working on your site, re-open your local /pages/index.js file and make your desired changes.
You might also consider downloading the Advanced Custom Fields (ACF) plugin. While not a requirement, this tool will enable you to add extra fields to your pages and posts and extend their capabilities.
Conclusion
Building your own front end gives you ultimate control over your content, but it can also seem like a daunting task. By opting for a web development framework, you can fast-forward through much of the configuration and complexities to create a beautiful front end with minimal hassle.
Let’s recap how you can connect the Next.js framework to your WordPress CMS in three easy steps:
- Prepare your development environment.
- Create a Next.js project.
- Connect Next.js to the CMS.
Do you have any questions about building a website using WordPress and Next.js? Let us know in the comments section below!


