
If you’ve ever ventured into cPanel to manage your site’s files, you’ve seen there’s a lot more files in WordPress than the theme and plugin files you have access to from the dashboard. If your host doesn’t offer cPanel or a file manager, there’s two ways you can access and manage the rest of your site files in WordPress.
You can either install a file manager plugin (although we really don’t recommend it) or access your files via FTP or use the best method of the three, SFTP. Using one of these tools will allow you to edit, create, move, copy or delete files on your WordPress site.
In this post, we’re going to focus on how to manage files with SFTP, since you definitely don’t want to use FTP for security reasons. We’ll cover how to obtain your WordPress SFTP credentials from WPMU DEV’s hosting dashboard so you can establish a connection to your server and manage your site files with FileZilla.
Follow our video guide to quickly get started.
If you use a different host or want to use FTP for WordPress, don’t go anywhere. You can still follow along, since the process of getting WordPress FTP credentials is very similar.
Some older hosts require that you add your WordPress FTP credentials to your wp-config file to manage updates. This is outside the scope of this article. WPMU DEV offers manged WordPress hosting, making this process much more simple. You can try out WPMU DEV hosting right here if you don’t want to deal with editing your wp-config files to enable updates.
Contents
- SFTP Clients
- Getting Your Host, Port and SFTP username and password
- Connecting to Your Host with FileZilla
SFTP is the Way to Be
SFTP, which stands for SSH File Transfer Protocol, or Secure File Transfer Protocol, was designed by the Internet Engineering Task Force. I’m pretty sure anything designed by a task force is legit and SFTP is no different.
Since SFTP uses SSH to securely transfer files, it is the ideal way to transfer files to your host. By contrast, FTP does not use an encrypted SSH connection, so people can see everything you’re sending, including your passwords and other sensitive information. That’s no bueno.
It’s the equivalent of paying a bill in a public place over the phone and saying your credit card information out loud for everyone to hear. You’re freely giving the sensitive information needed to hijack your WordPress site.

This is why some hosts only let you connect via SFTP. This is a great safety precaution and prevents newbies from inadvertently using FTP for WordPress.
Also something quick to note, SFTP and FTPS are not the same thing, so don’t get confused when shopping for hosts who offer SFTP.
SFTP Clients
Now that we got that out of the way, we can move on to how to connect to your host via SFTP. You’re going to need an SFTP client. There’s a lot of free options to choose from. Some text editors, such as Dreamweaver, even have an SFTP client built right in.
FileZilla
FileZilla is the most popular open source application for managing files, so that’s what we’re going to be using for this tutorial. It operates on Windows, Linux and Mac so it’s a viable cross-platform solution for a lot of people.

Download FileZilla from this page to avoid all the additional files FileZilla can come with. If you download FileZilla from the home page or a zip file, do not install the file that says bundled, as it comes with spammy files.
FileZilla is free open source software that relies on advertising to be able to release more frequent updates. If you do open and begin to install the bundled version of FileZilla, you’ll be prompted to install additional “special offers” from their partners. You do not need these in order to use FileZilla or SFTP so do not install them.

There are other SFTP clients besides FileZilla that you can use. When it comes to text editors and SFTP clients, every person has their preferences, so if you don’t like one, try a different one.
Here’s some other popular free and paid SFTP clients to choose from:
How to Keep Your WordPress Staging and Live Sites in Sync
And Now I’d like to Introduce Your Host, WPMU DEV
Once you’ve selected your SFTP client, you’re going to need the following information from your host to access your files:
- Port Number
- Host
- SFTP Username and Password
Usually, your host will have all this information together. In this tutorial, I’m going to show you how to get this information from the WPMU DEV hosting dashboard.
How to Know If Managed WordPress Hosting Is Right For You
Where to Find Your Port Number
Your particular host will have a port number they want you to use. WP Engine, for instance, uses port 2222. WPMU DEV hosting uses port 22, which is generally used for connecting via SSH.
If you’re not sure what port to use, you can try port 22, but you should really ask your host.
If you’re using an FTP WordPress option the port number will often be 21.
Where to Find the IP for Your Host
For your host, you can use your site address or IP address. Of course you already know your site address because you chose it, so that’s an easy one.
If you need your IP address to connect to WPMU DEV hosting, go to the hosting section, select the install, and under domains, next to A record you’ll find your IP address.

Where to Find Your WordPress FTP Credentials
You can get or create your WordPress SFTP credentials from your host. Some hosts, such as Flywheel, will automatically create an SFTP user for you. While others, such as WPMU DEV hosting, will allow you to create one yourself.
For WPMU DEV, we’re going to start by heading to the hosting area in the Hub. I’m going to select the site we want to create an SFTP user for.

I will arrive at the dashboard for that site, where I will then select Accounts

1.6 million WordPress Superheroes read and trust our blog. Join them and get daily posts delivered to your inbox – free!

Look for the blue button that says Add User and select SFTP User from the dropdown.

Then you’ll be able to create a username in box 1 and a secure password in box 2. Make sure you keep this information private. You don’t want to paste it into a support message board for all to see.

If you want to restrict access to a certain folder, you can select from wp-content, Plugins, Themes or Uploads from the dropdown in box 3, otherwise, just leave none. For example, you can create an SFTP user for your graphic designer and allow him or her to submit images for your site to the Uploads folder only.
In box 4, you can also specify if you want to grant access to a production environment or a staging environment.
The Benefits of Using Staging Environments in WordPress Development
Then push the Add button and you’re ready to move on to the next step.
Establishing a Connection to Your Host with FileZilla
Ok you have all the details you need, so open up FileZilla, or your SFTP client of choice, and enter your host, SFTP username, password and port.

Then push Quickconnect and give it a moment to establish a connection to your remote host.
When the connection is made, you’ll see a successful message and you’ll see your remote site files.

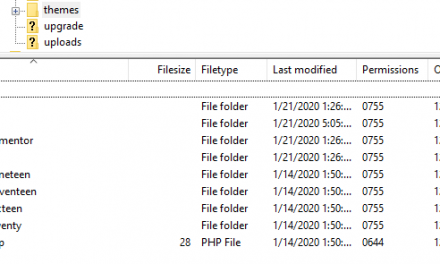
If you open up your remote site files, you’ll start to recognize the WordPress file structure.
The Ultimate Guide to Theme Template Files in WordPress

And look! There’s your theme files. You can now navigate through all your WordPress files and create, deleted or edit files. Just right click and you’ll be able to open files to view or edit them in your default text editor, create a new file in a directory or delete a file.

Keep in mind that if you edit a file, you’ll have to upload it when you’re finished. If you open your file using View/Edit in Filezilla, when you save the file in your text editor, a dialogue box will appear in FileZilla that will ask you if you want to upload the file to your host. Select Yes to upload the file with your new changes to replace the existing file.

8 Ways to Sync Git Repositories with WordPress
That’s About All There is To It
As you can see from this tutorial, connecting to a remote host is a pretty simple three step process. All you need to do is install a client, create or get your WordPress FTP credentials or SFTP credentials from your host and then enter it in your file manager client. The overall process is the same no matter what host or SFTP client you’re using.
Once you connect via SFTP you’ll be able to manage your site much more easily. You’ll be able to use your preferred text editor instead of the one in WordPress. You’ll be able to easily transfer files from your local staging environment. You’ll be able to upload files in bulk and files you get from GitHub. Using SFTP opens up so many possibilities.
If your host only allows you to connect via FTP for WordPress, you should consider switching to one that offers SFTP. WPMU DEV is one of many WordPress managed hosts who offer SFTP and we’d be happy to help you get started. WPMU DEV members get hosting included with their membership so what are you waiting for?
If you enjoyed this post, don’t forget to leave me a comment below and share it on your social media channels. And if you need help creating an SFTP user or connecting to your WPMU DEV hosted sites, our support team is ready to help 🙂


