The WordPress admin toolbar comes with a standard look and set of functions that are generally very useful, so why customize it? Well, sometimes the standard layout doesn’t suit the needs of every WordPress user or developer. Perhaps there are menu options listed you never use. Or maybe it doesn’t have links to your most-used dashboard sections.

No matter the specific reason, making customizations to the WordPress toolbar can streamline your workflow and improve how WordPress functions for individual users, teams, and developers. For that reason, today, we’re discussing why someone might want to customize the admin WordPress toolbar and several ways to go about it.
The WordPress Admin Toolbar: Why Customize It?
Before we get into the specifics of how to customize the toolbar, let’s spend a moment discussing why you might want to go through this effort in the first place. What follows are just a few reasons:
- You may wish to add shortcuts to frequently accessed parts of your site that aren’t present in the toolbar by default.
- Sometimes plugins, themes, or other third-party tools add a menu or feature to the toolbar that you don’t want to be there.
- You may want to add white-labeling to the admin toolbar to create a more branded experience for your team or clients.
- The location of the toolbar is inconvenient for your personal workflow and you’d like to move it to appear elsewhere.
If it sounds like these might be useful modifications to make, keep reading.
How to Add Items to the WordPress Admin Toolbar
If you want to add items to the WordPress toolbar, your first order of business is to add markup to the functions.php file in WordPress. Or, you can always download the Code Snippets plugin. It allows you to add code to your theme files without having to dig around in them directly.

Keep in mind though that whenever you make changes to your site’s code, you should always be working off of a child theme, or at the very least, have a recent backup to revert to should you make a mistake.
Move Items Using Code
You can go about adding items to the WordPress toolbar in a number of ways. The first is to manually add a bit of code to your theme’s functions file.
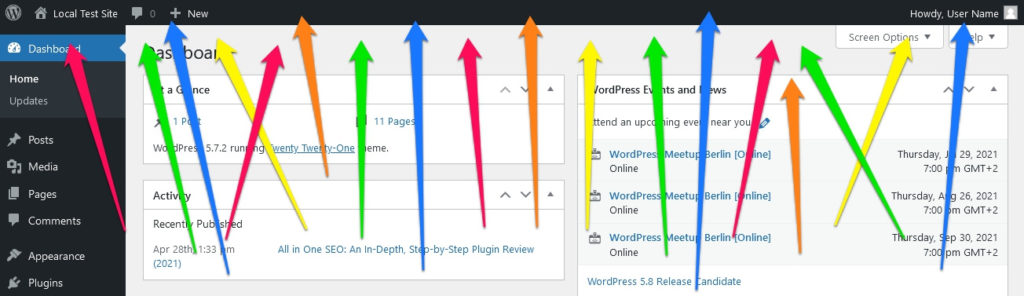
// add a parent item to the WordPress admin toolbar function add_link_to_admin_bar($admin_bar) { $args = array( 'id' => 'my-custom-link', 'title' => 'My Custom Link', 'href' => 'https://www.mydomain.com' ); $admin_bar->add_node($args); } add_action('admin_bar_menu', 'add_link_to_admin_bar', 999);The snippet above will add a new menu item to the admin toolbar. The id part controls the HTML ID the new menu item will have, while title and href determine its label and where it links to respectively. Here’s what it looks like in the WordPress back end:

href can point to any web address you want. However, you can also modify this code snippet to create links to parts of the WordPress admin interface, such as the media library:
// add a link to the WordPress media library to the admin toolbar function add_link_to_admin_bar($admin_bar) { $args = array( 'id' => 'media-library', 'title' => 'Media Library', 'href' => esc_url( admin_url( 'upload.php' ) ) ); $admin_bar->add_node($args); } add_action('admin_bar_menu', 'add_link_to_admin_bar', 999);To link somewhere else in the admin interface, simply hover over the menu items in the WordPress dashboard and check their document names in your browser. Then use that instead of upload.php. For example, for the Plugins menu, exchange it with plugins.php, for Appearance, use themes.php, and so forth.
Finally, you can also use similar code to add submenu items to existing links. For that, you just need to know the ID of the parent you want to target and include it in the code snippet. For example, here’s how you add a submenu item to the link leading to your site’s front end (it also opens in a new tab):
// create a submenu item in the WordPress admin toolbar function add_link_to_admin_bar($admin_bar) { $args = array( 'parent' => 'site-name', 'id' => 'google-analytics', 'title' => 'Google Analytics', 'href' => 'https://analytics.google.com/analytics/web/', 'meta' => array( 'target' => '_blank', ) ); $admin_bar->add_node($args); } add_action('admin_bar_menu', 'add_link_to_admin_bar', 999);How do you know the ID of the menu item you are targeting? Well, you either know it because you created it in the first place or you can find out by examining the parent menu item with your browser developer tools. Check where it says something like id="wp-admin-bar-site-name". Everything after wp-admin-bar is the ID, in this case site-name. You can also use this to create sub-submenu items.
Here’s what the above looks like when added to functions.php:

Use the code snippets to build parent and child menu items at will. More information in the developer documentation.
Use a Plugin to Customize the Toolbar
If you want to skip the code route altogether, there are three plugins we’d like to highlight here that make adding links and menus to the WordPress toolbar a snap. Let’s take a look:
1. Branda

Branda is a full-fledged white labeling plugin that allows you to customize nearly every aspect of your website’s dashboard. It’s also free. The plugin lets you change or remove logos from the toolbar, add toolbar links, remove toolbar links, and more. In addition, it has a variety of other customization features. You can change the dashboard’s look, change the login screen, make new color schemes, modify system emails, and more.
2. Admin Toolbar Menus

Another plugin option is Admin Toolbar Menus, which makes it easy to establish three different WordPress toolbar locations on the dashboard. In addition, you can make custom toolbar menus using the standard WordPress menus page. It includes support for multi-level menus as well. The menu locations are under the Site Name menu dropdown, along the primary toolbar, and under the My Account dropdown. There are also no settings to be configured, just select your menu location, what it should contain, and you’re good to go.
3. Toolbar Publish Button

The last plugin we’d recommend for this section is Toolbar Publish Button. It simply adds the Publish button to the WordPress admin toolbar. This way, you don’t have to scroll down the page to get to the Publish/Save button. Just access it at the top of your site and proceed with your work.
How to Remove Items from the Toolbar
If you’re finding the WordPress toolbar too cluttered, you can remove the items as well. This, again, happens either manually or through the use of a plugin. Let’s look at the code route first.
Remove the WordPress Admin Toolbar Items with Code
Thankfully, manually removing items from the WordPress toolbar is as simple as using the remove_node() function in functions.php. To do this, you need to first locate the toolbar menu item IDs, then use a bit of code to remove them.
We have already covered above how you can find out the IDs with the browser developer tools. It’s the same for removing menu items. For example, here’s what it would look like if you wanted to get rid of the WordPress logo:
function remove_link_from_admin_bar( $wp_admin_bar ) { $wp_admin_bar->remove_node( 'wp-logo' ); } add_action( 'admin_bar_menu', 'remove_link_from_admin_bar', 999 );This also works with submenu and sub-submenu items. Simply check the ID, add it to the code snippet and you are done.
Alternatively, Go With a Plugin
We already mentioned Branda in the previous section. However, it’s important to note that it’s useful for removing toolbar items as well as for adding them. You can remove menu entries as well as the WordPress logo, your avatar and account links, and more with just a few clicks. It greatly simplifies the process and puts numerous customization opportunities at your fingertips.
How to Customize the Style or Branding of the WordPress Admin Toolbar
If you want to change up the look and feel of your toolbar or add some custom branding, that’s also fairly easy to accomplish. Here are two plugins that offer a straightforward means of achieving a specific look.
1. WP Custom Admin Interface

First up is the WP Custom Admin Interface plugin. As its name would suggest, it makes it easy to create a WordPress admin menu and toolbar that looks and functions however you see fit.
A few standout features include the ability to add or remove items from the toolbar, change their order, the menu level of items listed, as well as rename and restyle all titles and links within the toolbar. You can even set custom toolbar conditions for designated user roles.
And, can you believe it, this plugin is totally free to use.
2. Absolutely Glamorous Custom Admin

Next up is the Absolutely Glamourous Custom Admin plugin. It lets you easily customize the entire WordPress dashboard, admin toolbar, menus, and login screen. Specifically, you can add, remove, or hide menu items, remove the WordPress logo, and add custom color schemes and fonts to the toolbar. You are also able to create brand new color schemes for it and other aspects of the dashboard. The ability to create custom branding for the dashboard in terms of custom pages, fonts, text, colors, and images is also part of the package.
It’s a powerful plugin and it’s also free.
Move the WordPress Admin Toolbar to Another Position
The last order of business here is to discuss how to move the WordPress toolbar. If its default position at the top of the screen is getting in the way frequently or just isn’t intuitive for your workflow, it is possible to move it.
Again, you can achieve this via code or with a plugin with relative ease, at least for the front end. Turns out, moving the admin bar in the back end takes quite a bit of markup, especially to make it responsive. Therefore, we will skip this here as it goes beyond the scope of this tutorial.
Moving the WordPress Toolbar with Code
After making a backup of your site and/or working with a child theme, open the functions.php file and insert the following code to move the toolbar to the bottom of the screen, specifically. Or, paste it into the Code Snippet plugin’s text box.
function move_admin_bar_to_bottom() { ?> LetsWP also has a similar snippet with conditional logic to only apply this change to yourself and not all other users on your site.
Using a Plugin
We’ve also found three reliable plugin options that make moving the WordPress toolbar an easy task. Bonus: these plugins even make it so you can remove the toolbar if you’d like to streamline your site previews further.
1. Remove Admin Toolbar

A plugin option for removing the WordPress toolbar altogether is Remove Admin Toolbar. This straightforward plugin allows you to hide the admin toolbar with just a few clicks. Alternatively, you can use it to hide portions of it to suit your custom needs. It has three basic options to choose from: hide from all, hide from all except admin, and hide from admin but except other users. This one is easy to implement, lightweight, and free.
2. Hide Admin Toolbar

Another plugin option is called Hide Admin Toolbar. All it does is hide the WordPress admin toolbar from view. It’s an open-source, free plugin with just this one function. However, it could be a good solution for you if you don’t want to get anywhere near code.
3. Bottom Admin Toolbar

The last plugin we’re featuring here is Bottom Admin Toolbar. It allows you to shift the position of the WordPress toolbar to the bottom of the screen with just a few clicks. No messing with code or complicated settings. Just activate and enable the appropriate setting and you’re good to go. It even adds a keyboard shortcut that lets you hide the bottom toolbar at will. Just press Shift + the down arrow.
Summary: Customizing the WordPress Admin Toolbar
If the WordPress toolbar isn’t serving you in its current form, then it’s just taking up space.
Thankfully, you can make it work for you in a number of ways. By adding or removing items, changing the styling, changing its location, or even removing it entirely. With a few straightforward code snippets or easy-to-use plugins in hand, you can make these changes quickly and get on with the rest of your work.
Did you make changes to the WordPress admin toolbar? If so, what did you change and how? Let us know in the comments!


