In October 2020, Google released a brand new version of their Analytics platform: Google Analytics 4. While the only thing that’s changed is the addition of a property, it came with a bunch of exciting features, an updated and in many ways simplified interface, and a shiny new name. In this Google Analytics 4 tutorial, we will dive into all of it!

There’s a whole host of complex features to wrap your head around and they add tons of important functionality. Most notably, you can now track both apps and websites, which is a pretty big deal and was a huge limitation in older versions of Google Analytics!
Ready to try it out for yourself? Here is everything you need to know about GA4: the best of its major additions and how to get comfortable with the new interface, all in one tutorial.
What is Google Analytics 4?
Google has introduced a major update which adds a new type of property. You may know it already as App + Web, and it does exactly as the name implies: track both your website and application across different platforms and properties.
Universal Tracking, the now outdated property, only allowed you to track traffic on your website. While you can still continue to use it, even alongside Google Analytics 4, GA4 provides you with a lot more flexibility.
While the UI is very different compared to the older versions of Analytics, many of the features are the same or similar. There are a few new things you’ll need to learn to work with, but once you’ve adjusted, the Google Analytics experience remains very much the same.
Major Changes in Google Analytics 4
While GA4 doesn’t come with a huge list of changes, there are quite a few important new additions. Here are the most major updates:
- A cleaner and easier-to-navigate UI. Most elements have been reshuffled, and now the focus is more on the funnel from acquisition to re-engagement.
- Views no longer exists.
- Google Analytics can now track mobile apps, software, and website traffic all in one property. In the past, you could track apps, but it was entirely separate. They then released App + Web tracking, and now with GA4, it’s the default standard for all Analytics users.
- Cross-platform metrics: track your visitors’ journeys from website to app and back again.
- New integrations across all Google websites and products. How is your Youtube campaign impacting your website traffic? Are your Google Ads bringing in enough customers?
- Machine learning supports predictive metrics and allows you to analyze possible trends in your traffic before they happen and make better choices with your content.
- The new interface is customer-centric, tracking users based on activity and demographics, rather than device-centric. It does a much better job of mapping your customers across platforms.
While the changes in the background are substantial, the UI and many of the features have pretty much stayed the same.
Should You Use the New Google Analytics?
The rollout of big new changes can be a cause for celebration or an unwanted disruption. Which category does GA4 fall into?
While a few features have been removed, which can present difficulty setting up your analytics the way it used to be, most users won’t have any trouble getting used to the changed UI of Google Analytics 4 (if you do, there is still this tutorial).
Pros
The unified cross-platform tracking is probably the biggest advantage of GA4. Being able to map out the customer journey, without segmenting your data into confusing chunks, is extremely valuable. This can really take your advertising campaigns to the next level.
The machine-learning-powered predictive analytics are also a very nice feature. It helps you guess where your traffic may go next, and even make optimizations to your marketing strategy to pull in certain demographics.
Finally, Google is moving away from cookies. The GDPR brought heavy penalties on user tracking. GA4 aims to track users privately and anonymously to avoid running into any future pitfalls when it comes to collecting personalized data.
GA4 is the future of Google Analytics, and that’s possibly the best reason to make the switch now.
Cons
That said, there are some minor disadvantages. The loss of certain events, tags, dimensions, and other functions can be confusing to work around. And using GA4 means starting fresh with no past data to work off of.
For now, you can continue using Universal Analytics just as you did before, so there’s no harm in trying out the new version. You can use both alongside each other as well, so if there’s a feature you’re missing that isn’t in GA4 yet, you’re not losing out on any important metrics.
It’s possible that Universal Analytics may disappear in the future, though as of yet Google hasn’t announced any plans of doing so. Your old data and events are safe for the time being, but it may still be wise to set up GA4 in case Universal Analytics ever goes away.
How to Set Up Google Analytics 4 on Your Website
Ready to get GA4 on your website? The process is simple enough whether you’re already using the old Universal Analytics on your existing site, or are starting fresh with a brand new website.
If you already have Google Analytics on your site, it will be a little easier to set up GA4.
General Steps
First step: Login to Google Analytics and click Admin. Look under the Property column and you should see GA4 Setup Assistant as the very first option. If you don’t, make sure you have the right account and property selected.

Confirm that you want to create a new Google Analytics 4 property by clicking Get Started. Then follow the wizard as it sets everything up for you.
Once finished, you can now visit the Admin page again. The GA4 Setup Assistant can help you with tags, events, and anything that wasn’t set up in the initial installation.

WordPress-Specific Settings
WordPress and other CMS users may encounter extra difficulty with GA4. If your realtime metrics aren’t updating, you may need to paste the tag into your site manually.
Under Admin > Property > Data Streams > Web, click your data stream. Now look for Add new on-page tag under Tagging Instructions and you should see your Global Site Tag (gtag.js).

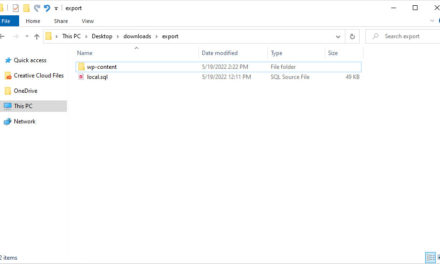
Copy this and paste it into your WordPress site’s header.php file right under the opening tag. You can do this either by going to Appearance > Editor > Theme Header (header.php) in your WordPress dashboard or using an FTP client to access the file on your server and edit it with a code editor.
Your realtime metrics should now work properly.
If you’re starting fresh, you’ll need to create an Analytics account and set up Google Analytics. In your Admin menu, create a new property for your website and add a data stream from a website or app. You’ll need to follow the instructions above to get your Global Site Tag and paste it into your header.
If you have trouble, you can always install a plugin like Google Analytics Dashboard which will help you connect GA4 to your site.
Making the Most of Google Analytics 4 – A Short Tutorial
Setting up GA4 is easy enough, but from there, you have a whole new UI to explore and plenty of features to play with. Having trouble? Here are a few important things you can do in the new Google Analytics.
Navigating the New Google Analytics 4 Interface
On the user end, possibly the biggest change in GA4 is the UI. There are certainly similarities and familiar waypoints that will help you get your bearings, but plenty of things have shifted around or been removed entirely.

To start out, look to the left to see your menu bar, let’s go over the main items in the menu bar on the left:
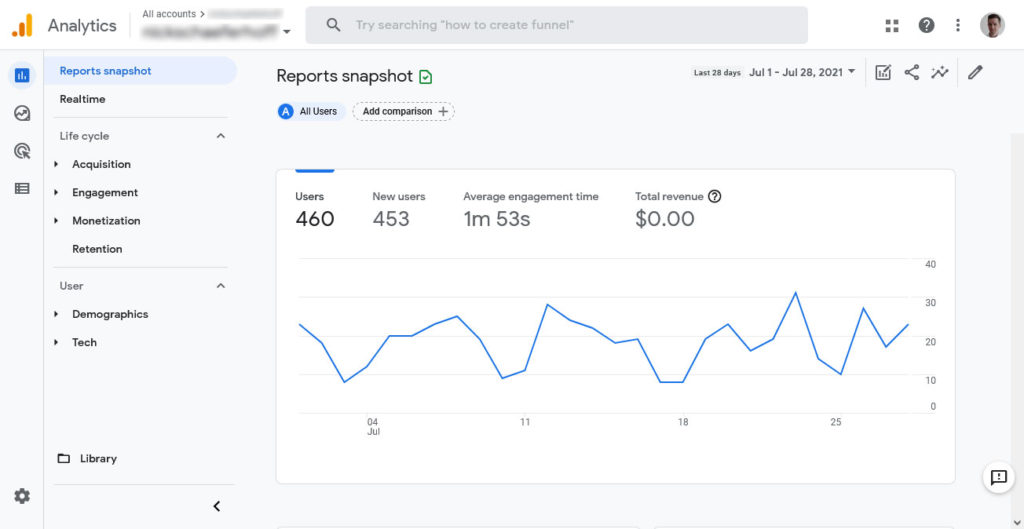
- Home — The familiar home menu with all its charts and reports, now with a slightly different look.
- Realtime — See what your users are doing right now.
- Life Cycle — This subsection includes Acquisition, Engagement, Monetization, and Retention. Its purpose is to gather statistics throughout the user life cycle, in other words how they find your site, what they do on it, and if they return again later.
- User — This subsection includes Demographics and Tech. It offers an overview of who your users are, while the Life Cycle menu shows what your users are doing.
- Events — The Events subsection includes Conversions and Events. It tracks your users as they explore your site. This data is then ported over to Life Cycle.
- Explore — These charts let you use visualizations to map out user behavior and get insights into their actions.
- Configure — The Configure subsection allows you to segment your audiences and set up custom dimensions, similar to events.
- Admin — Finally, you have the settings menu just where it used to be.
The Most Significant Changes
The old Universal Analytics only had the Home menu, Customization, the Reports subsection with Realtime, Audience, Acquisition, Behavior, and Conversions, and finally the Admin settings. Many of these remain, but may have been moved and redesigned.
- The Realtime menu is now a single page.
- The Acquisition and Behavior menus have become part of the Life Cycle subsection. The new Engagement menu covers most of what Behavior did before.
- The Audience menu is now the User menu.
- Ask Analytics Intelligence is now Insights.
- On the Admin page, you’ll notice that the View menu has disappeared. There is no direct equivalent, but data filters, data streams, and audiences may replicate some of the old functionality.
- On Overview screens, the Edit Comparisons button in the top right corner replaces custom segments.
While some changes are to the metrics and measurements themselves, you’ll find that many are simply cosmetic. In some cases data you’re already tracking has been rearranged and reordered to be more efficient.
Though GA4 looks more complicated with more submenus on the side than before, it trims a lot of the fat and is in many ways much easier to make sense of.
How to Use GA4 Realtime
One of the most important overhauls is to Realtime. Real-time metrics did exist in the past, but with several dedicated sections, it could be confusing. The new Realtime combines this all into one simple menu with all the same valuable data.
You can find the menu located right under Home. The instant highlight of the page is the big map you can click and drag around which shows where your users are coming from. Scroll down and you’ll also see data and graphs on your user demographics, events, conversions, and views.

To make the most of this data, learn how to use Comparisons. Add new ones by clicking Add comparison in the top left corner or the Edit comparisons icon in the top right corner. Then set up your comparison based on user demographics, events, or other parameters and click Apply.

Doing so will take you to a screen where you can compare your custom user demographics against all users who visit your site. Comparisons are a big part of GA4, and you can find them on almost every page.
Another cool thing you can do with Realtime is click View user snapshot in the top right corner. This will take you to a random anonymous user and show you what events they’re triggering and where they’re from.

Creating Events in GA4
Events are a big deal in Google Analytics 4 and, frankly, could use their own tutorial. With the system focused more on users as they move down the funnel, there are plenty of automated events built in already which let you track what people are clicking on and looking at. You can also create your own.

The first way to create an event is to base it off one that already exists. For instance, you could base a custom event off first_visit, but only have it trigger under additional parameters.
Find Configure > Events in the menu and click it to see what’s available on your site. The list should already contain quite a few automatic events. Click the Create Event button at the top of the list and define its parameters.

If you want to create a totally custom event from scratch, you’ll need to use Google Tag Manager. This will allow you to set up custom tags and triggers for when people interact with your site. There’s a special GA4 Event tag which will collect analytics and send it to your dashboard.
Google Analytics 4 Tutorial: Final Thoughts
GA4 presents dozens of new ways to track your users in real-time, all powered by robust machine learning. While it can take some to get used to the new interface, additions, and cuts to existing features, it’s definitely worth the shift.
Use the new Google Analytics to easily monitor your users cross-platform, and tune in to the predictive metrics to make changes that will explode your growth. You can keep tracking with the old Universal Analytics, so there’s no reason not to try it.
Will you be switching to Google Analytics 4 after going through the tutorial above? Why or why not? Let us know your thoughts in the comments!


