
If you use a mobile device to browse the internet, you’ll have noticed lots of sites with burger menus. These are menus that are hidden behind a ‘burger’ icon that the user can tap on, to reveal the whole menu.
The reason they’re called ‘burger menus’ is because of the icon that normally represents them – three lines. It looks like a little burger, or at least that’s the theory. I like my burgers a little less skinny!
But naming aside, being able to add a burger menu to your WordPress site is something that will enhance the user experience for people visiting on a mobile device.
You could add a plugin to create a burger menu. Or you could install a theme with one already there (like one of ours). But what if you’ve got your own theme and you’d rather add the burger menu yourself?
In this post I’m going to show you just how to do that. Taking a menu that’s been added via the standard WordPress menu screen, I’ll show you how to add some CSS and Javascript that’ll turn your existing menu into a burger menu on small screens. Continue reading, or jump ahead using these links:
- What You’ll Need
- The Desktop Menu Version
- Adding the Burger Icon
- Hiding the Burger Icon on Large Screens
- Adding Styling for Your Mobile Burger Menu
- Adding the Script
What You’ll Need
To follow along with this post, you’ll need:
- A development installation of WordPress running a site that has a menu already created.
- Your own theme or a child theme of a third party theme. Don’t directly edit the third party theme or your changes will be deleted when you update it. Instead, create a child theme if you need to.
I’m going to apply this code to my own website. It targets the main navigation menu, which in my case has a CSS class of .menu.main. If yours is different you’ll need to edit any CSS targeting those classes so it applies correctly to your own theme.
So, let’s get started!
The Desktop Menu Version
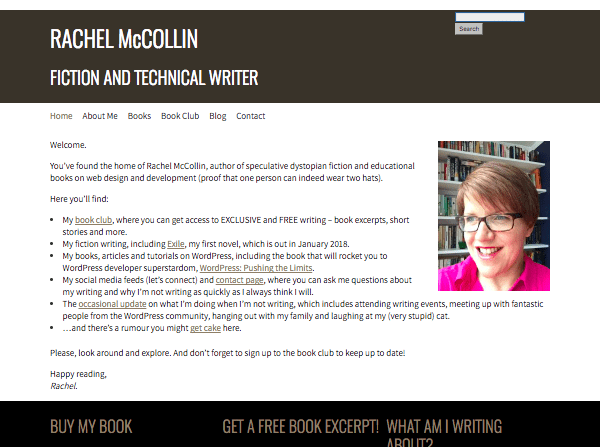
Right now my menu looks fine on desktop – it sits beneath my header banner above the content:
But on mobile things aren’t so pretty. On an iPhone 7 the menu is split across multiple lines and doesn’t even do that consistently, It also gets in the way of the content:

I could improve that by centering the menu items, but then it would take up way too much space. Instead I’m going to add a burger menu so that on small screens the menu is hidden until the user taps on the burger icon.
Adding the Burger Icon
The first step is to add the burger icon. You do this in your theme’s header.php file.
Note: If you’re using a third party theme, create a child theme, copy the header.php file from the parent theme into that and edit the new file in your child theme.
Add a link just below the main navigation menu. Here’s mine:
This creates a link with the class togglenav – because it toggles the navigation on and off. Inside this link is the burger icon, which is created with an HTML symbol. No custom graphics required – neat, huh?
Note that the link goes nowhere – it’s just a hashtag, not a url.
That’s all you need to add to your header file, so you can save and close it now.
If you refresh your screen you’ll see the burger icon has appeared:
We don’t want that to be visible on the desktop version of the site, so we’ll fix that in the next step.
Hiding the Burger Icon on Large Screens
Now for the bit where it starts to come together – the styling. You can add all this in your theme’s stylesheet. If you’re using a child theme, you’ll already have created a stylesheet for it and can add everything there.
Note: my theme is responsive but it isn’t mobile first so I’ll be using max-width in my media queries. If your theme is mobile first you’ll need to change the way you add this code to media queries.
Let’s start with the large screen (or desktop) version of the toggle icon. Add this to your stylesheet:
This makes the new link (and the icon) invisible by default. I’ve included !important as otherwise it can be overridden by other link styling.
Now here’s my site on a large screen:
It’s gone. We’ll need to switch it off again for smaller screens but we’ll come to that shortly.
Adding Styling for Your Mobile Burger Menu
Now you need to add all of the styling for the mobile version of the menu, which will appear when a user taps on the icon.
First, in your stylesheet create a media query:
I’ve targeted screens with a maximum width of 480px but you could go for wider screens if you wanted, especially if your menu is large.
Now let’s add some styling in that media query. First we’ll turn the icon back on and style that:
That will turn the icon back on for small screens, and adds positioning and colour, as well as setting up hover and active styles to override any existing styles in the theme for links.
Now let’s style the menu itself. Add this in your media query:
Let’s walk through what this does:
- It makes the menu as a whole display as an
inline-block, with a solid white background and relative positioning – so we can use absolute positioning for child elements. - It sets the
ulelement to be invisible by default. The Javascript will slide it in when we add that, which will make it appear. It also adds position and colour styling for the list. - It removes floats for list items and displays them as a block.
Now save your stylesheet. Before your burger menu is working properly you’ll need to add the final step – a script.
Adding the Script
This step consists of two steps: enquiring the script and adding the code to it. Let’s start by enqueuing it.
In your theme add a folder called scripts and inside that, an empty file called burger-menu-script.js.
Now open your theme functions file and add this to it:
This correctly enqueues the script you just created. Now you need to add some code to it.
Open that file and add this script:
This takes the .toggle-nav element we created and creates a click call for it, which will be triggered when someone taps it. It then uses .slideToggle to toggle the navigation menu in and out when the link is clicked. It also stops the link behaving in its default way.
Finally, save your file.
So now here’s the site on a small screen:
And when I tap on that icon, the menu appears:

And here’s a video of how it works when I visit the site on my phone (the video is a bit jerky so you may want to visit the site on mobile to see it live).

All done! Now all I need to do is work on my header banner, which also looks pretty ugly on small screens!
Adding a Burger Menu Will Enhance the User Experience on Mobile
If you follow the steps above (editing the CSS to suit your theme if you need to), you’ll create a simple burger menu that improves user experience on your site when people visit it on a mobile device. And if you need to, you can amend the styling, changing the color of the icon, adjusting the width of the menu, and whatever you need to make it work for you.
Tags:


