Your home doesn’t really feel like yours until you’ve added your unique customizations to it, isn’t it? Some furniture here, a couple of paintings there, a few plants to liven up the space, setting up the book rack, you know, the usual.
Your WordPress dashboard is pretty much like your home. It’s where you do all your work. It’s where your site takes its shape and comes alive. So, why not make it uniquely your own?
Customizing your WordPress dashboard has various benefits:
- It makes it leaner and lighter by removing distracting menu items and widgets.
- You get to enjoy a user-friendlier and more productive admin interface.
- Your clients will love an admin dashboard that’s personalized especially for them.
- It’s optimized for better performance.
In this post, I’ll show you how to completely customize your WordPress admin dashboard using free plugins and/or code.
And, being WPMU DEV, we also provide an excellent plugin solution for this called Branda… so if you’d like to achieve everything below with a lot less effort, grab the plugin from the WordPress.org repository.
Sounds good? Here is a list of what we’ll cover in this article:
- Backup Your Website
- Create A Child Theme
- Customizing Your Admin Login Page
- Removing Widgets from WordPress Dashboard
- Adding New Widgets to WordPress Dashboard
- Changing Your Dashboard’s Color Scheme
- Admin Theme
Backup Your Website
It’s essential to take a full backup of your site before you start modifying it. We recommend using free plugins such as Updraft Plus or BackWPup to do the same. Alternately, if you’re a WPMU DEV member, there’s nothing better than using Snapshot Pro to backup your site automatically.
Create A Child Theme
You can start editing your core WordPress files now, but every time you update WordPress or your theme, all the changes you’ve made will be reset. This is where having a child theme helps.
A child theme, as the name suggests, is a child of its main parent theme and sits atop it. Any changes you need to make to your site, you can do in your child theme. When you update your parent theme to the latest version, the child theme still says the same, thereby retaining all the changes you made earlier.
We highly recommend setting up a child theme. It sets a future-proof environment that’ll save you a lot of headaches. You can follow our guide on how to create a WordPress child theme to get started. The WordPress developers guide on Child Themes is also a great resource.
Customizing Your Admin Login Page
First impressions matter! Your admin login page is the first thing you see when you want to access your site’s dashboard. So let’s start with that.
We recommend using our very own Branda plugin for all of your customizing needs. She can create custom admin screens and incorporate your branding on all-things admin (and much more). To learn how to customize your admin with Branda and white labeling, check out this article.
For this tutorial, we’ll be using the Custom Login Page Customizer plugin for this. It lets you easily customize your login page directly from the WordPress customizer. With it, you can personalize almost any aspect of your login page and make it look exactly the way you want. What makes it amazing is that it shows you a live preview of the custom login page as you’re modifying it.
Once you have installed and activated the plugin, navigate to LoginPress > Customizer in your WordPress dashboard to start customizing!
Here are some of the features you can personalize with this free plugin:
- Logo
- Background
- Login Form
- Forget Form
- Login Button
- Error Messages
- Welcome Messages
- Form Footer


Removing Widgets from WordPress Dashboard
“Every act of creation is first an act of destruction.” – Pablo Picasso
The WordPress dashboard is cluttered with unnecessary widgets. Thankfully, you don’t need to add code or use a plugin to remove them.
Go to your WordPress dashboard, click the Screen Options tab at the top-right of the page. It’ll reveal an options panel containing checkboxes to enable/disable the widgets.
I’ll uncheck all the widgets save for the Quick Draft one.

And just like that, all the clutter is gone.
You can do the same for all your wp-admin pages like Posts, Pages, Posts Editor, etc. Go make Marie Kondo proud!
Note: This method saves the widget visibility settings on a per-user basis. So, if you have a multi-author blog, you need to set it up for all of them. Or, you can use custom code to enforce it strictly for all your site’s users.
To remove the default WordPress dashboard widgets for all non-admin users, add this code to your child theme’s functions.php file:
Refer WordPress Codex on remove_meta_box function for more examples.
You might also have other widgets added by your theme, plugins, or even your hosting platform. To remove them, you’ll first have to find their div ID. You can do this by using a browser inspector (in Chrome, you need to right-click on the widget and select Inspect), then copy the div ID of the widget you wanna get rid of.
To the above-given code, add another remove_meta_box line, but its parameter ( dashboard_right_now, dashboard_plugins, etc.) should be the div ID of the widget you want to remove.
Adding New Widgets to WordPress Dashboard
While removing an existing widget is a breeze, adding a new one isn’t as straightforward. But on the plus side, you can display anything you want with your new custom widget.
To add a new widget for your dashboard, just add the following code to your child theme’s function.php file:
This creates the most basic widget with just a line of text. However, you can use the same template to take it to the next level using HTML and/or PHP. The only limitation is your imagination!
Check WordPress Codex on wp_add_dashboard_widget function for more information.
Decluttering the Admin Bar and Sidebar
The admin bar is the black floating bar you see at the top of the page when you’ve logged into WordPress. By default, it contains useful links such as viewing pending comments, adding new posts/pages, editing your profile, visiting the site homepage/dashboard, etc. It also houses the WordPress logo. The sidebar is the vertical menu on the left side of your dashboard.
We’ll be using the free WP Admin UI Customize plugin to get this done. After installing and activating the plugin, make sure to set the user roles you’ll be customizing for. If it’s for your own use, select just the Administrator role. If it’s for other users, choose suitable roles.

Next, go to WP Admin UI Customize > Admin Bar to modify the admin bar menu items. The admin bar is divided into left and right sections.
You just have to drag and drop the menu items where you want them in their respective sections. After clicking the expand arrow under a particular menu item, you can also rearrange or edit their sub-menus. This gives you precise control over how your admin bar looks.

Similarly, the sidebar can be modified by going to WP Admin UI Customize > Sidebar. The interface and functionality are pretty much the same, except here you don’t have to deal with two different sections. Drag and drop the menu items where you want them to be, or remove them altogether.

Another free plugin I’d recommend to edit admin menus is Admin Menu Editor. It also includes various other cool features such as adding your own logo, setting custom branding colors, adding a footer text to your dashboard, etc. However, like with most free plugins, there’s always a catch! The functionality to edit the admin bar menu is only included in its pro version.
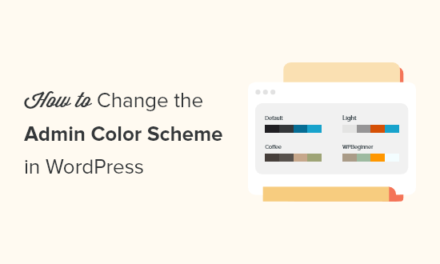
Changing Your Dashboard’s Color Scheme
The default WordPress color scheme is dull and monotonous. However, many users don’t realize that they can go to their Profile settings in the WordPress dashboard and change the color theme. As of now, WordPress comes with 8 different color themes for you to choose from.

But what if you want a different color scheme? Or you want to force a particular color scheme for all your site’s users? Fret not, for there are easy solutions to them too.
If you want more color scheme options, use the Admin Color Schemes plugin by WordPress’ core team. It adds 8 more unique color schemes.

For applying a custom admin color scheme, such as using your brand colors, you can use the Admin Color Schemer plugin.
To force the admin color scheme to all the users, you can use the Force Admin Color Scheme plugin. It’s pretty straightforward to use. Just tick the Force this admin color scheme on all users option under Admin Color Scheme in your Profile settings.

Admin Themes
We’ve covered how to customize the dashboard features and its color scheme, but what if you want to completely change how it looks and behaves? Say you want a lighter interface instead of the regular and boring default one. Or maybe you want it to be more modern and enticing.
Whatever your motivation, you can make use of admin themes to make significant changes to your admin dashboard. Admin themes, despite their name, are plugins which totally modify the look of your backend. We’ll list down some of the best free admin themes below.
 If the light and airy Fancy Admin UI isn’t up to your liking, you can move over to the dark side with Slate Admin Theme. Its minimalistic design is perfect for writing and editing without any distractions. It also comes with a few set color schemes that you can choose from.

Inspired by Google’s material design language, Aquila is a complete redesign of the WordPress dashboard with a stern focus on user-friendliness. According to its author, it “cleans up the admin area from unnecessary or potentially confusing items for the end-user.”

Don’t like any of the options listed above? Wanna try tweaking the appearance of your dashboard by yourself? This is the perfect plugin to achieve that. It lets you hide or move stuff around, change fonts, colors, sizes, etc. Any modification you may want to do with CSS, it can easily be achieved with this plugin.
The Future is Custom-Made
Customizing your WordPress’ admin screens gives it a more professional image and makes it stand out. It creates a more personalized experience for your clients or users, and it also helps them streamline their workflows better.
We’ve shown you how easy it is for you to achieve all this with just a few lines of code and/or a plugin.
And if you’re looking for more, go no further. Try Branda, the best and only white labeling plugin you’ll need to customize your WordPress dashboard. She does all the things listed above, and more, all in just one smart little package.
Put your dazzling shoes on and get started with your custom WordPress dashboard journey today!
Tags:


