
Do you want to display WordPress posts in a grid layout?
A grid layout gives you more flexibility when displaying your posts in WordPress. This can be helpful when creating custom pages.
In this article, we’ll show you how to easily display your WordPress posts in a grid layout anywhere on your site.
When Do You Need a Grid Layout for WordPress?
Every WordPress theme supports the traditional vertical layout of blog posts, and this works well for most kinds of websites. However, this layout can take up a lot of space, especially if you have a lot of posts.
If you’re creating a custom homepage for your site, then you may want to use the grid layout to display your recent posts.
This will give you more space to add other elements to your home page.
Plus, your post grid will highlight your featured images, so it’s visually appealing and clickable. You can also use the post grid to show off your creative portfolio and other types of custom content.
Many magazine themes and photography themes already use the grid-based layout to display posts. However, if your theme doesn’t support this functionality, then you’ll need to add it.
With that said, let’s show you how to display your WordPress posts in a grid layout. Simply use the quick links below to jump straight to the method you want to use.
- Create a grid layout with WordPress block editor
- Create a grid layout with Post Grid plugin
- Create a grid layout using SeedProd page builder
- Create a grid layout by adding code to WordPress
Method 1. Create a WordPress Post Grid Layout with Block Editor
This method lets you simply display your posts and thumbnails in a post grid layout using the WordPress block editor. There’s a built-in post grid block that lets you create your own grid.
To do this, open up the page you want to edit, then click the ‘Plus’ add block button and search for ‘Query Loop’, then click the block to add it.
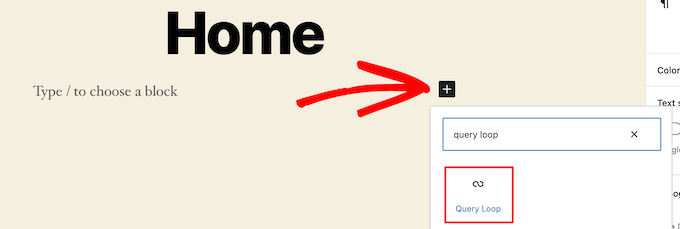
This block adds your post loop to your page.
Then, click the ‘Start Blank’ option at the top of the block to create a post grid.
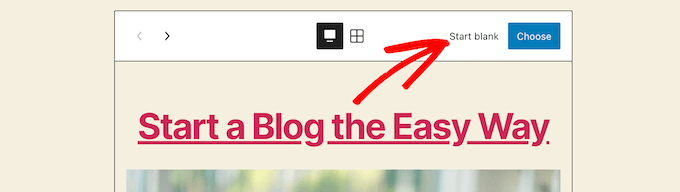
This gives a few different choices depending on the type of information you want to display with your post grid.
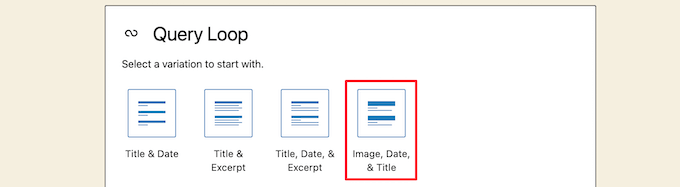
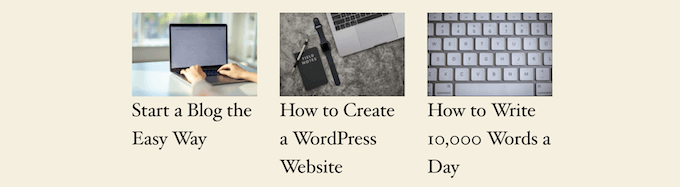
We’ll select the ‘Image, Date, & Title’ option, but you can choose whatever you like.
After that, hover over the image and select the ‘Grid View’ option.
This turns your list into a post grid.

Next, you can customize the information you want to display.
First, we’re going to delete the pagination at the bottom of the block. To do this, simply click on it, and click the ‘Three Dots’ options menu.
Then, click on ‘Remove Pagination’.
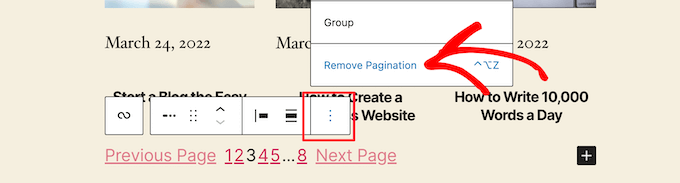
This will automatically remove the element from the block.
You can delete the dates from the posts the same way or leave more post information for your visitors.
Next, we’ll add links to both the post thumbnail and post title.
Simply click on your post thumbnail and turn on the ‘Link to Post’ toggle in the right-hand options panel.
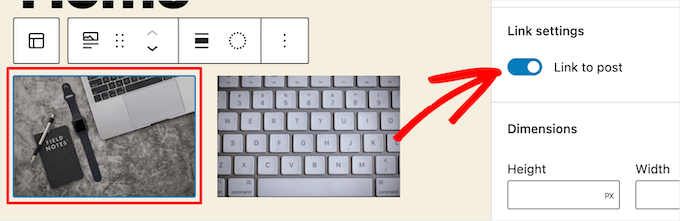
Then, do the same thing for your post title.
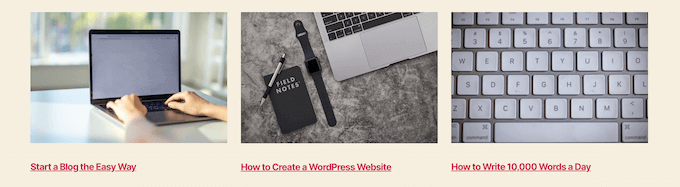
Once you’re finished, click the ‘Update’ or ‘Publish’ button to make your post grid live.
Now, you can visit your WordPress website to see your new WordPress post grid.
You can add this block to any page or post. If you’d like to use this as your blog archive page, then you can see our guide on how to create a separate page for blog posts in WordPress.
Method 2. Create a WordPress Post Grid Layout With the Post Grid Plugin
This method offers a simple way to add a customizable post grid that you can add anywhere on your website.
First thing you need to do is install and activate the Post Grid plugin. For more details, see our guide on how to install a WordPress plugin.
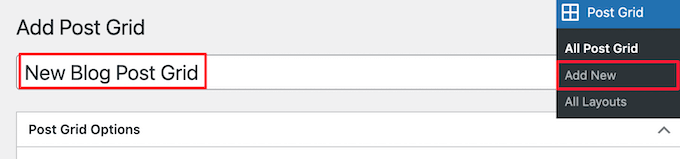
Upon activation, you need to visit Post Grid » Add New to create your first post grid.
Then, give your post grid a title. This won’t appear anywhere on your page it’s just to help you remember.
Below this, you’ll find the post grid settings divided into different sections with multiple tabs.
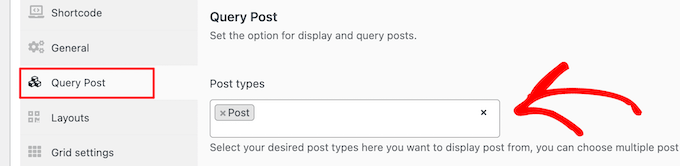
First, you need to click on the ‘Query Post’ tab. This is where you’ll define the post types that you want to display in the ‘Post types’ box.
By default, it will only display posts, but you can add pages and even custom post types.
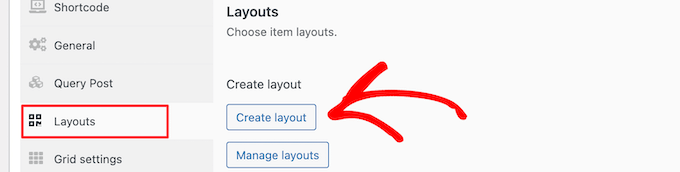
After that, you need to click on the ‘Layouts’ tab.
Then, click the ‘Create layout’ button. This will open in a new window.
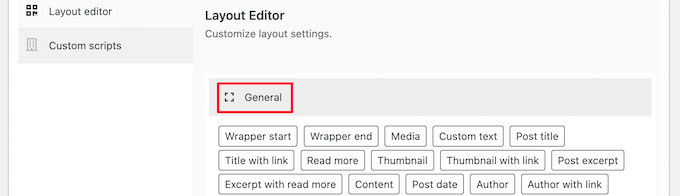
You need to name your layout. Then, click on the ‘General’ option, and it will open up a list of tags.
These tags are the information that will display in your post grid.
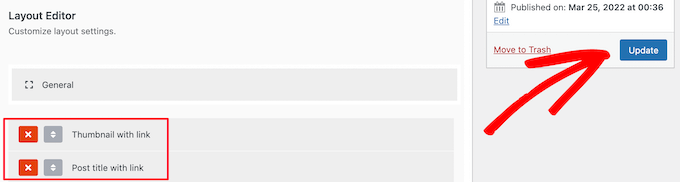
We’ll select the ‘Thumbnail with link’ option and the ‘Post title with link’ option.
Then, click ‘Publish’ or ‘Update’ to save your layout.
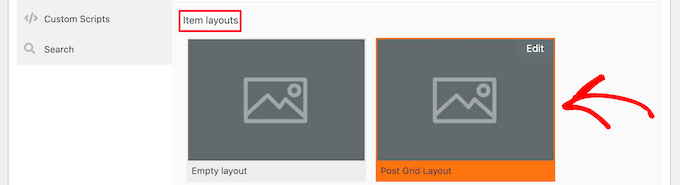
Now, go back to the original post grid editor in the previous tab, and there will be a new layout option available that you can select.
Simply click on the new layout in the ‘Item layouts’ section at the bottom of the screen.
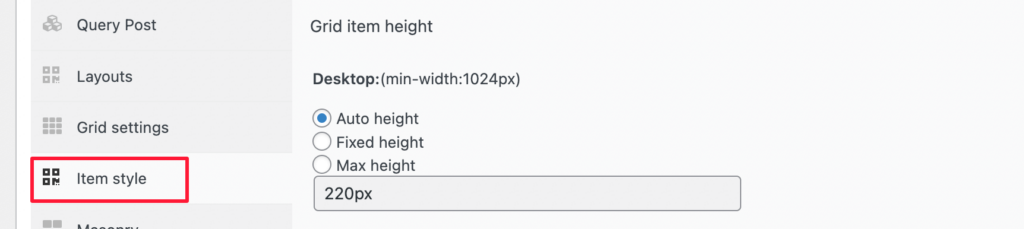
Next, click the ‘Item style’ tab. Here you can set the size of your grid.
The default settings should work for most sites, but if not, then you can change them here.
Once you’re finished, click the ‘Publish’ button at the top of the page, and your grid will be ready to add to your WordPress blog.
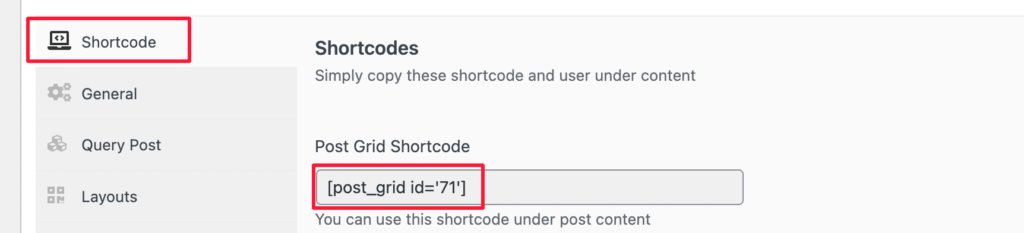
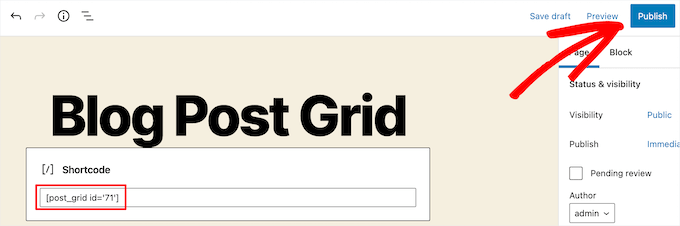
Now, you need to click the ‘Shortcode’ tab and then copy the shortcode in the ‘Post Grid Shortcode’ box.
After that, open up the page where you want to display your post list and click the ‘Plus’ add block button.
Then, search for ‘Shortcode’ and select the ‘Shortcode’ block.
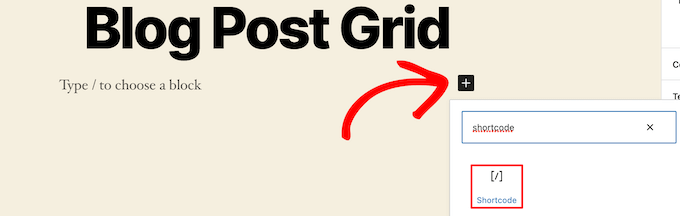
Next, paste the shortcode you copied earlier into the box.
Then, click the ‘Update’ or ‘Publish’ button.
Now, you can view your page to see your WordPress post grid layout live.
Method 3. Create a WordPress Post Grid Layout With the SeedProd Page Builder Plugin
Another way to create a post grid layout is using the SeedProd page builder plugin. It’s the best drag and drop WordPress page builder in the market used by over 1 million websites.
SeedProd helps you easily create custom pages and even completely custom WordPress themes without writing any code. You can use the plugin to create any kind of page you want, like 404 pages, coming soon pages, landing pages, and more.
To learn more, see our guide on how to create a custom page in WordPress.
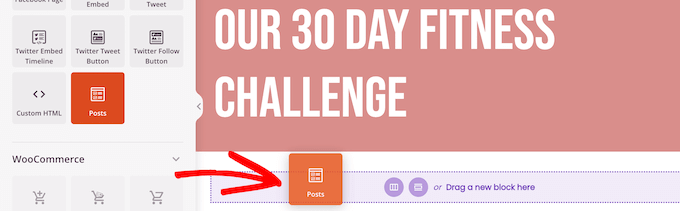
In the SeedProd builder, as you’re customizing your page, simply click the plus ‘Add Section’ button anywhere on the page.
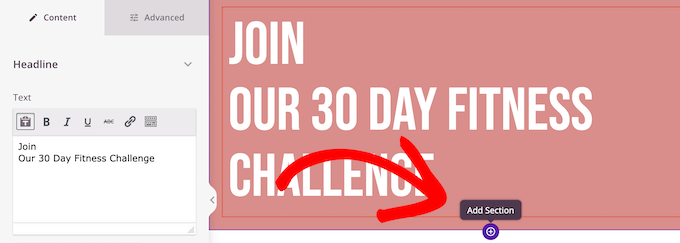
This will bring up an option to add a new block.
Next, drag the ‘Posts’ block over to your page, and it will automatically add a list of posts to your page.
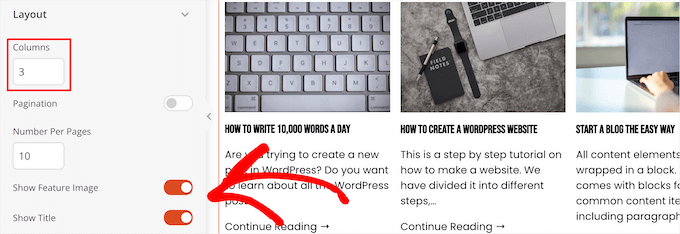
Now, you can customize this block with the left-hand options panel.
First, scroll down to the ‘Layout’ section. Here you can set the number of columns for your blog post grid and turn on the ‘Show Feature Image’ and ‘Show Title’ toggles.
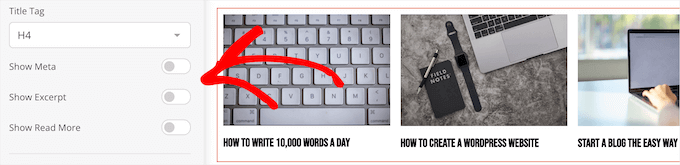
Next, scroll down to the ‘Show Excerpt’ toggle and the ‘Show Read More’ toggles and turn them off to create a simple blog post grid layout.
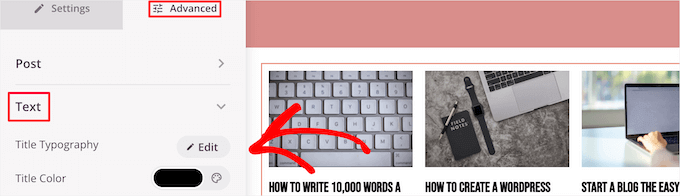
If you want to customize the color scheme, text, and more, then click the ‘Advanced’ tab at the top of the left-hand column.
Then, click the ‘Text’ drop down and make your changes.
You can continue customizing your page and blog post grid layout as much as you’d like.
Once you’re done, click the ‘Save’ button and select the ‘Publish’ drop down at the top of the page to make your changes live.
Now, you can view your new post grid on your website.

Method 4. Create a WordPress Post Grid Layout by Adding Code to WordPress
This method requires some basic understanding of how to add code to WordPress. If you haven’t done this before, then see our guide on how to copy and paste code in WordPress.
Before you add code, you need to create a new image size that you’ll be using for your post grid. To learn more, see our guide on how to create additional image sizes in WordPress.
Next, you’ll need to find the right WordPress theme file where you’ll be adding the code snippet. For example, you can add it to your single.php, so it appears at the bottom of all of your posts.
You can also create a custom page template and use it to display your blog post grid layout with thumbnails.
To learn more, see our WordPress template hierarchy cheat sheet to help find the right theme template file.
Once you’ve done that, you can start adding code to WordPress. Since the code snippet is quite long, we’ll break it down section by section.
First, add the following code snippet to your theme template file.
This code snippet sets up the post loop query. You can change the ‘posts_per_page’ variable to display more posts per page if you’d like.
Then, add the following code snippet to your theme template file.
This code snippet creates two columns for our posts and will display the title and post image. It also creates a CSS class that we’ll show you how to style later.
It also references ‘postimage’, so you’ll need to change this to the name of the image size you created earlier.
After that, add the following code snippet at the end.
This code snippet simply closes the loop. It also gives the option to add post navigation, but most website owners use a different plugin for this, so we didn’t include it to avoid code conflicts.
Here’s how the final code snippet looks altogether.
Now, you’ll need to add the following CSS to your site to make sure your post grid displays nicely.
If you haven’t done this before, then see our guide on how to easily add custom CSS to your WordPress site.
#gridcontainer{
     margin: 20px 0;
     width: 100%;
}
#gridcontainer h2 a{
     color: #77787a;
     font-size: 13px;
}
#gridcontainer .griditemleft{
     float: left;
     width: 278px;
     margin: 0 40px 40px 0;
}
#gridcontainer .griditemright{
     float: left;
     width: 278px;
}
#gridcontainer .postimage{
     margin: 0 0 10px 0;
}
You can modify the different CSS selectors to see how they change different elements of your post loop.
We hope this article helped you learn how to display your WordPress posts in a grid layout. You may also want to see our guide on how to choose the best web design software and our expert picks of the best live chat software for small businesses.
If you liked this article, then please subscribe to our YouTube Channel for WordPress video tutorials. You can also find us on Twitter and Facebook.
The post How to Display Your WordPress Posts in a Grid Layout first appeared on WPBeginner.


