WordPress is an excellent Content Management System (CMS) that enables you to run your business website easily. However, it can be frustrating having to constantly log in to WordPress to view your content and site updates. The process is time-consuming and can reduce your team’s productivity.
Fortunately, by integrating WordPress with your Slack channels, you can bypass these inconveniences. You can set up WordPress to send you Slack notifications whenever changes are made to your website. This can help you to automate your business communication and scheduling processes.
In this article, we’ll explain how to integrate WordPress with Slack using Automate. We’ll also discuss why this integration is so beneficial for improving communication within your business. Let’s get started!
An Overview of Slack
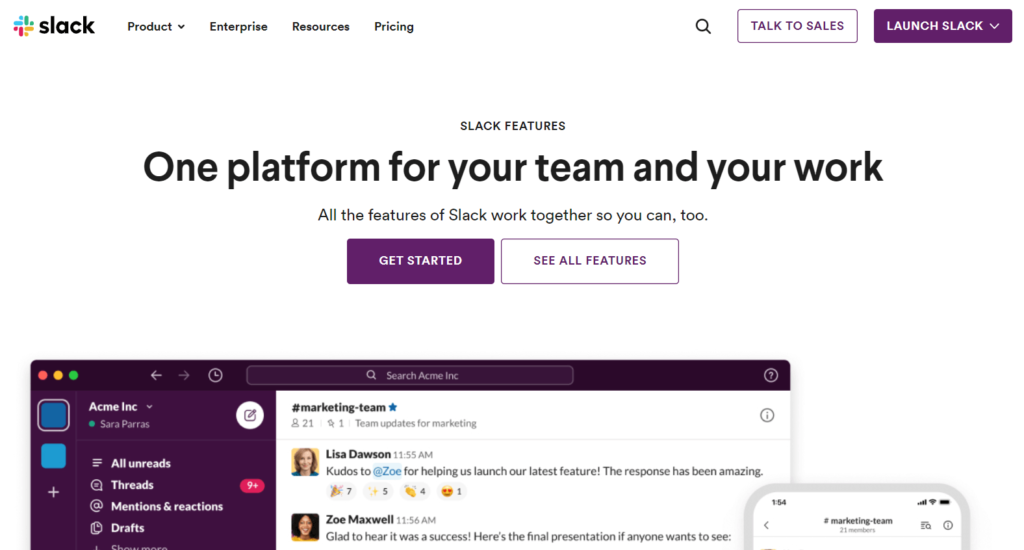
Slack is a communication platform that is popular among many companies and teams. It enables you to collaborate and share content in private messages or group chats known as channels:

These channels can be topic-specific and contain different team members so that you can manage many processes and projects from a single dashboard. Slack also enables you to add multiple teams to the interface, which is ideal if you have more than one business. Additionally, Slack Connect hosts communication between members from different companies.
Slack supports written messages, voice and video calls, and file sharing. It stores all of your data in a searchable history log and makes it straightforward to track past and current communication. Furthermore, it has excellent data security measures to protect all of your information.
Lastly, Slack is an excellent tool for businesses because of its Workflow Builder. This code-free platform enables you to automate processes such as updates and team requests. It can already save you and your business time and effort, but it does not yet support integration with other platforms like WordPress. You’ll need an additional tool to do this.
Why You Should Consider Integrating WordPress with Slack
Integrating WordPress with Slack means that you can receive push notifications (messages) every time an action is completed on your website. For example, you may receive a message about a new WordPress post, comment, or updates to existing pages. If you have a shared channel with your marketing team, you can use the integration to receive updates here:

This integration is essential for time-saving purposes. Every team member can receive updates without logging onto WordPress, and thus manage their schedules more efficiently. For example, content marketing team members can receive notifications of new posts and immediately start working on advertising copy and posting them across social media platforms. In addition, managers can ensure that individual team members and the business are adhering to deadlines.
It can also speed up general communication. Team members won’t need to write their updates constantly, as the integration will handle them automatically. Overall, integration can make it more straightforward and faster for different people to collaborate on team projects.
How to Integrate WordPress with Slack (In 3 Steps)
We already know how useful it can be to integrate Slack with WordPress. Now, we will look at how you can do this quickly and easily. We’re going to use the program Automate because it has a very straightforward interface that enables you to link your different applications.
You will need a Slack account and a WordPress site before beginning this tutorial.
Step 1: Create an Automate account
First, you will need to create an Automate account. You can do this by navigating to the Automate homepage and clicking on Sign Up. The site will direct you to this registration page where you can enter your personal details, or sign in directly with your Google account:

Automate has a free account option that enables you to set up five different Bots and complete 300 actions every month. The Bots are the automations you choose, such as sending messages to Slack when an action is completed on your WordPress site.
Your allocated Bots and actions are reset every month. However, you can also opt for paid plans from $9.99 to $159 per month. These packages provide a higher quantity of automated processes, and other benefits such as premium apps and multi-action Bots.
Step 2: Link Your WordPress and Slack Accounts
Once you have an Automate account, the site will direct you to the main dashboard. Here, you can add applications and Bots to control the activity between your different apps:

You can add new apps by clicking on + and typing in the name of the application. Here, you can add both Slack and WordPress to your Automate dashboard:

Once you link the two apps, Automate will automatically suggest different Bots that control triggers and actions. For example, you can set up a Bot that sends a direct message in your Slack channel when there is a new post on your WordPress blog:

You can choose to set up any of these Bots by clicking on the Try It Now button. Automate will then prompt you to link your WordPress and Slack accounts:

You can click on Link WordPress, and Automate will prompt you to enter your WordPress login details and blog URL. Then, you can link Slack by clicking on Link Slack and logging in to your Slack account. The application will also request your account access permission.
Step 3: Set Up Your Triggers and Actions
Once you link your WordPress and Slack accounts, you can set up the triggers and actions. If you previously selected the Bot that sends a direct Slack message when there is a new post in WordPress, you will see additional settings to configure. For example, the WordPress form will enable you to determine what kinds of posts and their status trigger the action:

Then, you can adjust your Slack settings to control the messages that will be sent from WordPress. You will need to select your username from the dropdown menu. You can also choose which elements, such as the post title and date, will appear in the message. Then you can select whether the message will be sent to a public or private Slack channel.
If you scroll down, you can also choose to add images, expand links, and send messages as a Bot. If you do not select the final setting, the messages in your Slack channel will appear to come directly from your account. Once you configure all the parameters, you can click on Save at the top of the page.
It’s that easy! Automate will now send Slack messages every time a new post is made in WordPress:

You can set up other Bots by navigating to the Bots heading on your Automate dashboard, selecting your apps, and navigating through the process with other triggers and actions. For example, you can set reminders based on new or updated WordPress content.
Conclusion
Slack is a high-quality application that enables you to communicate with your team and make your business run more smoothly. It can send automated website updates to your team members via direct messages or Slack channels if you integrate it with WordPress. As such, it can increase your overall productivity and improve company communication.
You can follow these steps to integrate WordPress with Slack:
- Create an Automate account.
- Link your WordPress and Slack accounts.
- Set up triggers and actions between the two applications.
Do you have any questions about integrating WordPress with Slack? Let us know in the comments section below!


