
Avada is already one of the most popular premium WordPress themes available. We’re going to make it even better by enhancing it with our free optimization tools ― Smush and Hummingbird.
It’s not uncommon for WordPress sites built with Avada to experience page loading slowdowns. This can happen for a variety of reasons, including data-heavy images, lack of caching, CDN quality, and a “host” of other tangibles. (Pun intended.)
This is where two of our optimization plugins shine. Smush and Hummingbird can make a serious impact when it comes to getting (and keeping) your site running at optimum speed.
With a fresh Avada install, we’re going to tweak some settings and run a few tests to see just how much of a (loading time) difference Smush and Hummingbird can make on an Avada themed site.
We’ll also present some additional suggestions that can improve Avada’s overall speed on your site.
When we’re done, you’ll have some great knowledge and resources in your arsenal to get your Avada site to operate lightning fast.
Feel free to jump ahead to any of the article sections:
- Avada Theme Testing Setup
- Hitting Peak Speeds Using Smush & Hummingbird with Avada
- Tips for Overall Speed Gains in Avada
- Fast & Furiously Optimized
Keep reading to check out our process, and the measurable results.
Avada Theme Testing Setup

Avada. Is. Everywhere. With over six million users, it’s the number one selling WordPress theme on ThemeForest.
Have you wanted to use this popular theme builder for your site, but were concerned about the loading latency that often occurs? We’ve been there, and can tell you there is an easy ― and free! ― way to make great strides in improvement.
Let’s look at what we’ll be doing to accomplish this.
Procedure
Note: We’ve indicated below which steps involve no cost vs. some cost.
- Install Avada Theme Builder & theme on a clean WP site (requires Avada theme license.)
- Tweak Avada optimization settings (no cost)
- Install Smush; optimize settings (no cost)
- Install Hummingbird; optimize settings (no cost)
- Turn on CDN in Hummingbird (requires Hummingbird Pro)
- Turn on FastCGI in the Hub (via WPMU DEV Hosting)
- Run speed tests, after each step above (no cost)
- Repeat entire procedure again, using a different Avada theme (no cost if you’ve already purchased Avada theme license.)
Parameters
- We’ll be using a clean foundation, meaning, our site will be built on a brand new WordPress installation.
- Theme configurations and options will be kept static after initial installation.
- My hosting is the Bronze plan, through WPMU DEV Managed WordPress hosting.
- My region is USA/East.
- Plugins are Smush and Hummingbird only.
(If you’re using our hosting, you will see the WPMU DEV Dashboard plugin, as it’s automatically installed on sites hosted by us.) - GTmetrix speed testing done using their default server location (Vancouver, Canada), and default browser (Chrome Desktop).
Particulars
Sites hosted by WPMU DEV will install the Pro versions of Smush & Hummingbird. To mirror non-pro versions of the plugins, I conducted all of my initial tests with the Pro features disabled.
Hummingbird optimization uses different types of caching and compression features on sites. Page, Gravatar, and RSS caching were disabled. Most hosts, including WPMU DEV, typically turn on browser caching and GZip compression by default. Since we can’t turn these off without impacting other settings, they’ll remain on during our tests.
Finally, as we’ve mentioned in other optimization articles, please note that no one will have the exact same results, because of the variables inherent to each element. Your geographical region, the size of your media library, your hosting provider, all paint part of the picture using very different brushstrokes. But no matter your particular site environment, you are bound to see marked improvement with this process.
Alright, let’s hit the track.
Hitting Peak Speeds Using Smush & Hummingbird with Avada
In preparation for this process, let’s make our tool kits match, like sisters on picture day. (Was it only my mom who did that with us?) If you haven’t already, download the Avada Website Builder. You’ll also need the Smush & Hummingbird plugins (both of which are free), but we’ll add those a little later.
For our speed measurement tools, we’ll be using Google PageSpeed Insights and GTmetrix, so you might want to open those two sites now.
Make sure you are starting on a new WP site, with no new pages or posts created, and no optional plugins or add-ons activated.
Next, install the Avada website builder. There are two additional Avada plugins required ― Core, and Builder ― so we’ll go ahead and install them as well.

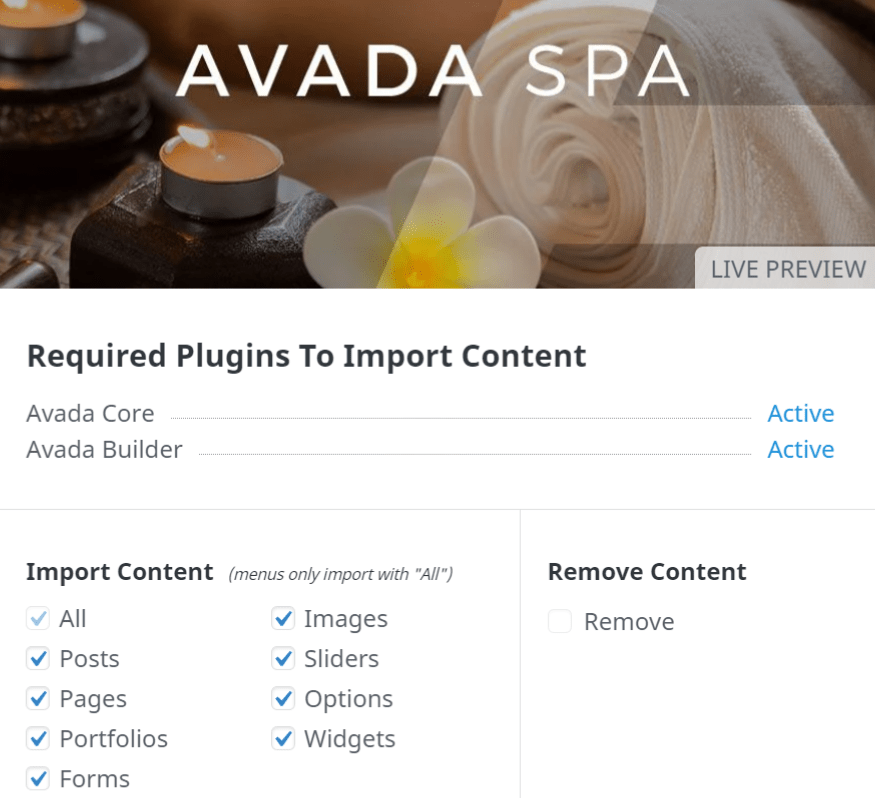
Theme 1 ― Avada Spa
Time to make our actual theme selection. For this first test, we’ll use Avada Spa. It doesn’t require any additional plugins, but has a fair number of images, so it seems like a good one to try. It’s tucked into the pre-built library in the Avada dashboard, and installation is a few simple clicks.
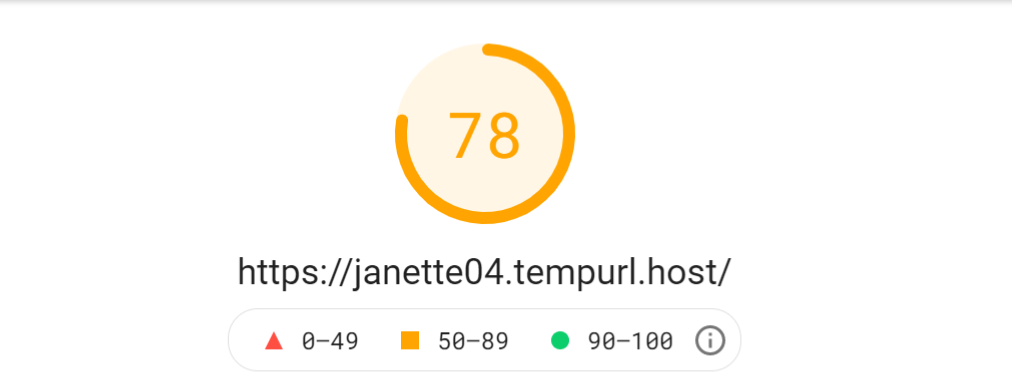
With our theme installed and applied, and before we start tweaking or adding anything, we should get an initial snapshot of our speed.


Both scores fall in the “7Os” or “C” range. We can definitely do much better.
I want to look into Avada’s built-in optimization settings, make some adjustments there, and see if we get page speed improvements.

From the Options/Performance menu tab, here are the changes I made:
Performance
- Image Lazy Loading >> from None to Avada
- Font Face Rendering >> from Block to Swap All
- Preload Key Fonts >> from Icon Fonts to All
- Load Stylesheet in Footer >> from Off to On
Dynamic CSS & JS
- Load Media-Queries Files Asynchronously >> from Off to On
With all changes saved, we’ll check our speed.


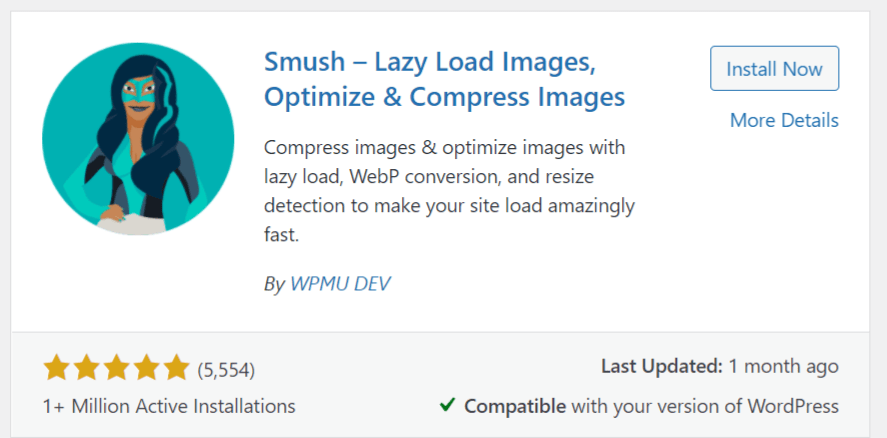
Let’s try the first of our optimization plugins, and activate Smush.
Upon navigating to the Smush dashboard, you should be greeted with the quick setup wizard. These settings include: Auto Compression, EXIF Metadata, Full Size Images, Lazy Load, and Usage Data.
Here’s what each feature does:
- Auto Compression ― will automatically optimize new image uploads, so you don’t have to do each one manually.
- EXIF Metadata ― will strip camera settings from your images, helping reduce file size. (Don’t worry; it won’t strip SEO metadata).
- Full Size Images ― will compress your original full size images. (Note: by default, it stores copies of your originals, in case you ever want to revert back.)
- Lazy Load ― will stop offscreen images from loading until a visitor scrolls to them.
- Usage Data ― will let our designers gain insight into what features need improvement. (Your personal data will never be tracked.)
Go ahead and run through each screen, leaving default settings on. (Allowing Usage Data will help towards the functionality of future versions of the plugin, but if it makes you uncomfortable in the least, leave it off.)

Once the wizard completes, the dashboard will reflect how many images could use compressing. Hulk smash that Bulk Smush Now button!
What do our image optimization stats look like now, Mdm. Smush?

Let’s see how much that lightened the (page) load, and do our speed tests again.


Time to kick things into high gear, and have Hummingbird alight on the scene.

After installing and activating Hummingbird, going to the dashboard will activate another quick setup wizard. This time, she’ll just suggest running a performance test, which is exactly what we want to do.
Once the test is complete, you’ll get a notification letting you know.
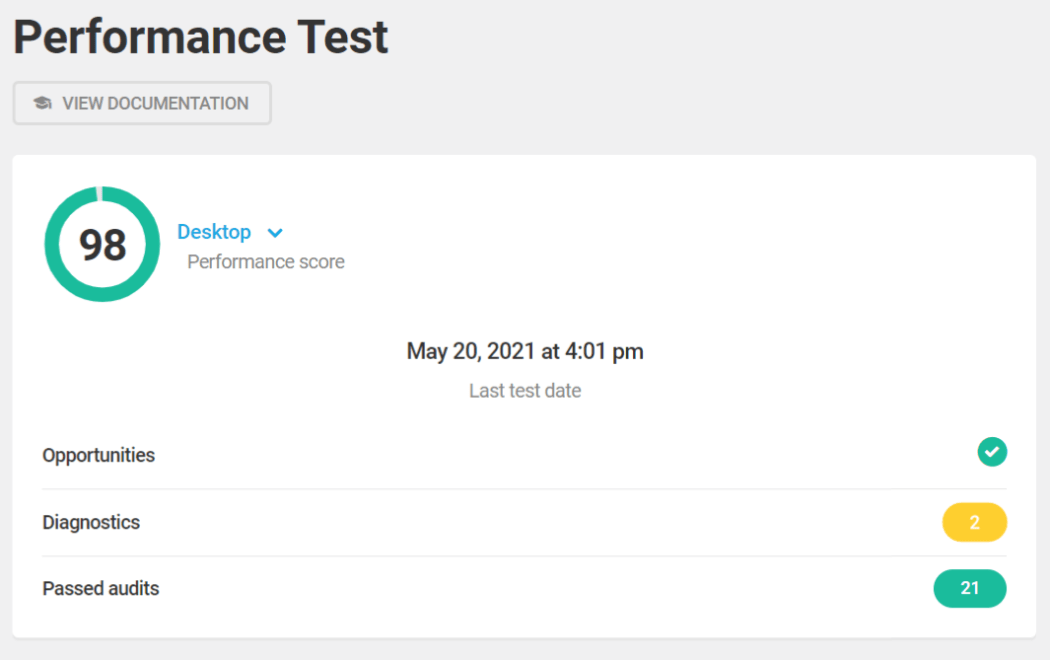
The dashboard shows us the score from the performance test.
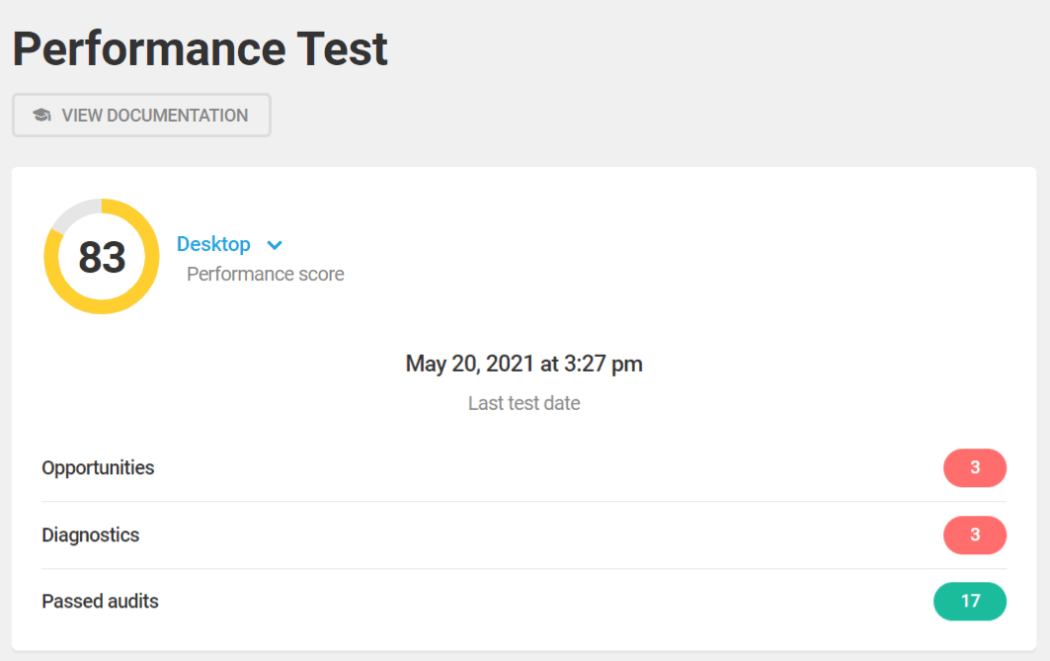
Hummingbird provides lists and a chart of assorted metrics and audits that were rated during the performance test.

She also provides additional score metrics called Audits. These separate issues into the categories of: Opportunities, Diagnostics, and Passed Audits ― all recommendations for improving your performance score.
Opportunities are basically color-coded alerts. Yellow indicates a mild to moderate issue, and Red means the issue is significantly impacting performance.
In this performance evaluation, Hummingbird has indicated that I have 3 Opportunities, which as least one of is high priority (red squoval).
To resolve these Opportunities, click on any alert row, and it will display:
- a detailed description of the issue
- a list of specific assets involved
- step-by-step instructions on how to resolve the issue

It’s a good idea to address these, and that’s what I’ll do now. Once you’ve made the fixes, you can move on to the next step… asset optimization.
From the left menu bar, choose Asset Optimization. Click Automatic, and make sure the Speedy slider is ON.

Of note: when you’re in Automatic mode, Hummingbird auto-detects newly added plugin and theme files and optimizes them for you, but won’t remove any old files from a plugin or theme that was removed. This is to avoid conflicts and issues, and why it’s recommended to re-check files on occasion ― so everything remains in sync.
Ok, time for some speed testing.


Great scores! One more thing we can still do… let’s turn on the CDN in Hummingbird. From the same Asset Optimization page, move the WPMU DEV CDN slider to ON (it will turn blue).
Let’s run our speed tests again.


We could stop here and be perfectly happy campers. However, I’ll throw one more log on the fire, by tweaking a setting through my WPMU DEV hosting.
Turning on FastCGI through WPMU DEV’s hosting Hub.
Time to put the pedal to the metal and get some new test scores.


Alright, I’m super stoked about that. Let’s move on to our second round of testing by installing a different theme.
Theme 2 ― Avada Classic
For our second test environment, we’re going to use Avada Classic. It requires the additional WooCommerce plugin to be installed, so will add an interesting element which could possibly affect page load speeds.
Before we actually change themes, let’s roll back to our original test environment. If you have WPMU DEV’s hosting, turn off FastCGI from the Hub. In Hummingbird, turn off CDN Asset Optimization. Then deactivate both the Hummingbird & Smush plugins.
We also need to revert the Avada Performance optimizations back to their defaults, via the Options/Performance tab, Reset All.
Once again from the Avada Dashboard, let’s navigate to the pre-built themes. Make sure you select all the components you installed for Avada Spa; then click Remove. Once that process completes, head to the Classic theme (it’s the first one), and install/activate it.

Prior to making any changes or adjustments, let’s get our initial speed test scores.

Ok, that’s respectable, but we want superb. Let’s adjust some of Avada’s built-in settings again.
I’m making the same optimizations as I did last time, but with one addition: Avada’s PWA plugin (primarily a caching app, under development at Google). Once PWA is installed and activated, I’ve got some choices now under Options for Progressive Web App. I’m switching it ON, leaving the pre chosen settings as is, and saving changes.

Let’s see how much of an impact those tweaks made in speed scores…


With the Avada optimizations under our belt, let’s reactivate Smush.
Your Smush settings will remain as we last had them. Because our new theme added new images to the media library, we need to let Smush do her thing.
You’ll already see the savings from bulk compression in her dashboard. We didn’t have to actively smush the images added to the media library with this theme, because we had previously told Smush to automatically compress our images on upload. And that’s exactly what she did.

Alright, time for another round of speed tests.


Even better scores than with our initial theme at this point. Of course, we can get them higher. Time to let our rapidly-fluttering-winged friend grace us with her presence. Reactivate Hummingbird, and run a performance test.

While I’m pleased with her score, it’s not as good as it can get. I see she has listed three Opportunities, and at least one is substantial (code red). I’m going to go in and fix what she’s recommending, and I suggest you do the same if you have issues indicated in Opportunities.

Time for our speed tests.


With our next tweak, we should see those markers go up even more.
In Hummingbird, go to Asset Optimization/Assets, and click the Re-Check Files button. While she’s checking, turn CDN to ON again (from the running pop up). She’ll tell you how many assets are found; click the “Got it” button. After her scoring, click Activate.
Before we do speed tests, I’d like to run another Hummingbird Performance test, and see how it’s improved since we made all those optimizations.
Let’s see if that bumped up our speed scores.


We could call it a day and have great responsiveness with these scores. But I’m gonna do that one last leap, and turn on the static server cache from my hosting Hub.
One final test… and survey says??


Okay, this is the best score I’ve seen yet. I’m gonna do a victory lap!! Before I get carried away with the checkered flag, I just want to share a serious thought on continued testing.
There will be slight variances if we were to test randomly going forward, as none of the elements are truly static. But you shouldn’t see any significant dips in page loading time, with all of the tweaks we’ve put into play.
Tips for Overall Speed Gains in Avada
This has been an eye-opening experience. Avada can most definitely ramp up the pace when used in tandem with Smush and Hummingbird. Even though we fine tuned numerous settings, there are some things you should always consider when it comes to getting and maintaining optimal speed on your site.
They are:
- Choose a theme that’s more minimalistic (i.e., “light”)
- Delete plugins that are old or no longer being used
- Enable caching
- Minify and Defer CSS & JavaScript
- Use a CDN
- Fix broken links
- Optimize your images
- Update your Hosting Plan
That last one can really make a night and day difference. Make sure your hosting provider has a good reputation, and is shown to be fast and reliable. (WPMU DEV hosting plans provide solid, fully dedicated WordPress site hosting, backed by Digital Ocean.)
Quick note regarding CDN as it applies to our plugins: the settings for the image CDN are located in Smush Pro, while the web object settings are in Hummingbird Pro.
Fast & Furiously Optimized
You’ve got all the tools at your disposal now. As your site grows, and you continue to add content and increase your traffic, you should regularly test and reassess your optimization settings.
As you’ve seen, Smush and Hummingbird are both free, feature-packed optimization tools that will increase your speed. But regardless of what you use, continue to make adjustments so your page loads are never a deterrent to visitors or clients.
Make Avada your own, and site speed your silver bullet.


