
Troubleshooting WordPress website issues never makes for a fun time. In fact, it can be a real drag. And often it leaves those less tech-savvy scrambling in search of answers. Or, it leaves them running to find a professional to hire. Either way, site issues can be a real ordeal, especially if you aren’t a developer.
However, did you know there are actually a lot of things you can do to identify and repair site issues even if you lack in-depth coding or web development knowledge? It’s true!
That’s what we’ll be offering here today: a list of 16 things you can do as a non-developer to troubleshoot and fix your most pressing site issues in WordPress.

1. Try a Different Browser
If you access your site and something appears broken or isn’t loading correctly, your first order of business is to simply try using a different browser to access it. There’s always the possibility that the issue is browser-specific and not actually indicative of a larger problem with your site.
Attempt accessing your site in each of the most popular browsers to see if the issue persists. You should try using a different device as well, like your phone or a tablet, to see if the problem is related just to your primary device as well.
If you determine your browser is causing the issue, at least you have a more specific problem to research. For example, different browsers sometimes process the same CSS in different ways and adding a fallback rule for that case can eliminate the problem. In troubleshooting WordPress, knowledge is power.
2. Clear Your Browser’s Cache and Cookies
If you’ve tried accessing your site in different browsers and the issue persists, your next step is to clear your browser’s cache and cookies. It’s possible that there is simply a problem with the stored information related to your site, which is why clearing this data can sometimes fix things.
The process for clearing your cache and cookies will differ depending on what you’re using. For example, in Google Chrome, you’d do this by going to Chrome > Settings and then selecting Privacy and security on the left hand side.
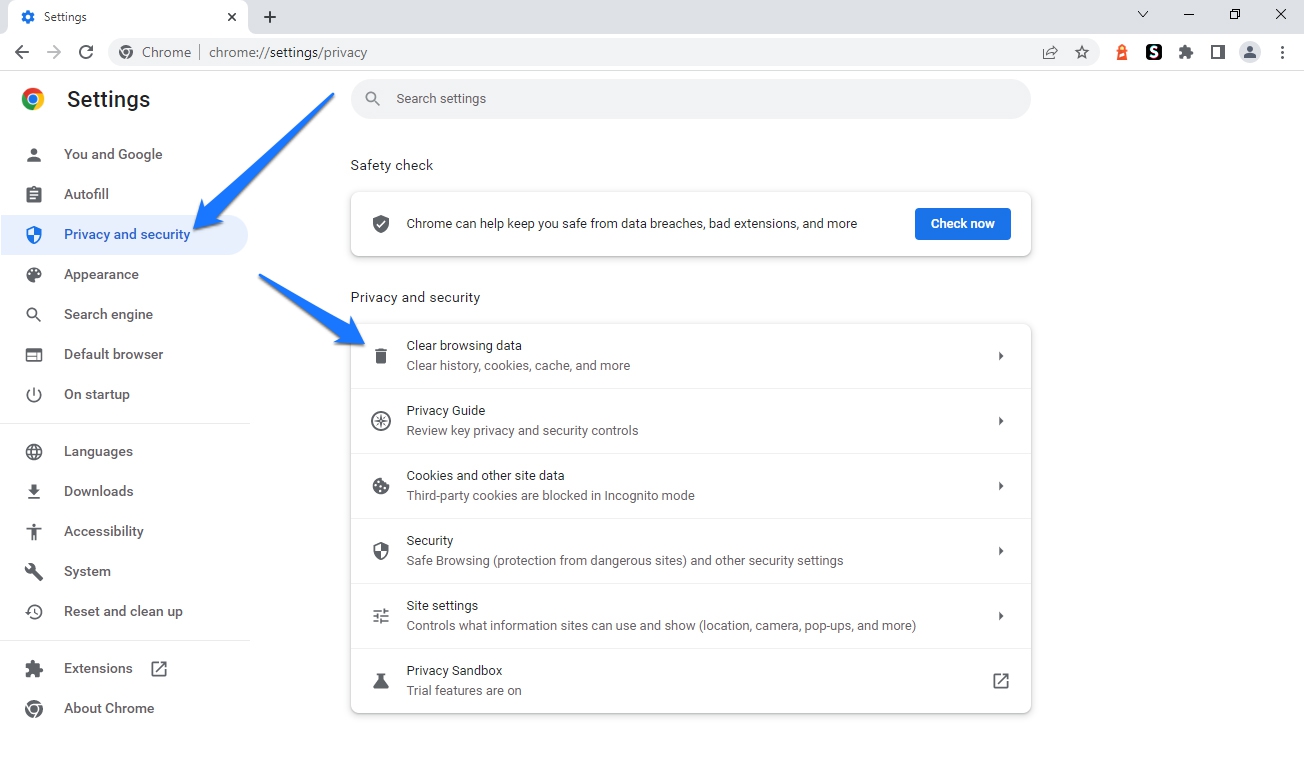
Next, find the option that reads Clear browsing data. A dialog should pop up from which you can select or deselect options to clear browsing history, cookies and other site data, as well as cached images and files. You can also set the timeframe for which to delete the data. Once you’ve made the selection you wish to make, click Clear data to complete the process.

3. Check Your Site in Incognito Mode
If you’re still having trouble after clearing your cache and cookies, try checking your site in incognito mode. This is a special browsing mode that doesn’t save any cookies or cached data to your computer. As such, it can be helpful for troubleshooting website issues.

Again, the process for opening an incognito window differs depending on your browser. In Google Chrome, you can do this by going to File > New Incognito Window.
4. Clear Your Website’s Cache
The next step in troubleshooting issues on your WordPress website, in addition to clearing your browser’s cache, is to empty the site’s own cache as well.
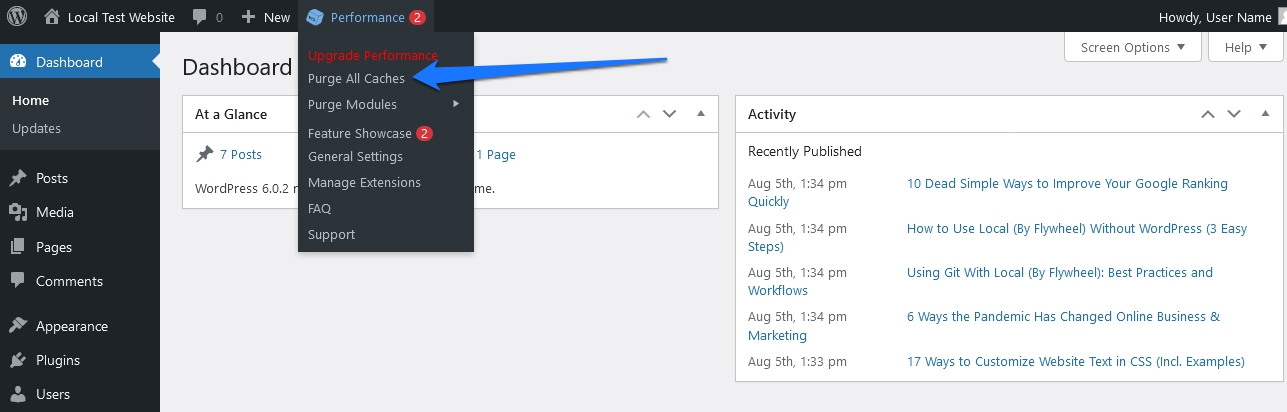
The process for that is generally fairly simple. For example, if you have a caching plugin installed like W3 Total Cache, you can clear your cache by clicking Performance at the top of your site’s dashboard then selecting Purge All Caches.
Other caching plugins offer similar ways to do this.
5. Use a VPN to Check Your Site
A VPN, or Virtual Private Network, encrypts your traffic and routes it through a server in a location of your choosing. This can be helpful for troubleshooting website issues because it allows you to check whether the issue is specific to your location or IP address.
If you’re having trouble accessing your site, try connecting to a VPN server in a different location and then loading your site again. If it looks fine when you do this, then the problem is likely related to your location and not your website itself. A few VPNs to consider using include ExpressVPN, NordVPN, CyberGhost VPN, and IPVanish. You can also try the free ZenMate browser extensions.
6. Make a Site Backup
So far, all the WordPress troubleshooting tips have been fairly non-invasive. That’s about to change. However, before you start making changes to your site, it’s always a good idea to create a backup. That way, if anything goes wrong, you can always restore your site to its previous state.
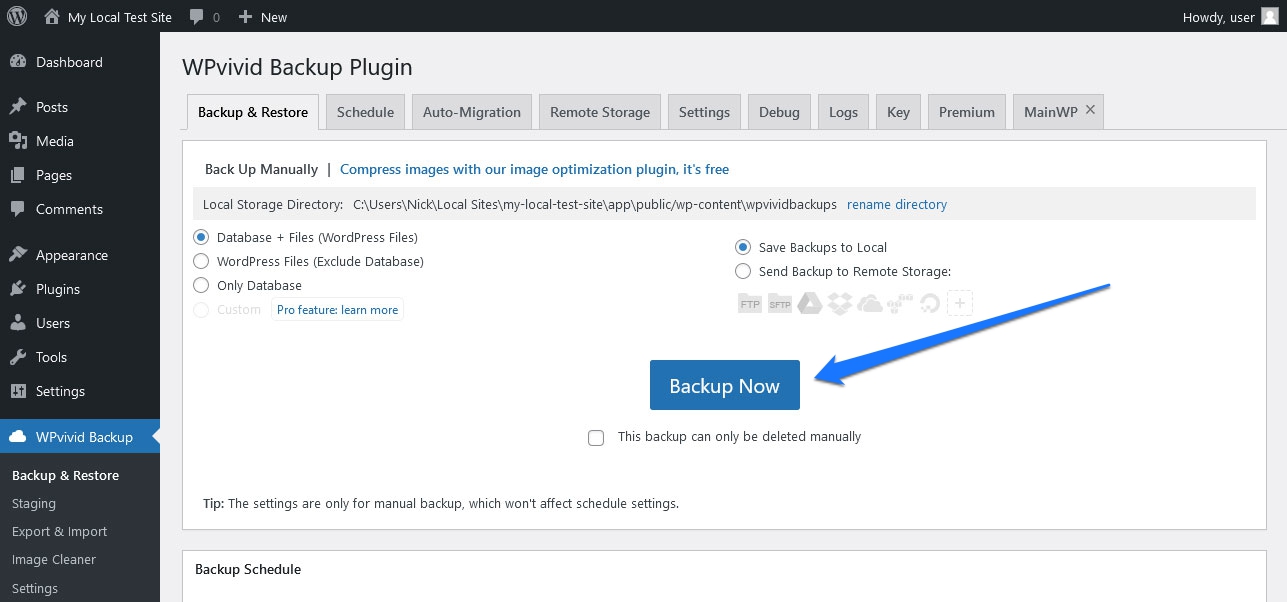
How you create a backup will depend on your hosting setup. If you’re using a shared hosting provider, you may be able to create a backup directly from your control panel. If you have a VPS or dedicated server, you’ll likely need to create a backup manually using something like SSH.
You can often use a WordPress plugin to configure and conduct backups as well. A few options to consider include UpdraftPlus, WP Time Capsule, and BackWPup.
7. Deactivate and Assess Plugins
WordPress plugins are often a necessity for site owners for adding features and functionality. However, these can sometimes conflict with each other or with the WordPress core, causing problems.
If you’re having trouble with your WordPress site, deactivating all of your plugins and then checking to see if the issue persists is a common troubleshooting tactic. To do this, you can go to Plugins while logged into the WordPress dashboard.
Next, click the checkbox at the top of the plugin list to select all the installed plugins. Then click the drop-down menu directly above that and select Deactivate. Finally, click Apply to make this change.

It’s actually best to do this on a development or staging version of your site, not the live version. If you don’t have a staging environment, then you can create one using a plugin like WP Staging or a tool like Local.
Sometimes it’s the interaction between two different plugins that can cause the issue. To figure this out, you’ll need to go through your plugins one by one and activate them, testing your site in between each plugin.
If you run into any issues, pause and then start deactivating all other plugins except the one that just caused the issue. If doing so removes the problem, you’ll then know that it’s a plugin conflict — not just a single plugin with poor coding or some such.
8. Switch to a Default WordPress Theme
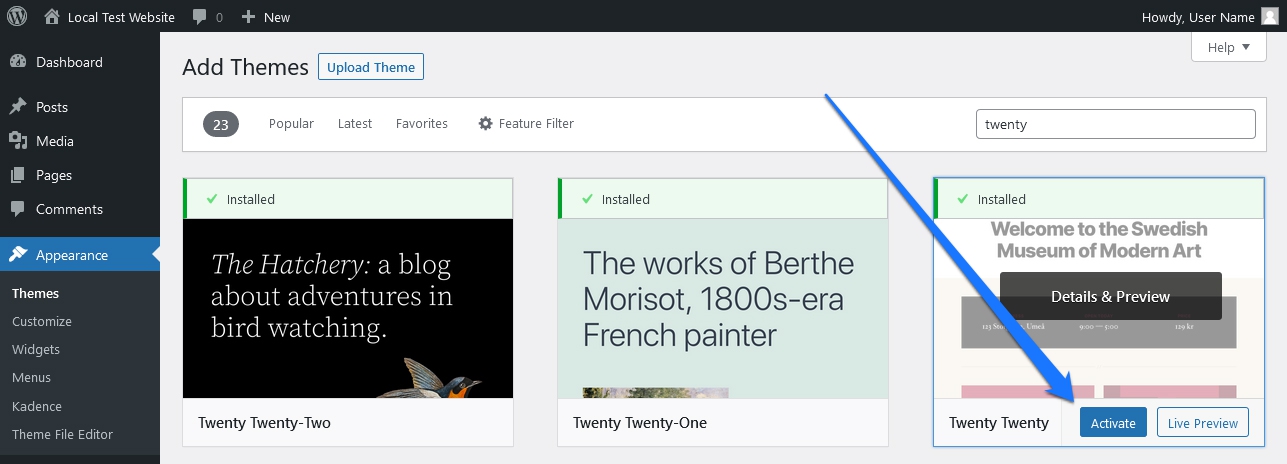
In addition to plugins, WordPress themes can also cause problems. If you’re using a custom theme, try switching to one of the default WordPress themes, like Twenty Twenty-Two, and then check to see if the issue persists.
You can change your theme by going to Appearance in your WordPress dashboard and then selecting Themes. From there, you can activate one of the default WordPress themes. If already installed, find the default theme in the theme list and click Activate.
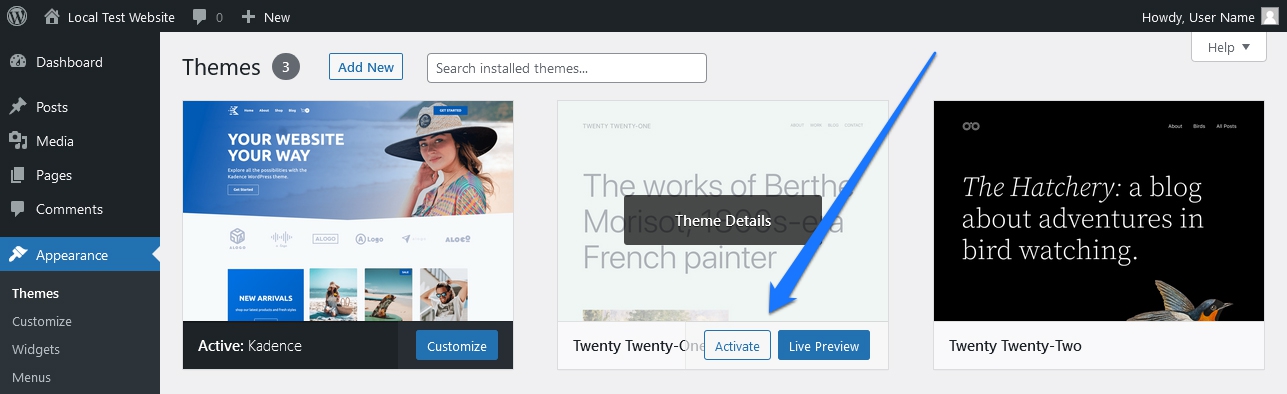
If not installed, click Add New and search for a default theme (their names all start with Twenty) and click Install. Once the installation process is completed, click Activate.
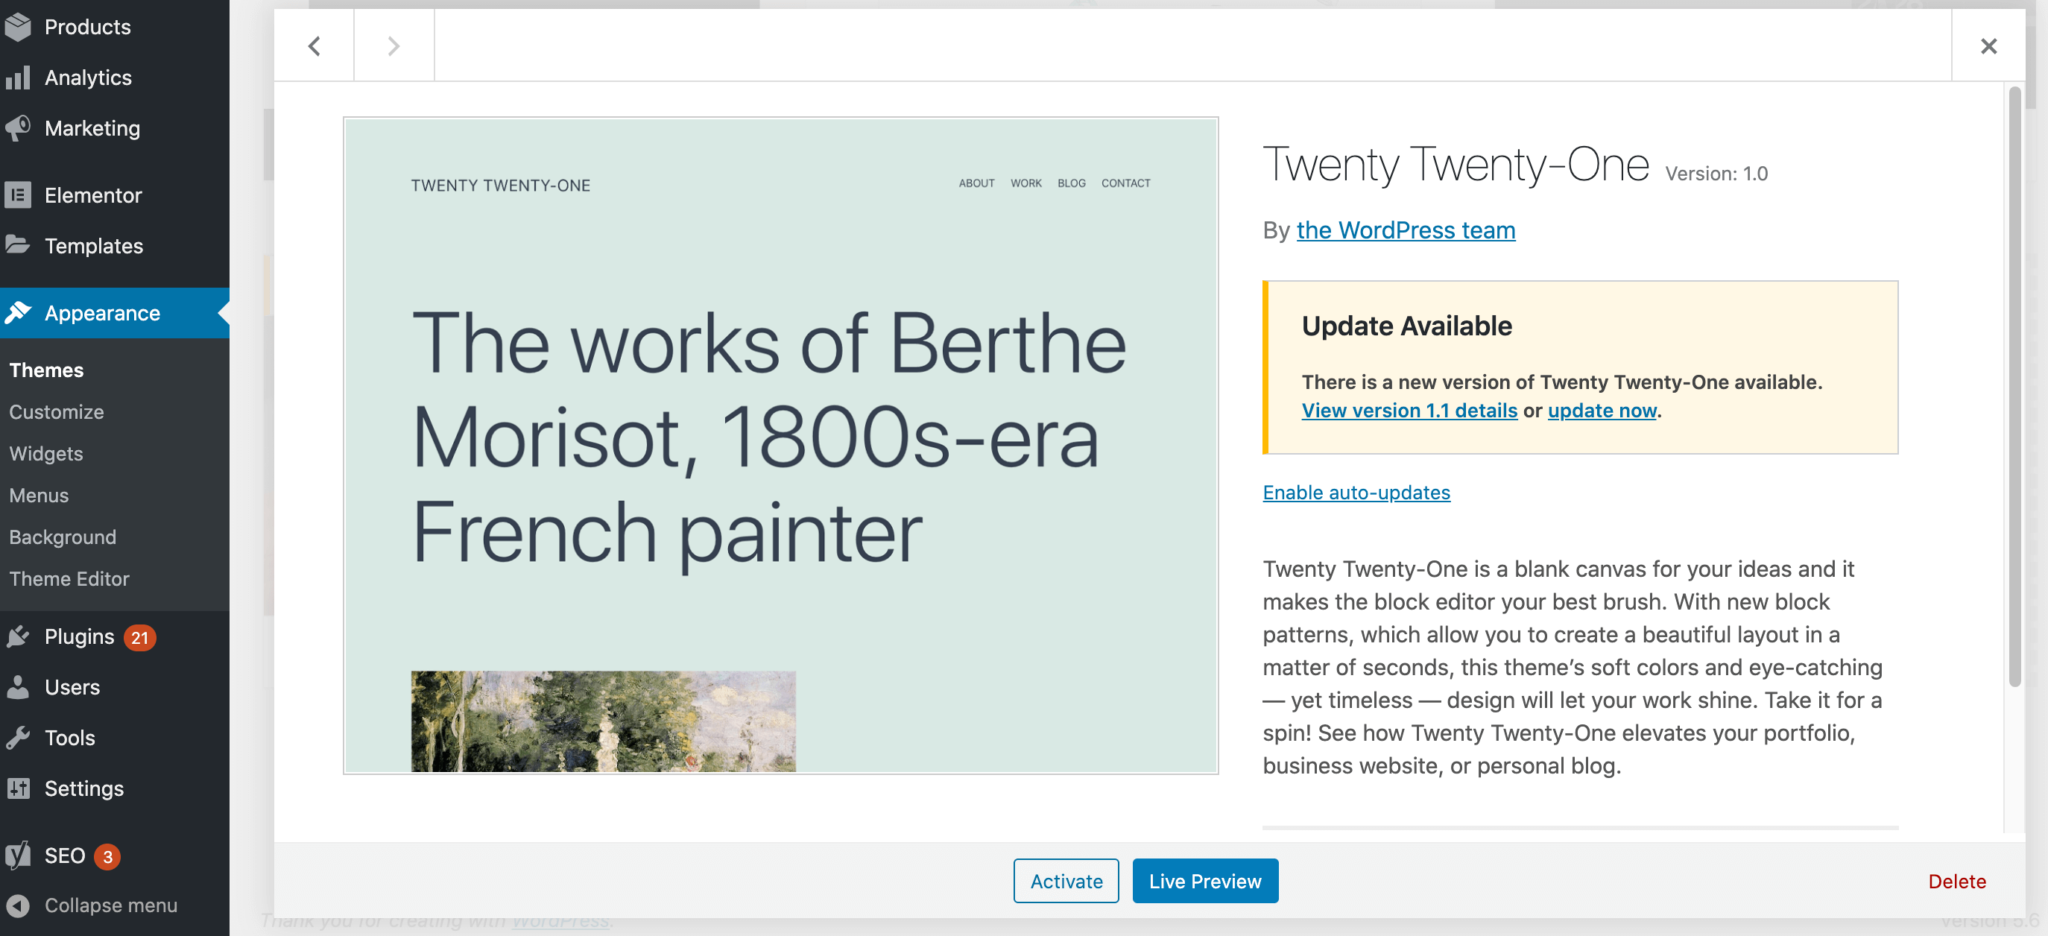
9. Update Plugins and Theme(s)
Your next course of business is to update both your plugins and themes. Often, plugin and theme developers will release updates to fix bugs or compatibility issues. As such, it’s always a good idea to make sure you’re using the latest version.
To update your WordPress plugins, you can go to the Plugins menu in the WordPress dashboard and then select Update under the Bulk actions drop-down menu.

You may also opt to update plugins individually by looking for the yellow banner across the bottom of each plugin in the list then clicking the Update Now button.
Updating your WordPress themes works similarly. You can go to the Appearance section in your dashboard and then select Themes. From there, you can click the Update now link next to any themes that have updates available.
10. Install the Query Monitor Plugin
If you want to get a little more technical, you can try installing the Query Monitor plugin. This plugin allows you to track all jQuery AJAX events on your site in real-time. This can be helpful for troubleshooting because it allows you to see which requests are causing errors on your WordPress site.
To install the Query Monitor plugin, you can download it from the WordPress plugin repository. Once it’s installed and activated, you can go to the new link that appears at the top of your WordPress dashboard — it typically appears as X.XXs XXMB X.XXs XXXQ.

Clicking this will make a small window pop up across the bottom of your browser showcasing various info about your site’s performance. Pay careful attention to errors (marked in red) as well as categories with numbers next to them. This typically indicates a factor of your site that could use some improvement.
11. Delete Your .htaccess File
Your next step in the troubleshooting process is to delete your .htaccess file. This file is used by WordPress to handle permalinks and redirects. Sometimes, it can become corrupt, causing problems on your site.
This file is automatically regenerated, so you don’t need to worry about losing any data when deleting it. However, before you do this, you’ll need to make doubly sure your website is backed up beforehand. Likewise, refresh your site’s permalinks as well.
To refresh permalinks, you can go to Settings in your WordPress dashboard and then select Permalinks.
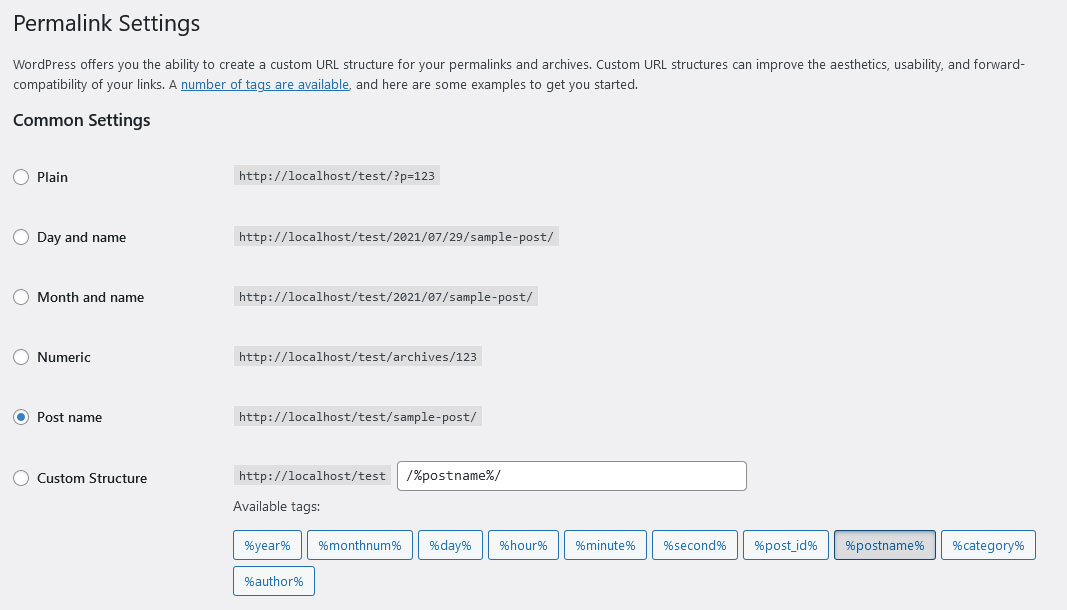
You don’t actually need to do anything on this page (and adjusting the settings here could be incredibly detrimental). Instead, just click the Save Changes button at the bottom of the page. This will refresh your permalinks and help ensure all is running properly on your site.
If you’ve done that and the problem hasn’t gone away, then access your site via FTP and delete the .htaccess file.
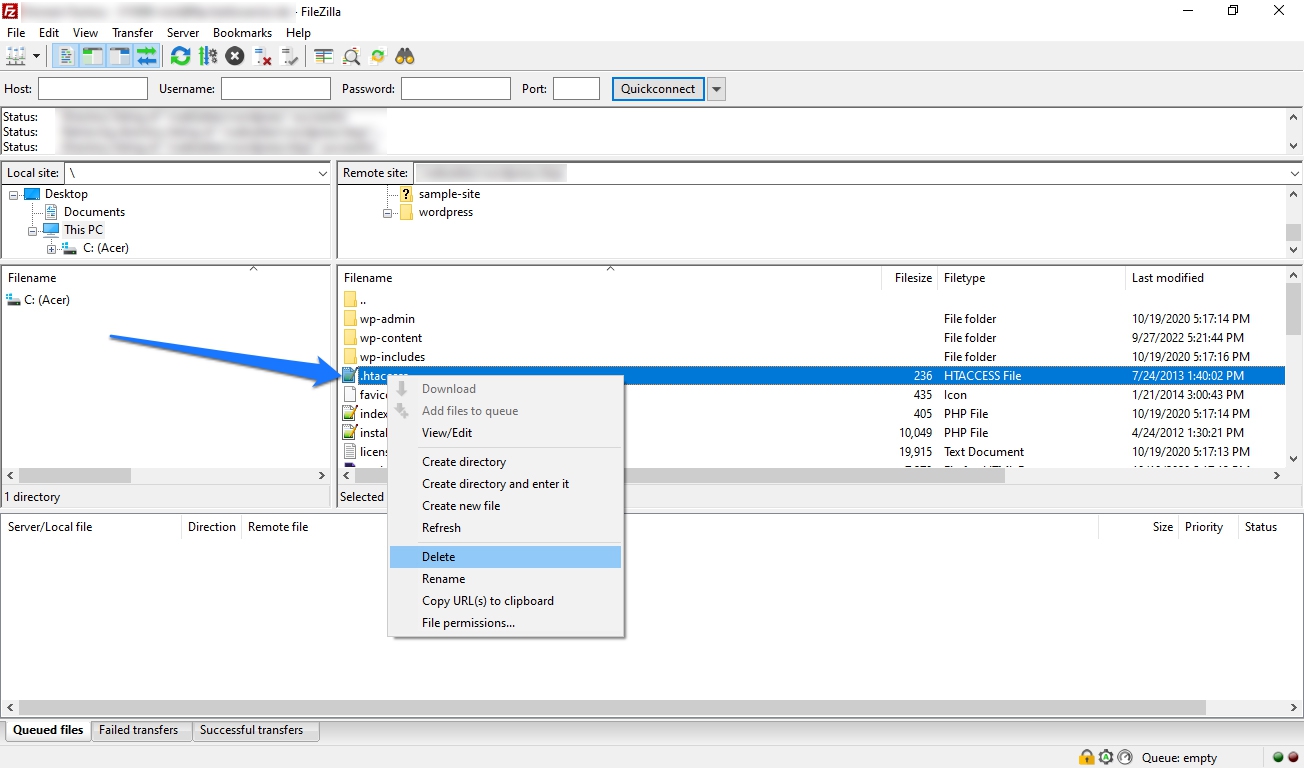
Dealing with FTP is always a scary-sounding prospect for non-developers but it’s actually pretty easy. To delete .htaccess, first open an FTP client (Filezilla is a popular one). Before logging in, you’ll need to make hidden files visible, as .htaccess is most often hidden from view. To do this, go to Server in the top menu then click Force showing hidden files.

Connect to your site as normal. Then find the .htaccess file inside the root folder. Once you’ve located it, simply delete the file, then close your FTP client. WordPress will automatically generate a new .htaccess file for you.
12. Check Your DNS Settings
Another tip to try is to check your DNS settings. DNS, or Domain Name System, is what tells browsers where to find your website. If there’s an issue with your DNS settings, then your site might not be accessible.
To check your DNS settings, you can use a tool like WhatsMyDNS. Simply enter your domain name and then select Search.
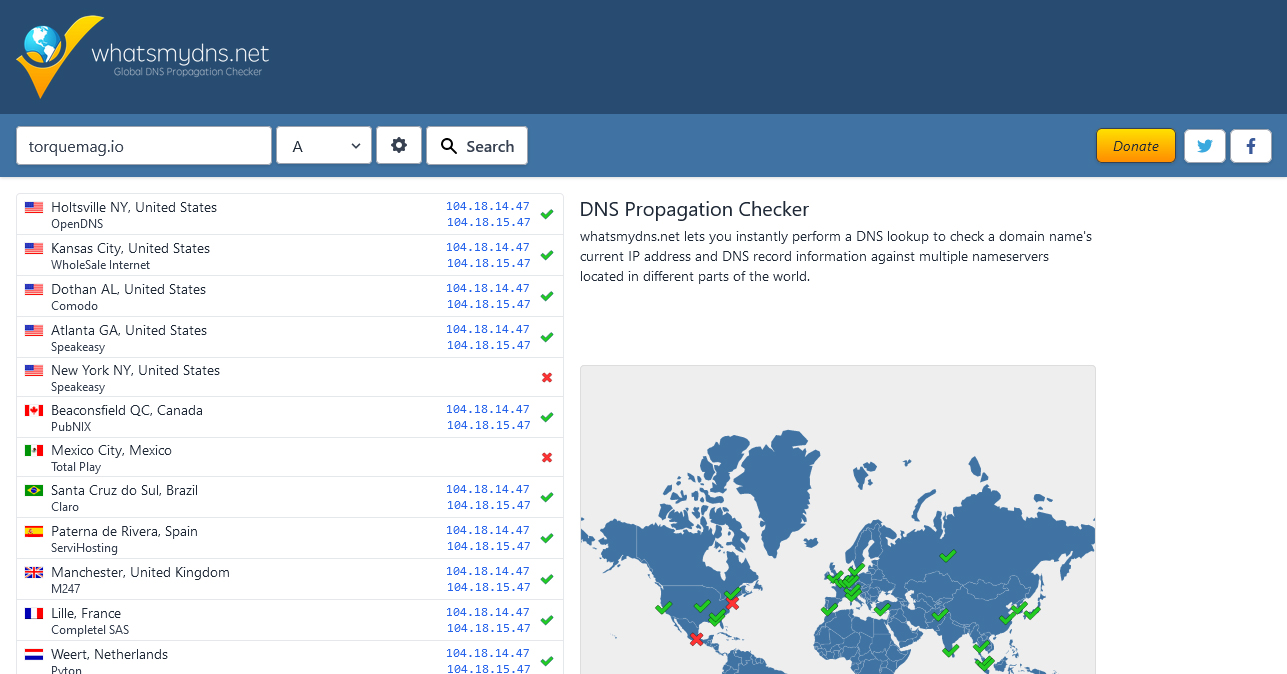
The tool will run a check to see if there are any DNS issues and provide guidance on how to fix it — this will usually involve contacting your hosting provider.
13. Check for Customer Support or Forums for Plugins/Themes
If you’re still having issues, then your next step is to check for customer support or forums for the plugin or theme that’s causing the problem.
For example, if you’re using a WordPress plugin, then you can go to the plugin’s page on the WordPress plugin repository and see if there are any support forums.
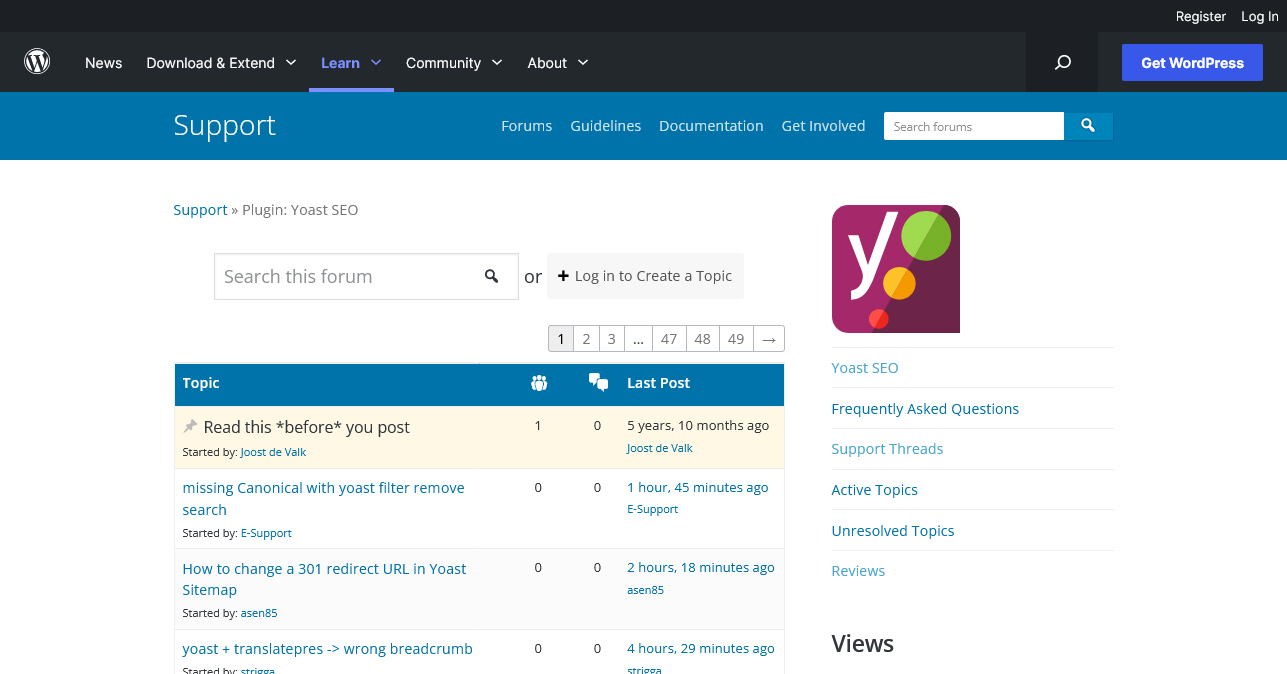
You can also do a Google search for “[plugin name] support” or “[theme name] support.” This should bring up any customer support forums or documentation that might be helpful.
14. Contact Developers Directly for Further Assistance
If you’ve tried all of the above troubleshooting steps and your WordPress installation is still having problems, then your next step is to contact the developers directly for further assistance.
If a plugin or theme is the culprit, seek out the developer’s contact information and reach out to them. Often, plugin makers will have a support ticket system, a contact form, a live chat, or some other method of getting in touch with support-related questions.
15. Consult Your Web Hosting Provider
Sometimes it’s your web hosting provider that’s to blame and/or can offer the greatest assistance. They might be able to help you figure out what’s going on and how to fix it, especially if it’s related to a site performance issue, slow load times, or server errors.
To get in touch with your web hosting provider, you can usually find their contact information in your hosting account’s control panel or dashboard.
16. Consult a Professional
If you’ve managed to dig through the above troubleshooting steps and you’re still having issues, then your next step is to consult a professional developer or agency for further assistance.
They’ll be able to help you figure out what’s going on and how to fix it. And at the very least, you’ll be able to say you gave it a real shot before seeking out assistance!
You Don’t Have to be a Developer for Troubleshooting WordPress
Troubleshooting website problems can be a real pain, especially if you don’t have the technical know-how. However, by following the tips above, you should be able to fix most common website issues without having to involve a professional.
If all else fails, you can always hire a professional to help you out. Good luck!
What other troubleshooting tips do you have for everyday users to check their WordPress sites for problems? Please share in the comments below!


