
It’s normal for your website to undergo additional work once it’s been built. Perhaps you’re planning to redesign it, add more functionality, or switch to a new theme. However, this can mean that your visitors are greeted with a glitchy site.
Fortunately, you can put your website into maintenance mode. This way, you can work on it in private while preserving your User Experience (UX).
In this post, we’ll take a closer look at maintenance mode and discuss when you might use it. Then, we’ll show you how to enable it in WordPress. Let’s get started!
When to Enable Maintenance Mode in WordPress
Maintenance mode enables you to present a message that informs visitors that your website is currently unavailable. As a result, users won’t be able to view or engage with your content. You can also let them know when you’ll have your website up and running again.
Without putting your site into maintenance mode, visitors can encounter broken links, redirects, and 404 errors. This can make you look unprofessional.
By putting your site into maintenance mode, you can create a positive reputation and preserve your UX. Here are a few scenarios when it would make sense to use it:
- When you’re switching to a new theme or redesigning your site
- When you’re fixing WordPress errors and bugs
- When you’re testing out new plugins
You can also modify your maintenance mode page to generate leads. For instance, you can redirect traffic to your social media accounts or include your contact details.
How to Enable Maintenance Mode in WordPress (3 Steps)
The easiest way to enable maintenance mode in WordPress is to use a plugin. In this tutorial, we’re going to use WP Maintenance Mode & Coming Soon. With over 900,000 installs, this is a trusted and reliable tool. Plus, it’s highly customizable, enabling you to add countdown timers and contact forms to your maintenance page.
Step 1: Install and Configure the Plugin
You can install the plugin directly from your WordPress dashboard. Once activated on your site, you can configure the plugin by navigating to Settings > WP Maintenance Mode.
Then, enable maintenance mode by checking the Activated box:

You can also choose whether you’d like search engines to display your website while it’s in maintenance mode. Simply use the Bypass for Search Bots dropdown menu to select your preference.
Next, you can choose which user roles have access to your front and back end while your site’s in maintenance mode. By default, this is set to Administrator.
Once you’re happy with the settings, click on Save changes.
Step 2: Create Your Maintenance Mode Page
At this point, you have enabled maintenance mode on your site. However, you can customize it to encourage users to take action.
To get started, head to the Design tab of the plugin’s settings. Then, use the dropdown box to select the page you want to use for maintenance mode and click on Edit:
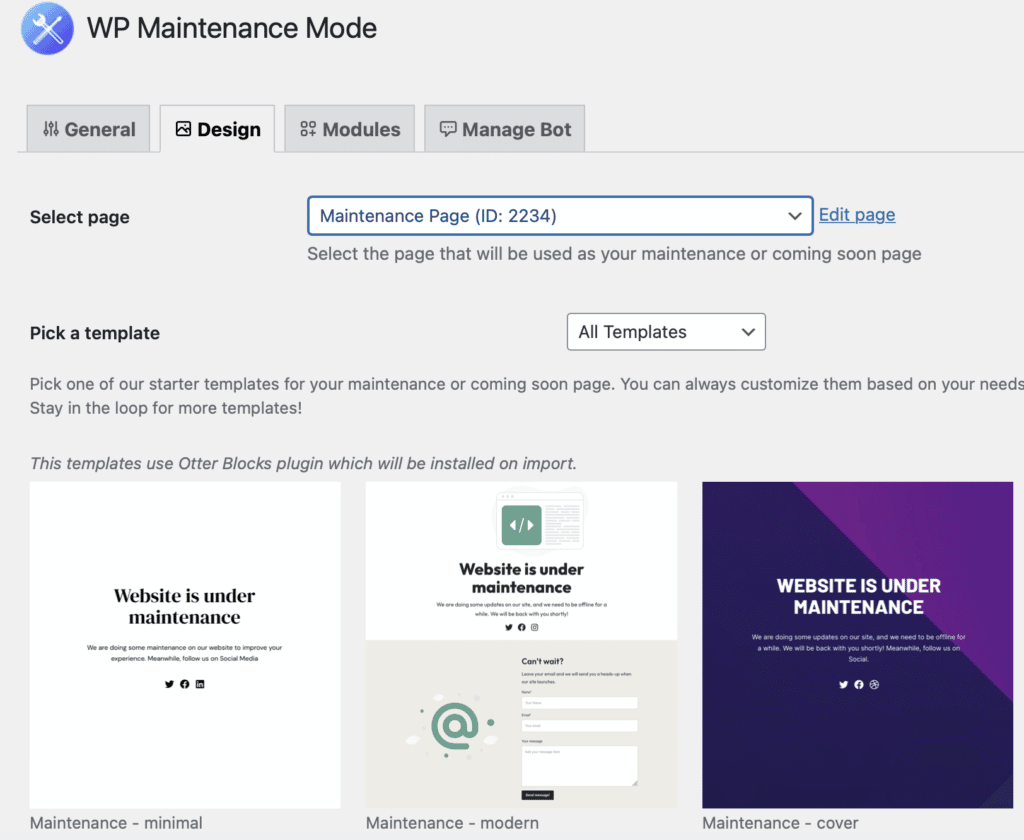
You can also use a pre-designed template by Otter Blocks. If you choose one of these templates, the Otter Blocks plugin will automatically be installed. The template will then be imported to a new draft page where you can customize the layout and enable it from the plugin’s settings.
Once you access your maintenance mode page, you can give it a captivating title and add the content that you want to display using blocks:

Additionally, you can make your page look more appealing by applying custom colors to fonts and backgrounds. Once you’re happy with your page design, save your changes.
Step 3: Make Your Maintenance Mode Notice More Engaging
You can go one step further and add elements to your page to boost your UX. For instance, a countdown timer can keep visitors in the know.
Find the Countdown module, then select the date when your website will be ready to launch and hit Reset:

You can adjust how your timer displays and apply custom colors in the Block settings. You could give visitors the option to be notified when your website is available. To do this, you’ll need to embed an opt-in form, or create your own headings and text fields:

Of course, you’ll need to sync this form with your email marketing platform to deliver your messages. If you’re collecting user data on your page, it’s important to make sure it’s GDPR-compliant. It’s also a good idea to add a link to your privacy policy page.
Additionally, you can add links to direct users to your social profiles. All you need to do is add your unique URLs to the appropriate icon:
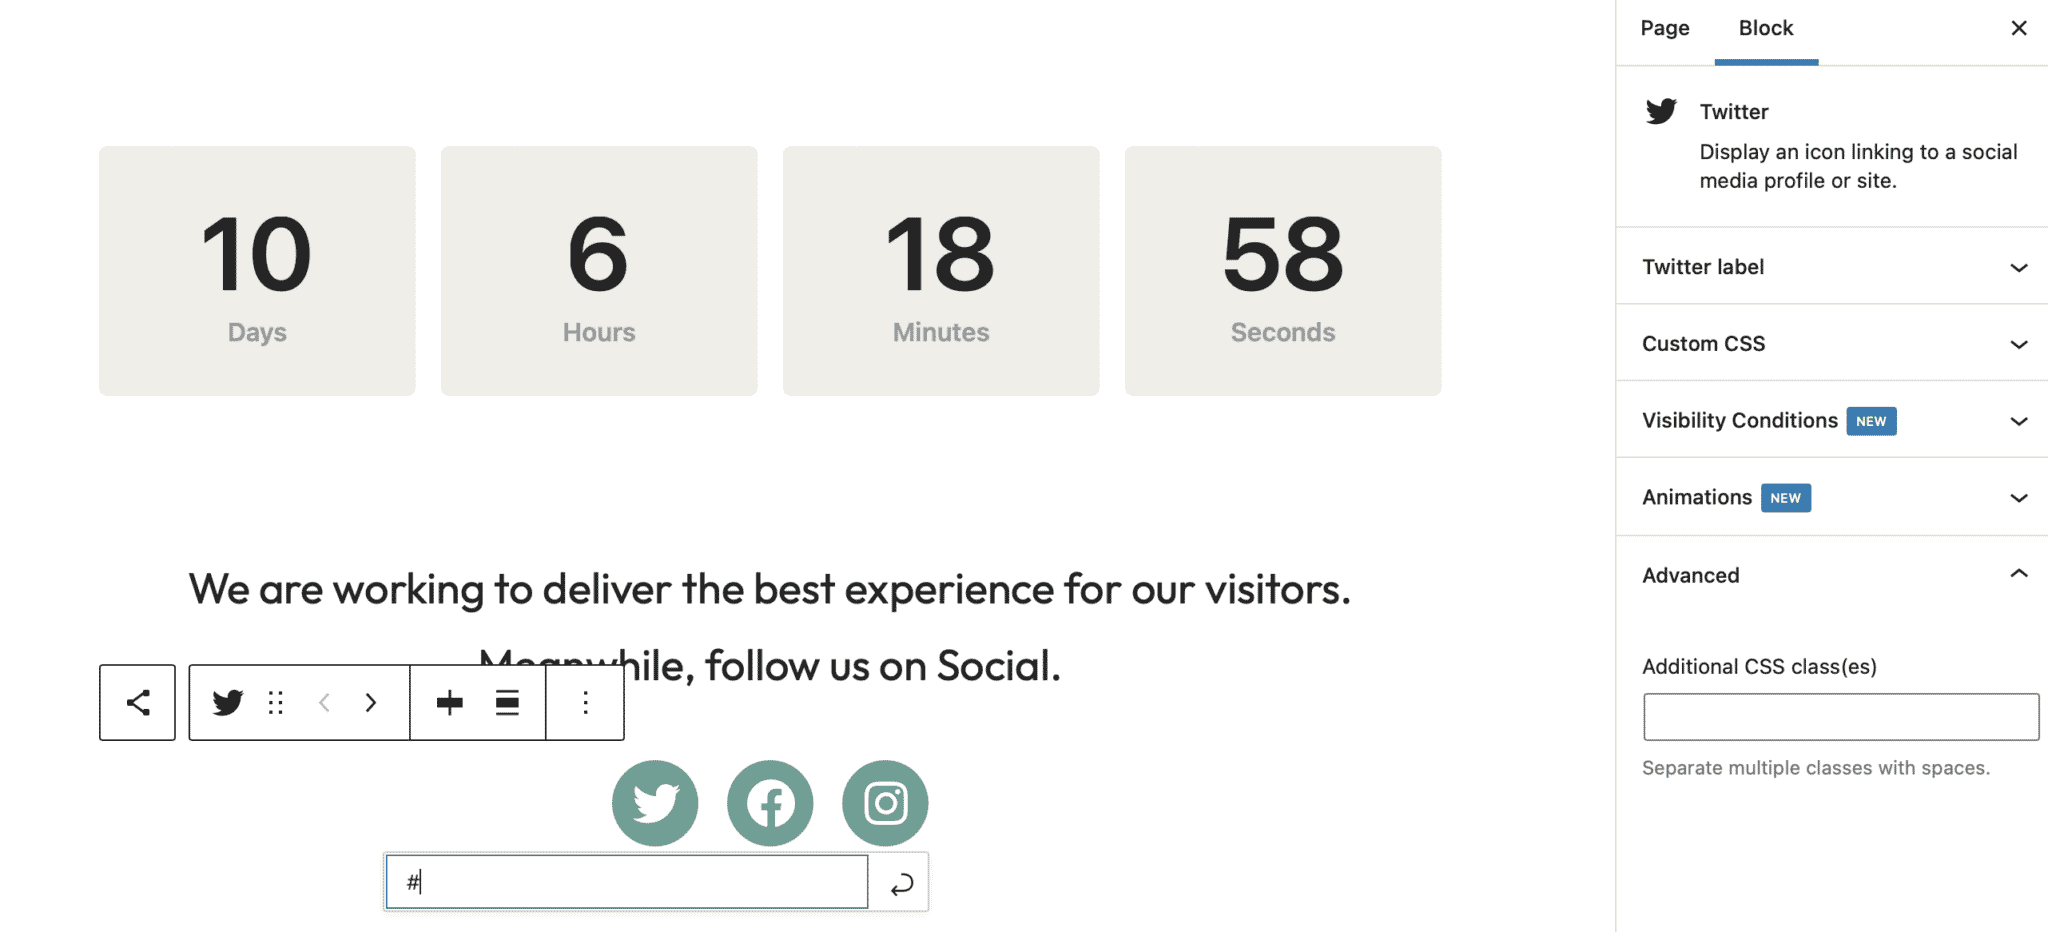
Then, you can add link labels in the Block settings to make your site more accessible.
Step 4: Set Up Your Chatbot
Lastly, you can set up a pre-programmed live chatbot to interact with your visitors. This can help you drive conversions and grow your mailing list before your site is even active.
To enable this feature, go to Manage Bot. Then, set the status to Activated:

Here, you can choose a bot name and upload an avatar to add a touch of personality to your bot. If you scroll further down, you can customize the messages that your visitors will see.
For example, you can ask them whether they want to be notified when your site is ready. If they say yes, you can ask them to provide their email address:
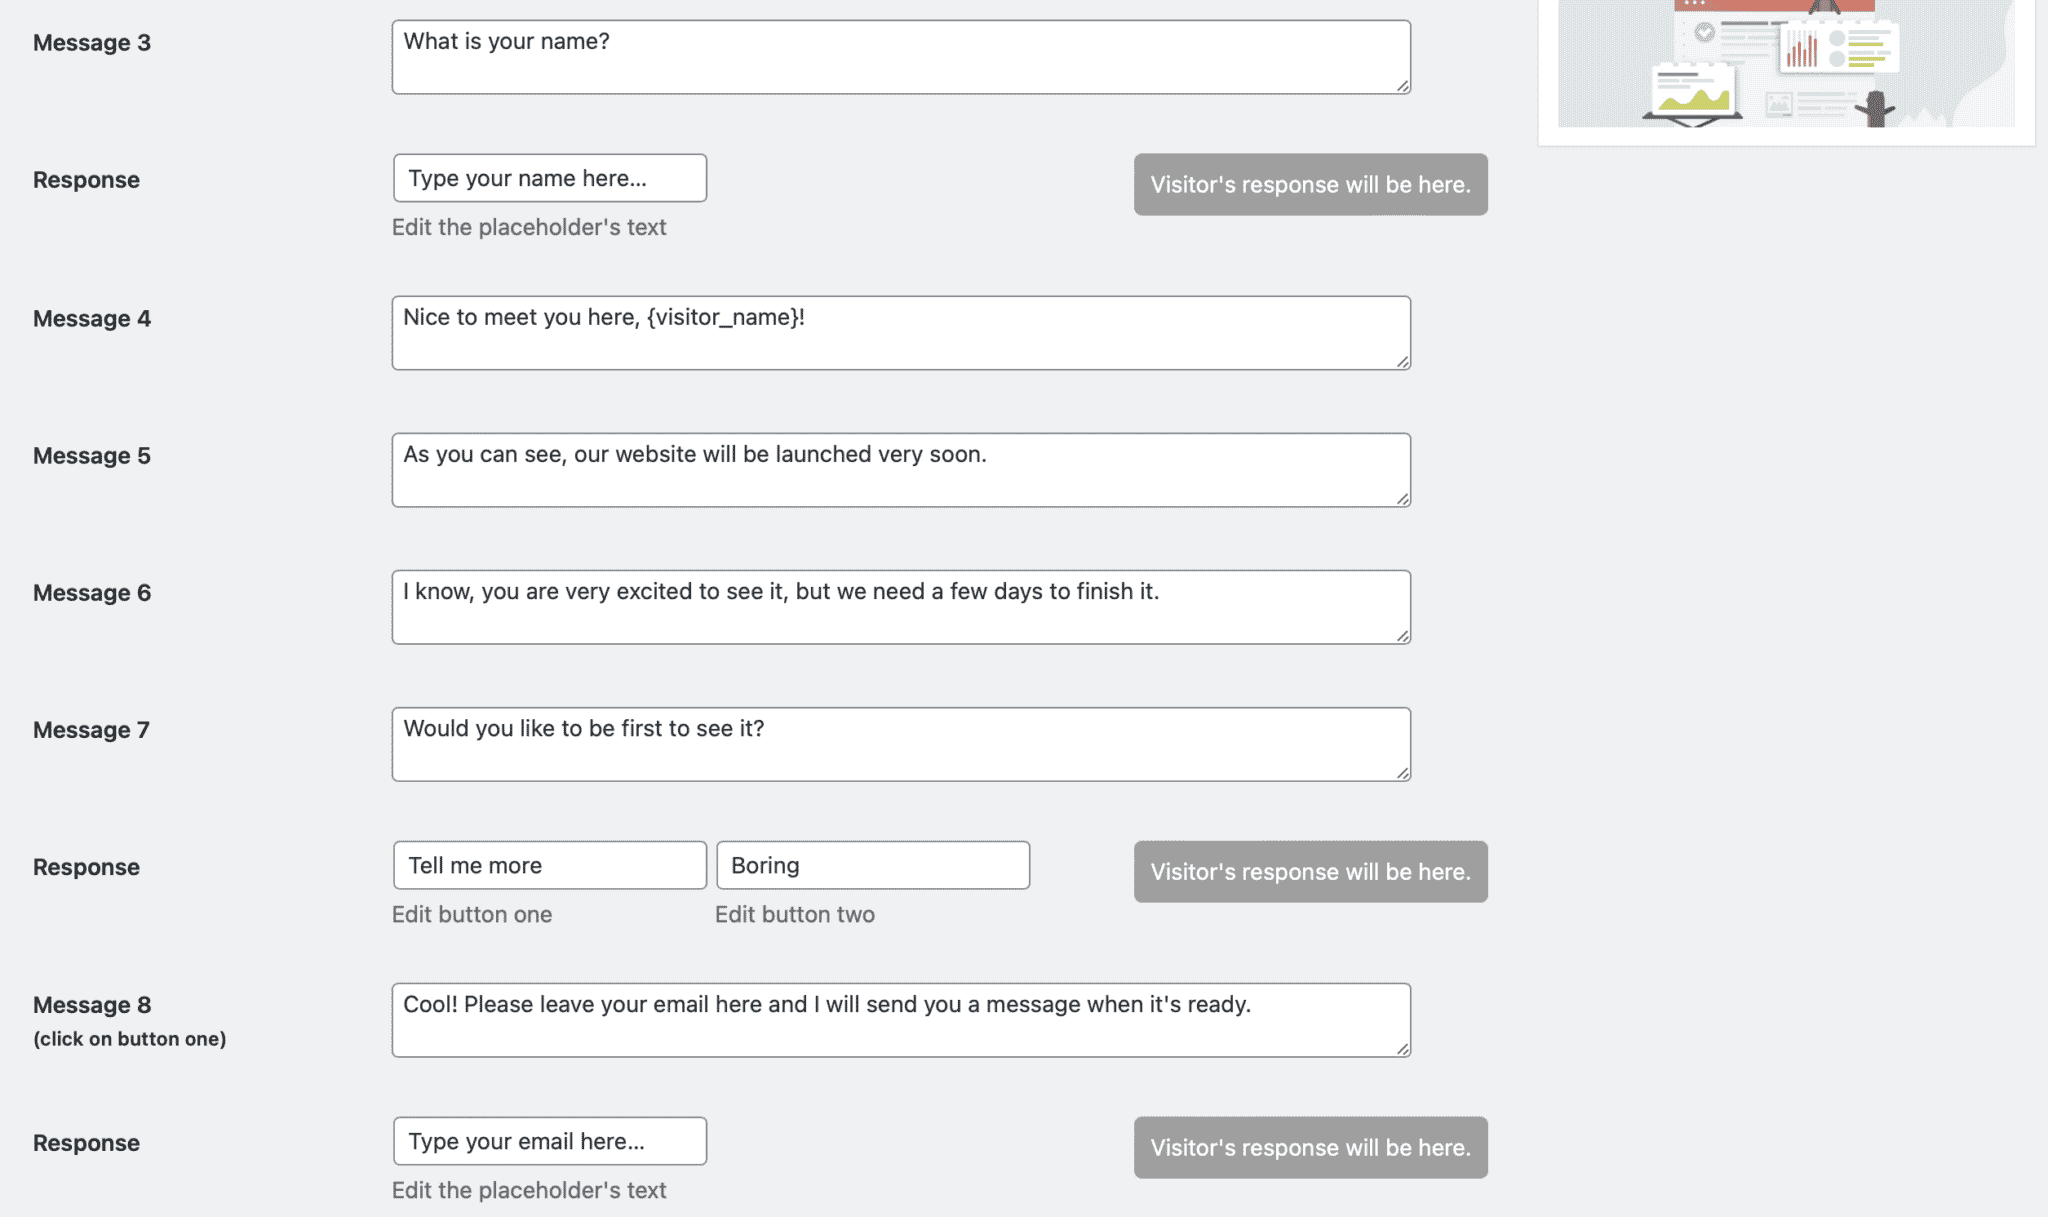
You can create short, simple message sequences, or build more elaborate ones to keep visitors on your page for longer.
Conclusion
While there are times when you’ll want to tweak your website, certain tasks can break your site or make your pages display oddly. However, you can enable maintenance mode to show a user-friendly notice and preserve your UX.
To recap, here’s how to enable maintenance mode in WordPress:
- Install and configure WP Maintenance Mode & Coming Soon plugin.
- Create your maintenance mode page.
- Make your maintenance mode notice more engaging by adding a countdown timer and other features.
- Set up your chatbot.
Do you have any questions about how to enable maintenance mode in WordPress? Let us know in the comments section below!


