Often, website owners focus on content marketing and Search Engine Optimization (SEO) to drive more visitors to their sites. However, if you don’t consider translating your website, any international visitors may not be able to read your content.
Fortunately, you can easily add multilingual features to your site. By simply creating a language switcher or enabling automatic translation, you can start serving your content to a global audience.
In this post, we’ll explain what multilingual websites are and the benefits of creating one. Then, we’ll show you how to make your site multilingual-ready with the TranslatePress plugin. Let’s get started!
What Is a Multilingual Website?
To put it simply, a multilingual website can serve its content in multiple languages. Meaning, even if the original article or page was written in English, visitors have the option of translating it into a language they can more easily understand.
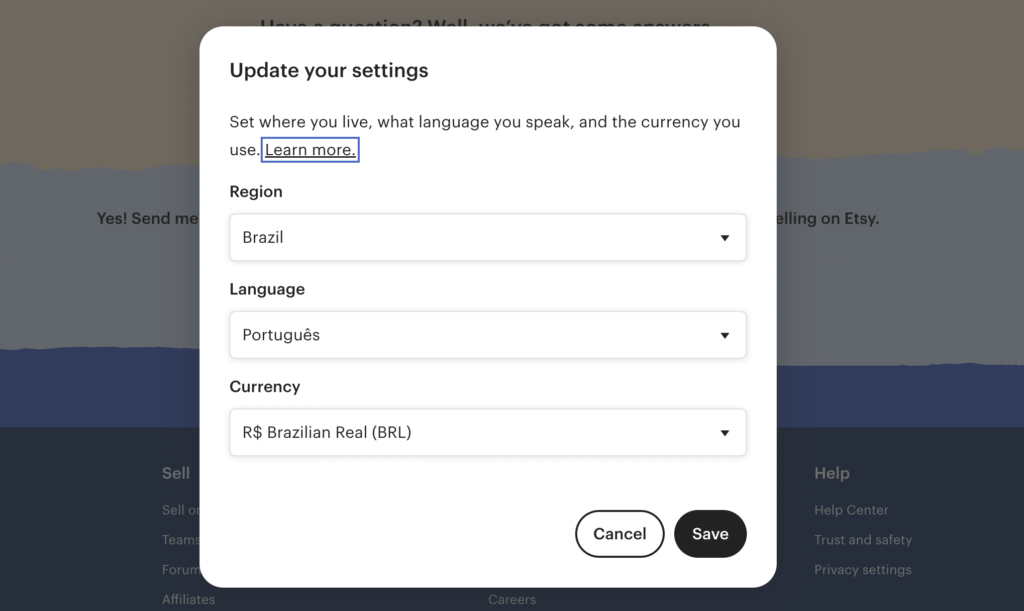
For example, Etsy enables users to specify their location. Before browsing any content, you can choose a unique region, language, and currency:
Once a visitor saves these changes, the site will automatically switch to their region’s language. They’ll be able to browse Etsy shops that ship to their country. It will also only show items that they can buy:

However, many sites opt for simpler translation services. Usually, you’ll see a language switcher, which is a dropdown menu with all of the different translations available:

There are many different ways you can make your site multilingual-ready. Each of these methods ultimately involves translating your content so it can reach a global audience.
The Benefits of Making a Website Multilingual-Ready
One of the main struggles that website owners face is search engine optimization. Whether you’re promoting your small business or blog, you’ll want to find ways to draw in high-quality organic traffic. This can be the key to increasing conversions on your website.
If you limit your audience to English speakers, you’ll likely only reach about 25 percent of internet users. By adding multilingual features to your site, you can enable international visitors to read your content.
What’s more, when you offer a variety of different languages, you can improve your site’s User Experience (UX). Instead of having to manually translate your content, visitors can immediately understand what you’re trying to say.
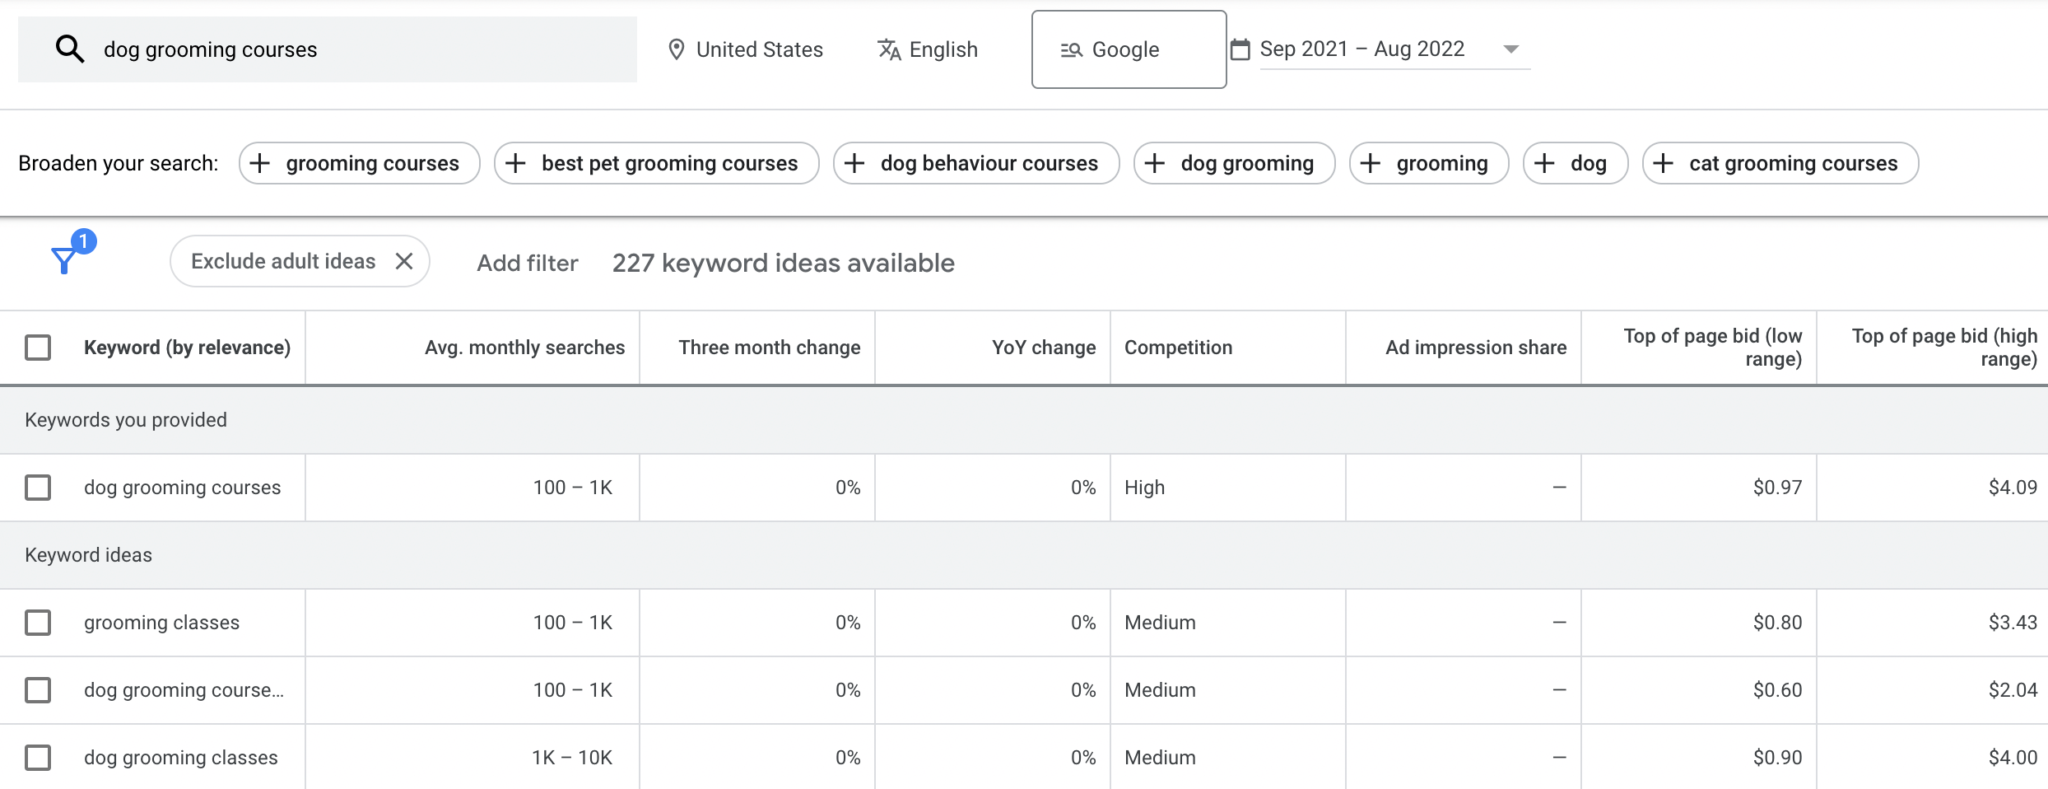
Plus, you may notice better results using translated keywords. That’s because English keywords can often be oversaturated and hard to rank for. For example ‘dog grooming courses’ has a high level of competition:
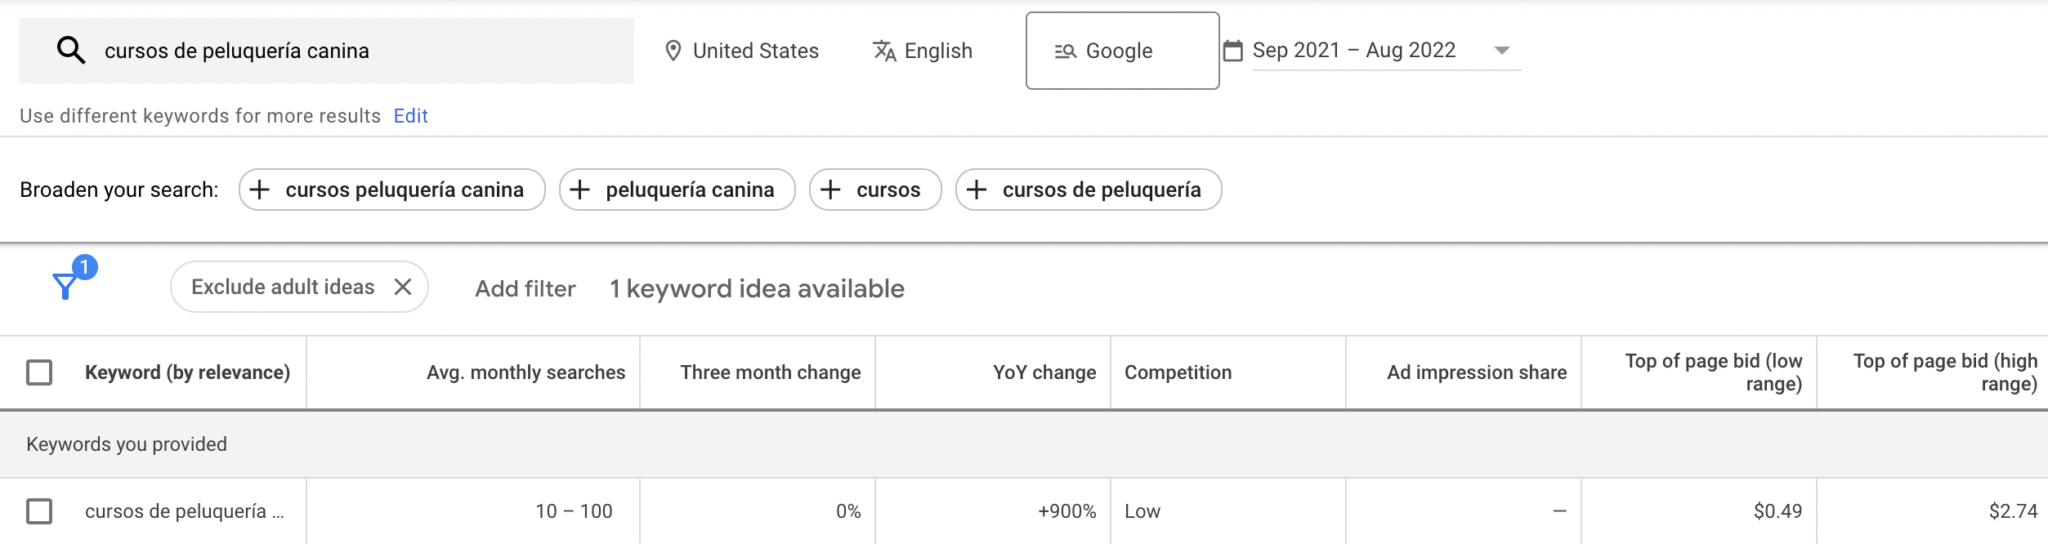
By simply translating this keyword into Spanish, you can significantly decrease your search competition. Since they can also have a cheaper top-of-page bid, translated keywords may enable you to set up an affordable ad campaign:
To start growing your website, you’ll want to remove any communication barriers between you and your audience. Once you build a multilingual-ready website, you can successfully connect with international visitors.
How to Create a Multilingual Website (In 3 Steps)
Now that you know about the benefits of adding translation features to your website, let’s walk you through how to create a multilingual website. This way, you can make it easier for a wide range of visitors to read your content!
Step 1: Create a Language Switcher
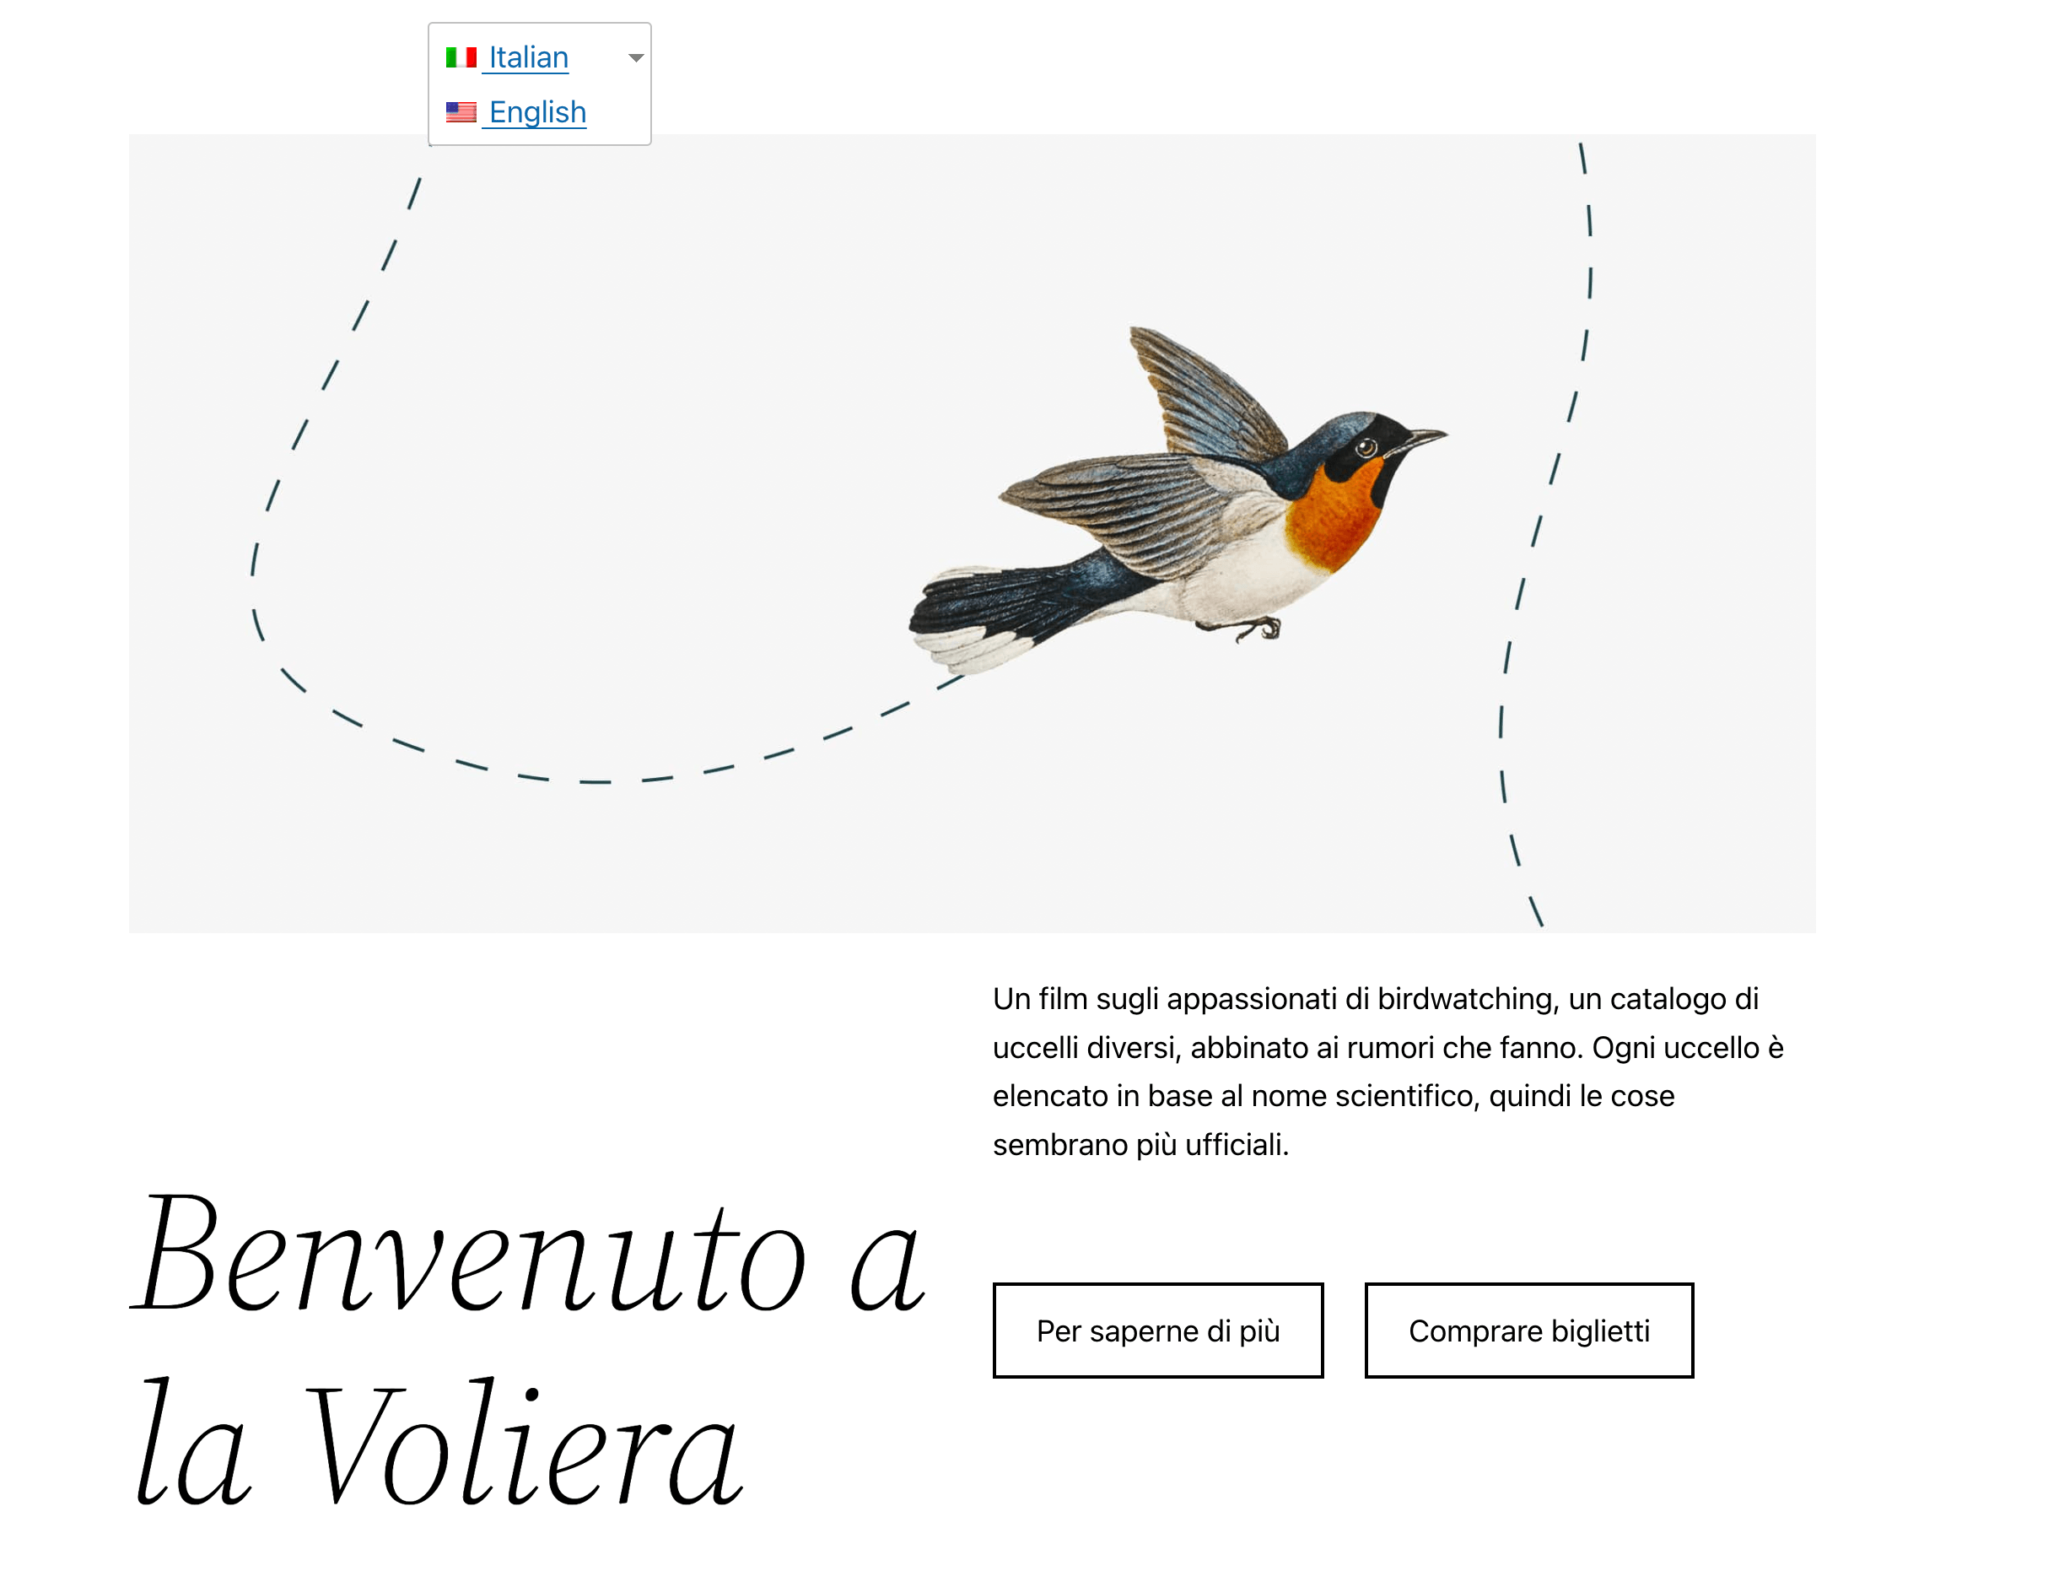
To start making your site multilingual-ready, we’d recommend creating a language switcher. This is a simple dropdown menu that website visitors can use to select a different language:
One of the easiest ways to do this is by installing a translation plugin like TranslatePress. This helpful tool can translate every part of your website using a front-end editor. Plus, it includes many useful multilingual features like a language switcher:

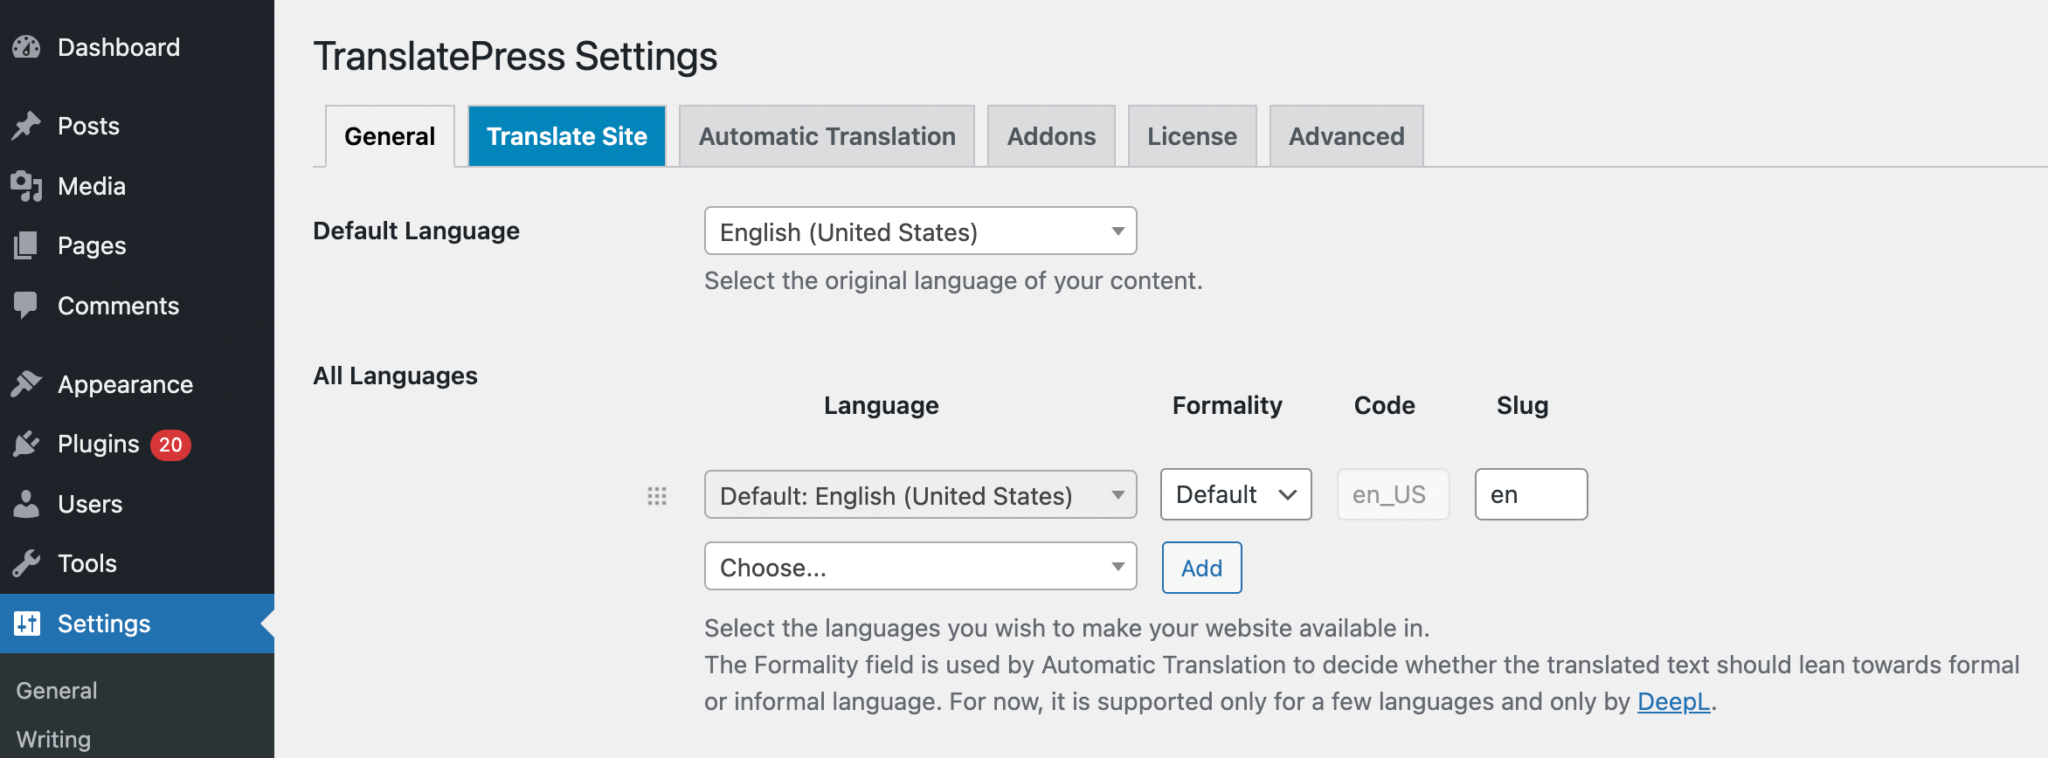
First, install and activate TranslatePress. Then, navigate to Settings > TranslatePress > General. In the All Languages section, check to see if the default language is correct:
Under this, select a language that you want to translate your content into. You can choose whether to have an informal or formal translation. Lastly, you can customize the slug:

Continue to add as many languages as you need. Next, find the Language Switcher section. Here, you can choose whether to place these switchers on your website as shortcodes, menu items, or floating language selections:
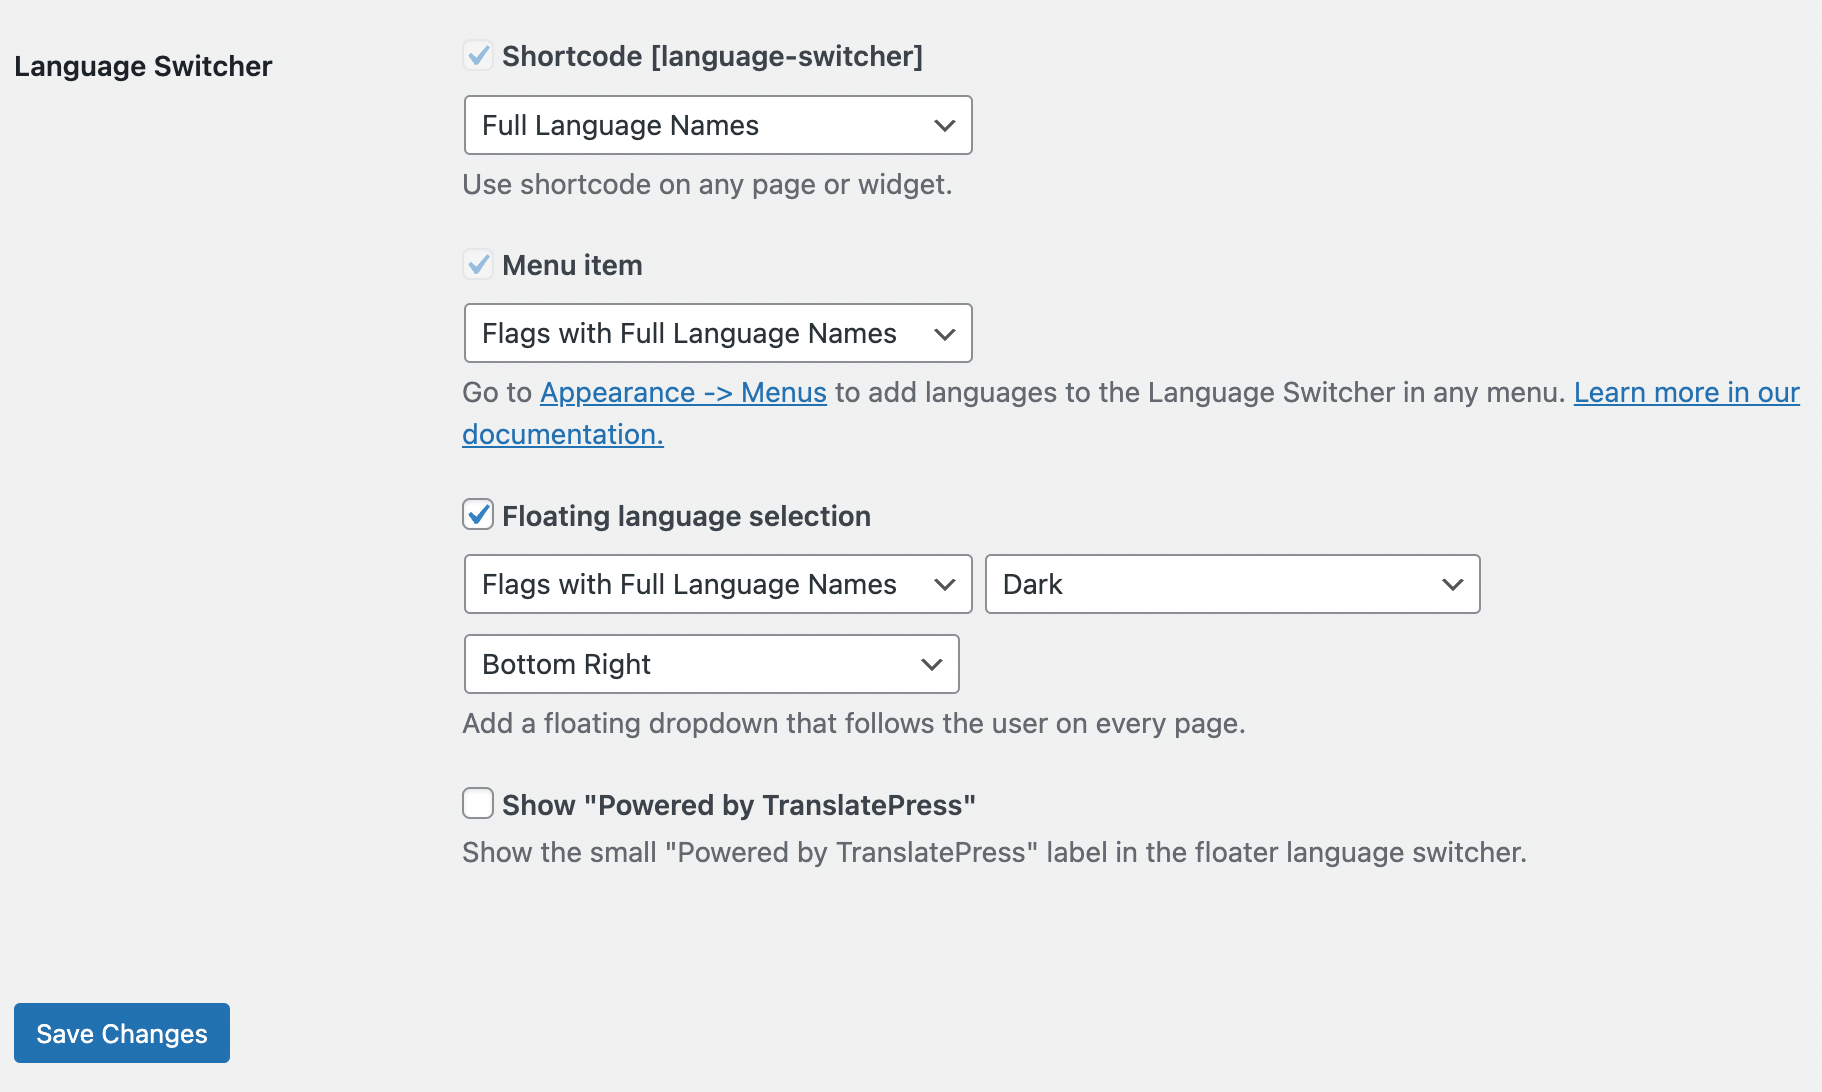
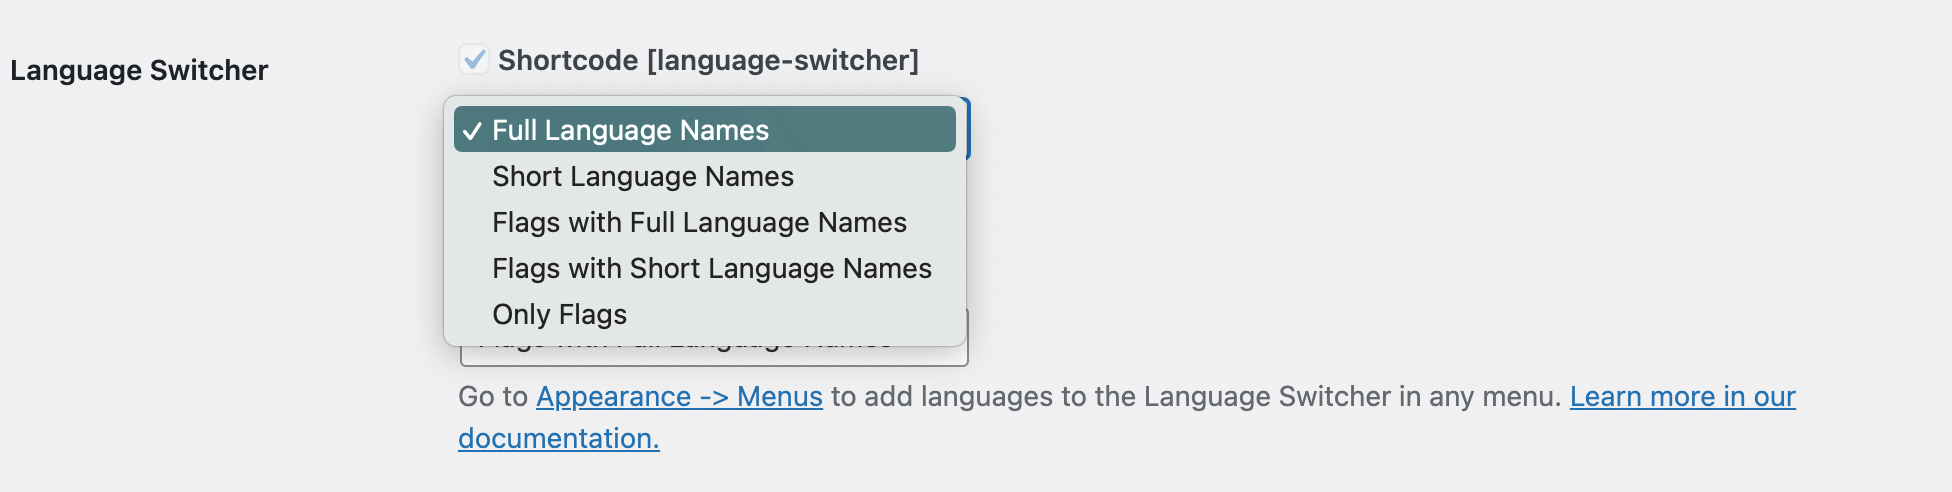
You’ll also need to customize how your language switcher appears. Using the dropdown menus, you can choose the full or abbreviated language names. You can also include language flags if you’d like:
If you select the Floating language selection option, the language switcher will automatically appear on your entire site. Rather than manually adding it to each page, it will follow users as they interact with your content. In the following example, we can see the switcher in the bottom right-hand corner of the screen:

Alternatively, you can add a language switcher to a specific page. To do this, open the Block Editor and insert a shortcode block. Then, paste the following shortcode: ‘[language-switcher]’:
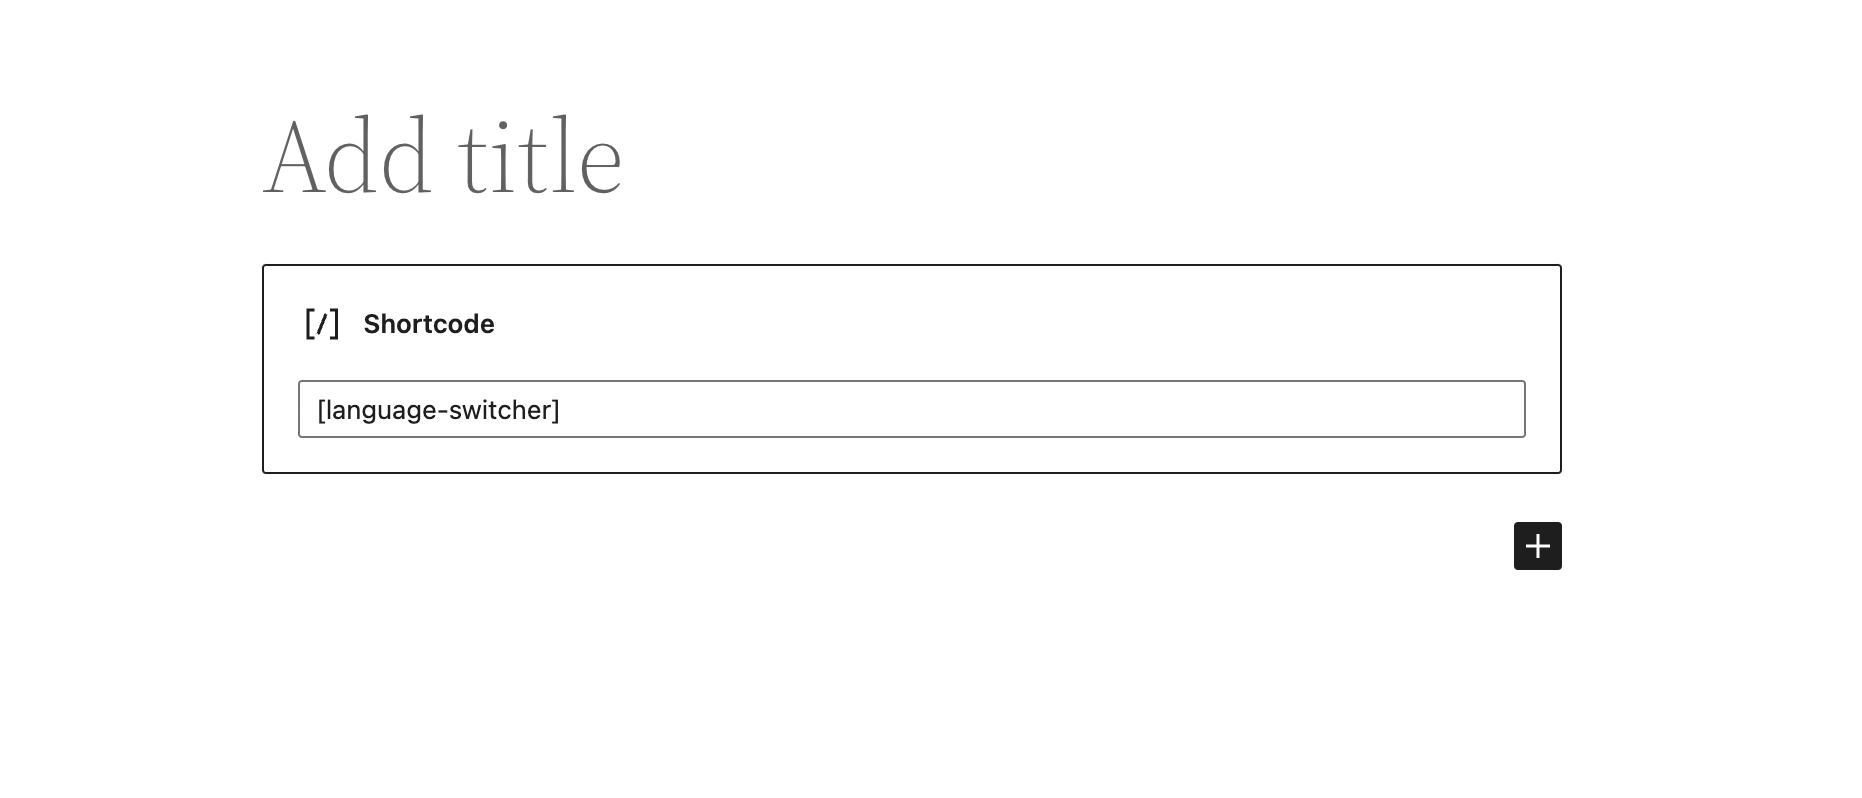
Once you hit Publish, you’ll see the language switcher at the top of the page!
Step 2: Set Up Automatic Translation
Next, you can set up automatic translation. Instead of manually translating every word yourself, you can allow a tool like Google Translate to automatically convert your content into another language.
This is likely the preferred method, since it will save you tons of time. Still, machine translation isn’t perfect, so keep in mind that this can lead to some awkward phrasing.
To get started, find the Automatic Translation tab in the TranslatePress settings. Then, enable automatic translation at the top of the page:

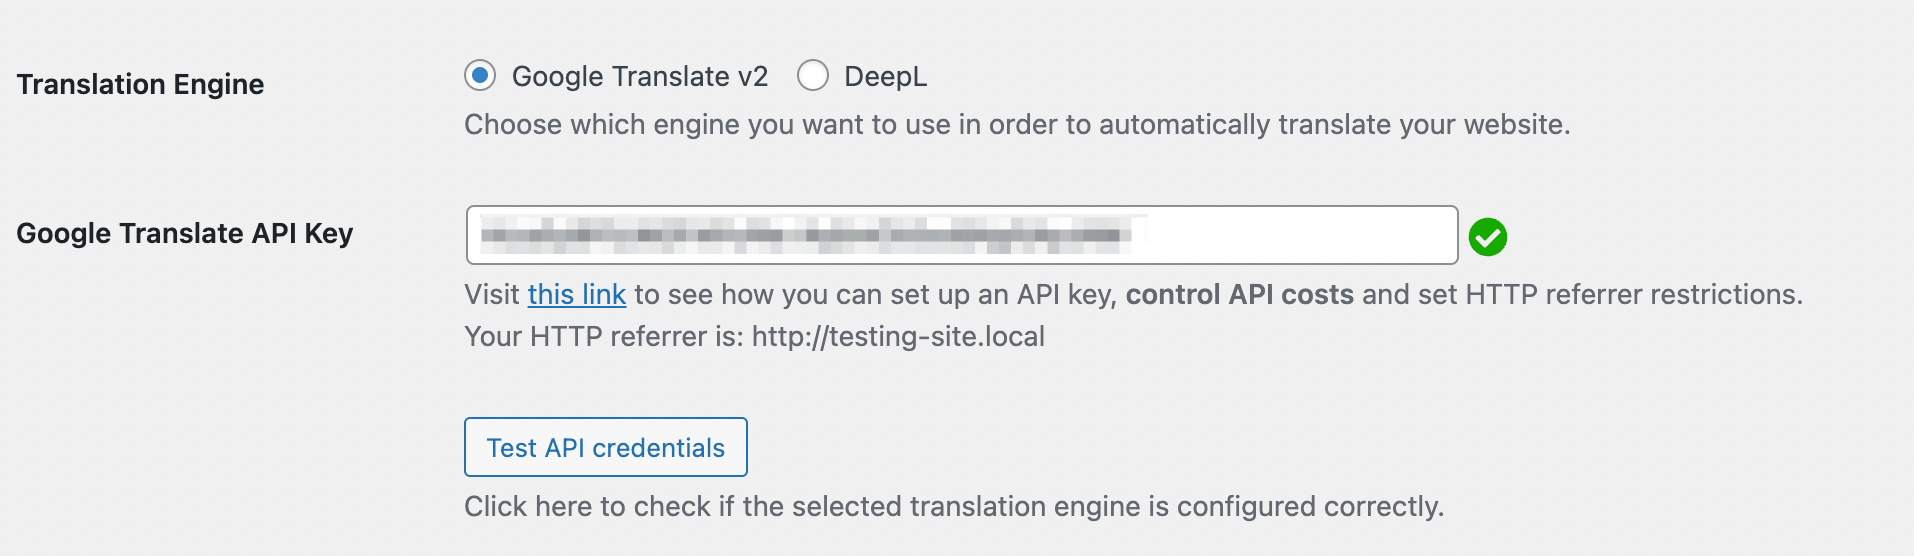
TranslatePress supports automatic translation with both Google Translate and DeepL. However, you’ll only be able to use Google Translate with the free plugin.
You’ll need to choose the translation engine you want to use. For each option, you’ll have to paste an API key:
For example, if you’re using Google Translate, you’ll need to enable Cloud Translation API in Google Cloud Console. To do this, go to APIs & Services:
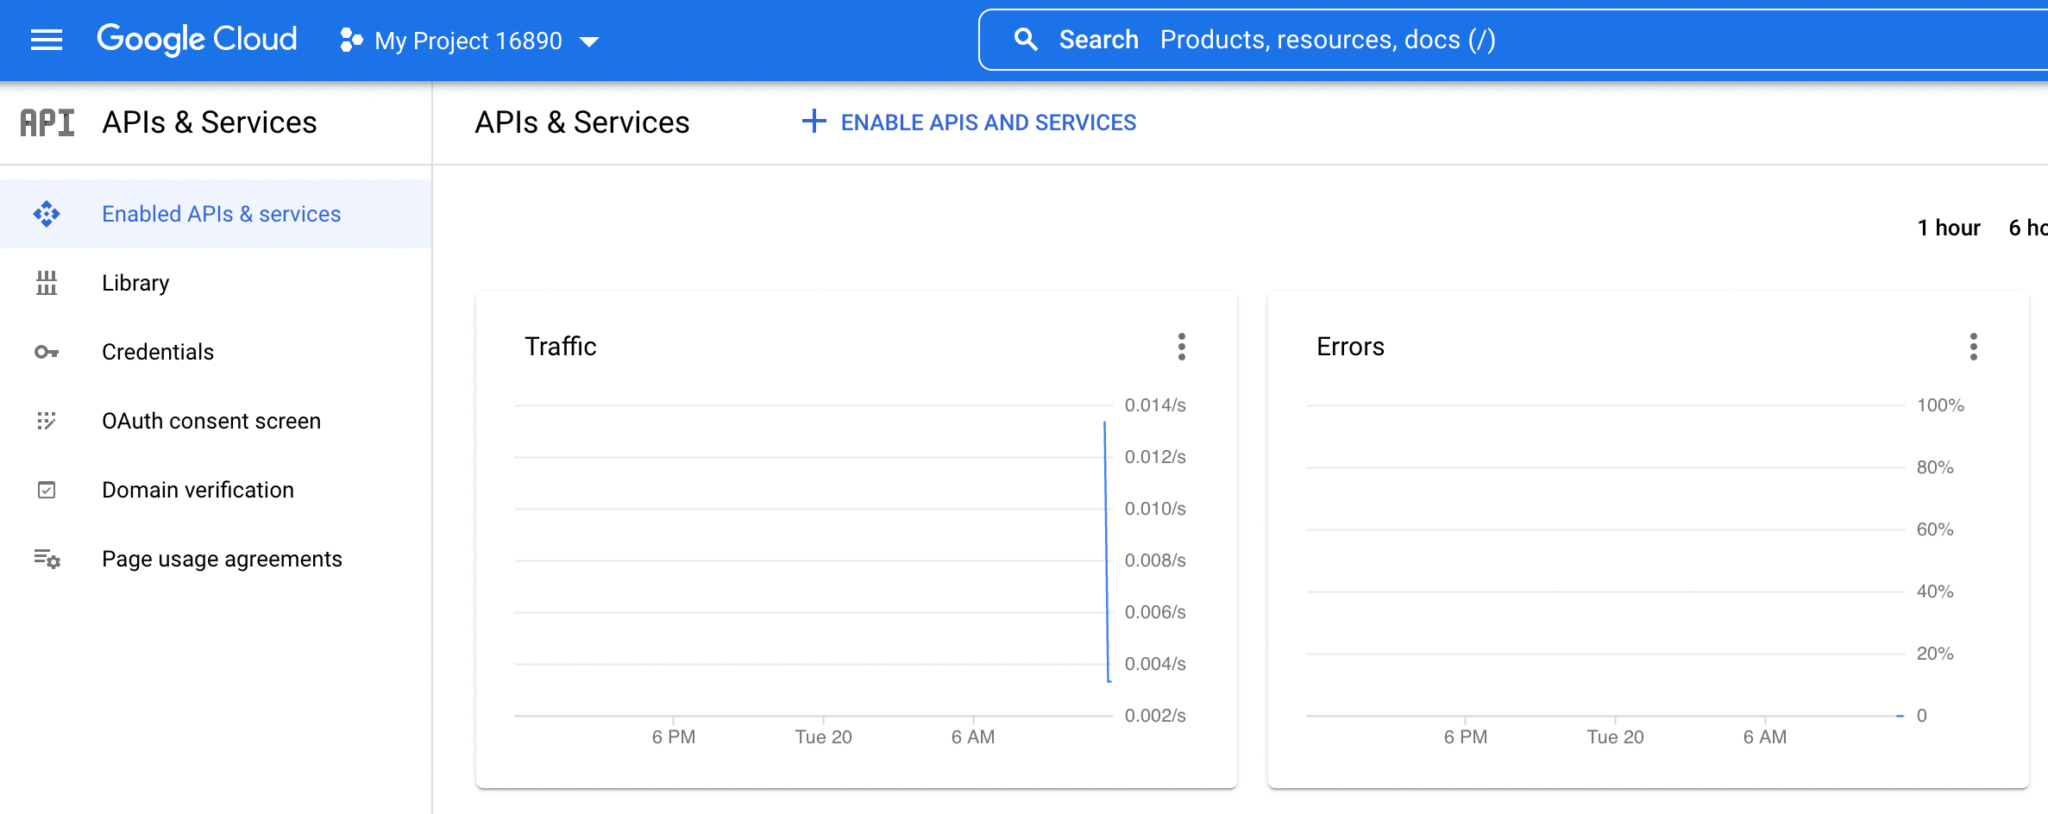
Then, go to Library and search for the Cloud Translation API. Once you locate it, simply enable it:

Next, navigate to Credentials > Create Credentials. Be sure to select the API Key option:

Once your API key is created, copy and paste it into the appropriate field in your TranslatePress settings. If it is working properly, you’ll see a green checkmark next to it.
After this, you can click on the Translate Site button at the top of your WordPress dashboard. This will open the TranslatePress editor, which contains the automatic translations of your content:

Now you have a fully translated website! Although you can leave this translation alone, you’re also able to make manual edits if necessary. This can help you improve readability.
Step 3: Manually Edit Your Translations
Automatic translation can be a quick way to create a multilingual website. However, Google Translate may not provide the most accurate translations. When you’re translating content for native speakers, you’ll want to make sure it’s as readable as possible.
Fortunately, TranslatePress allows you to edit any of its translations. In the visual editor, you can click on the pencil icon next to any text. This will show the original content as well as the translation:
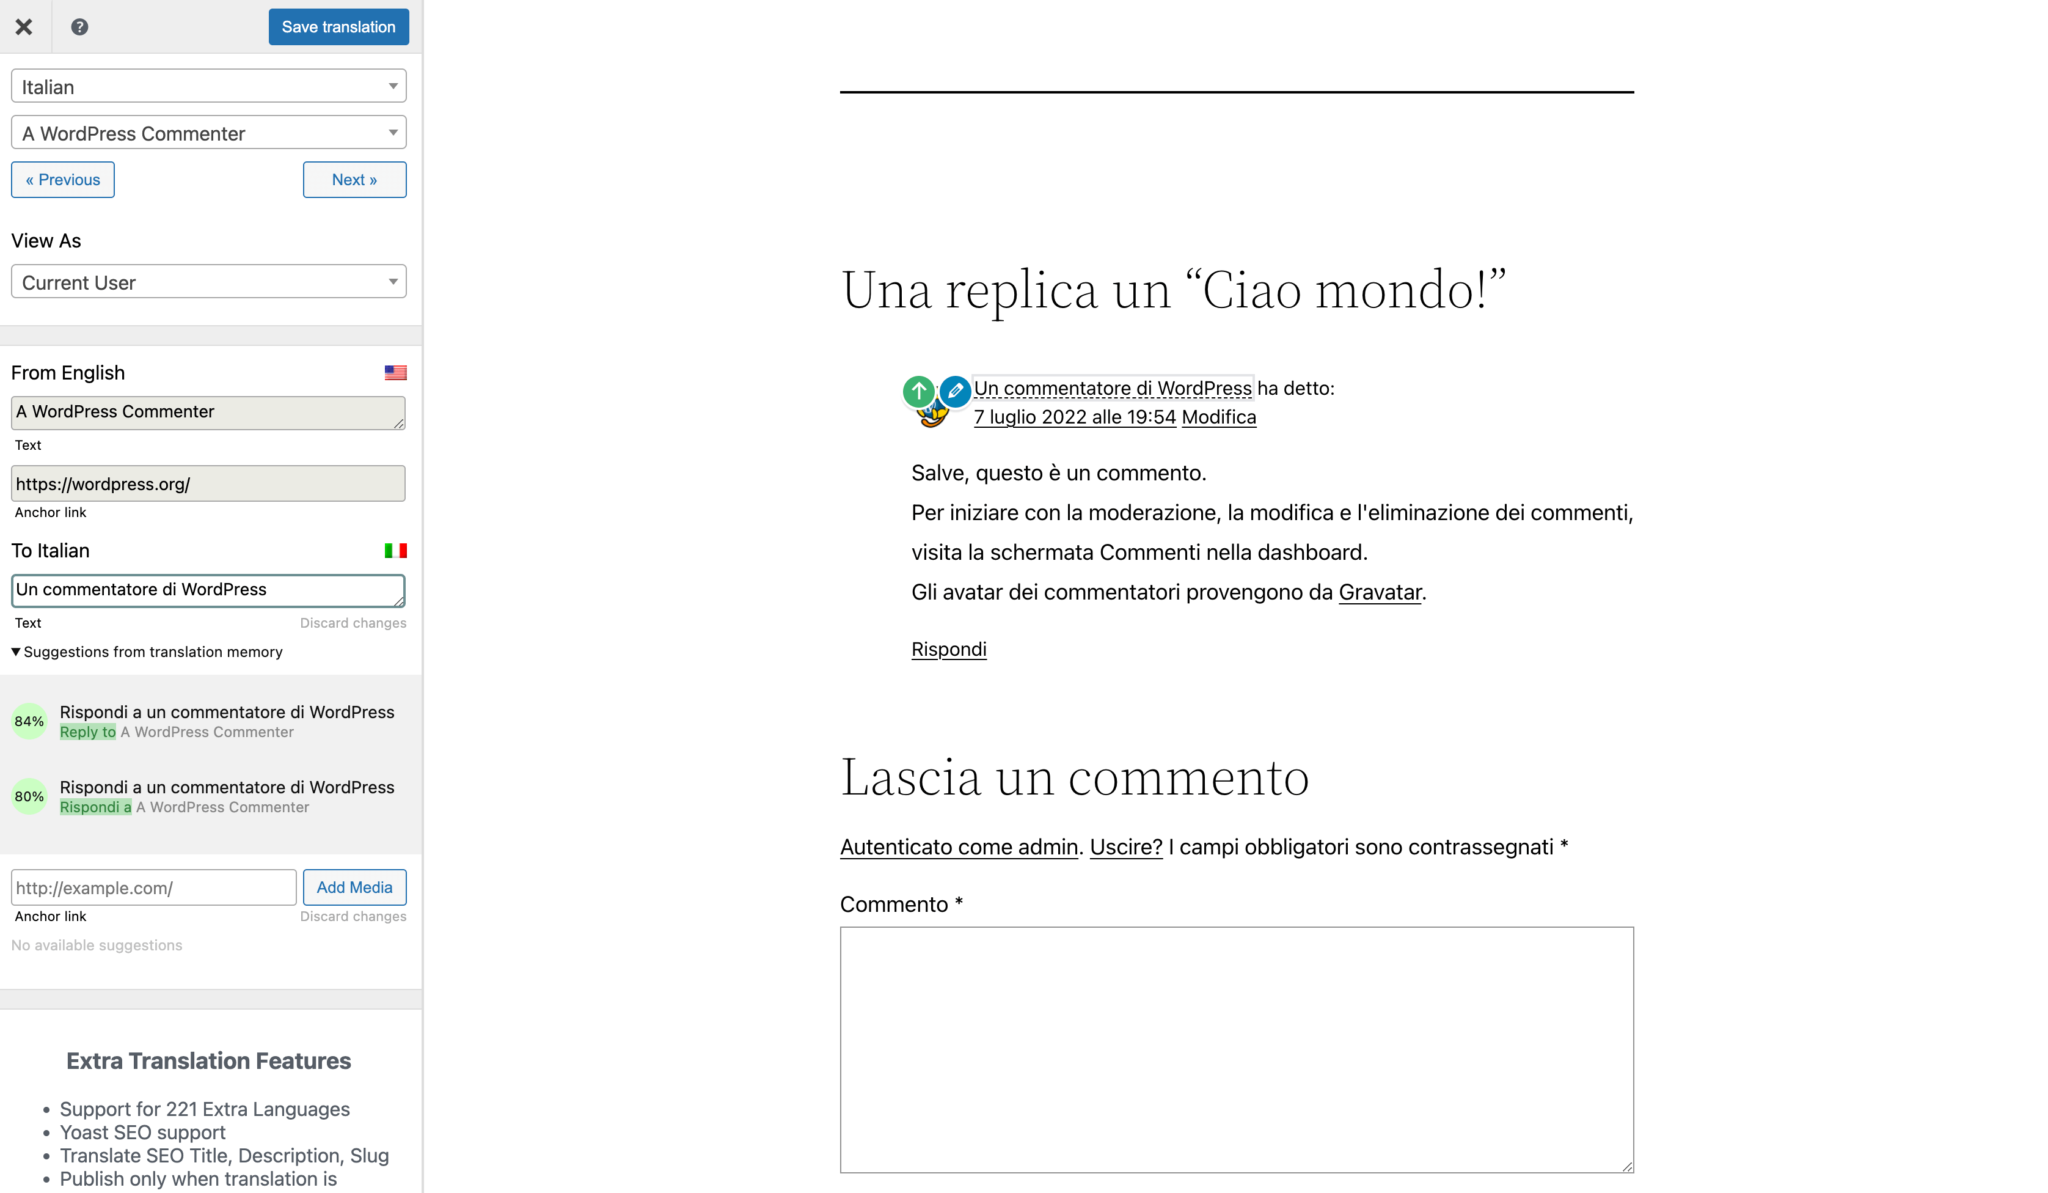
If you speak the second language, you can use the text boxes to remove any awkward phrasing. For additional help, TranslatePress will also provide suggestions on how to improve the translation.
You may also have images, sliders, or other media that needs to be translated. For example, an image overlaid with English words won’t automatically be translated:
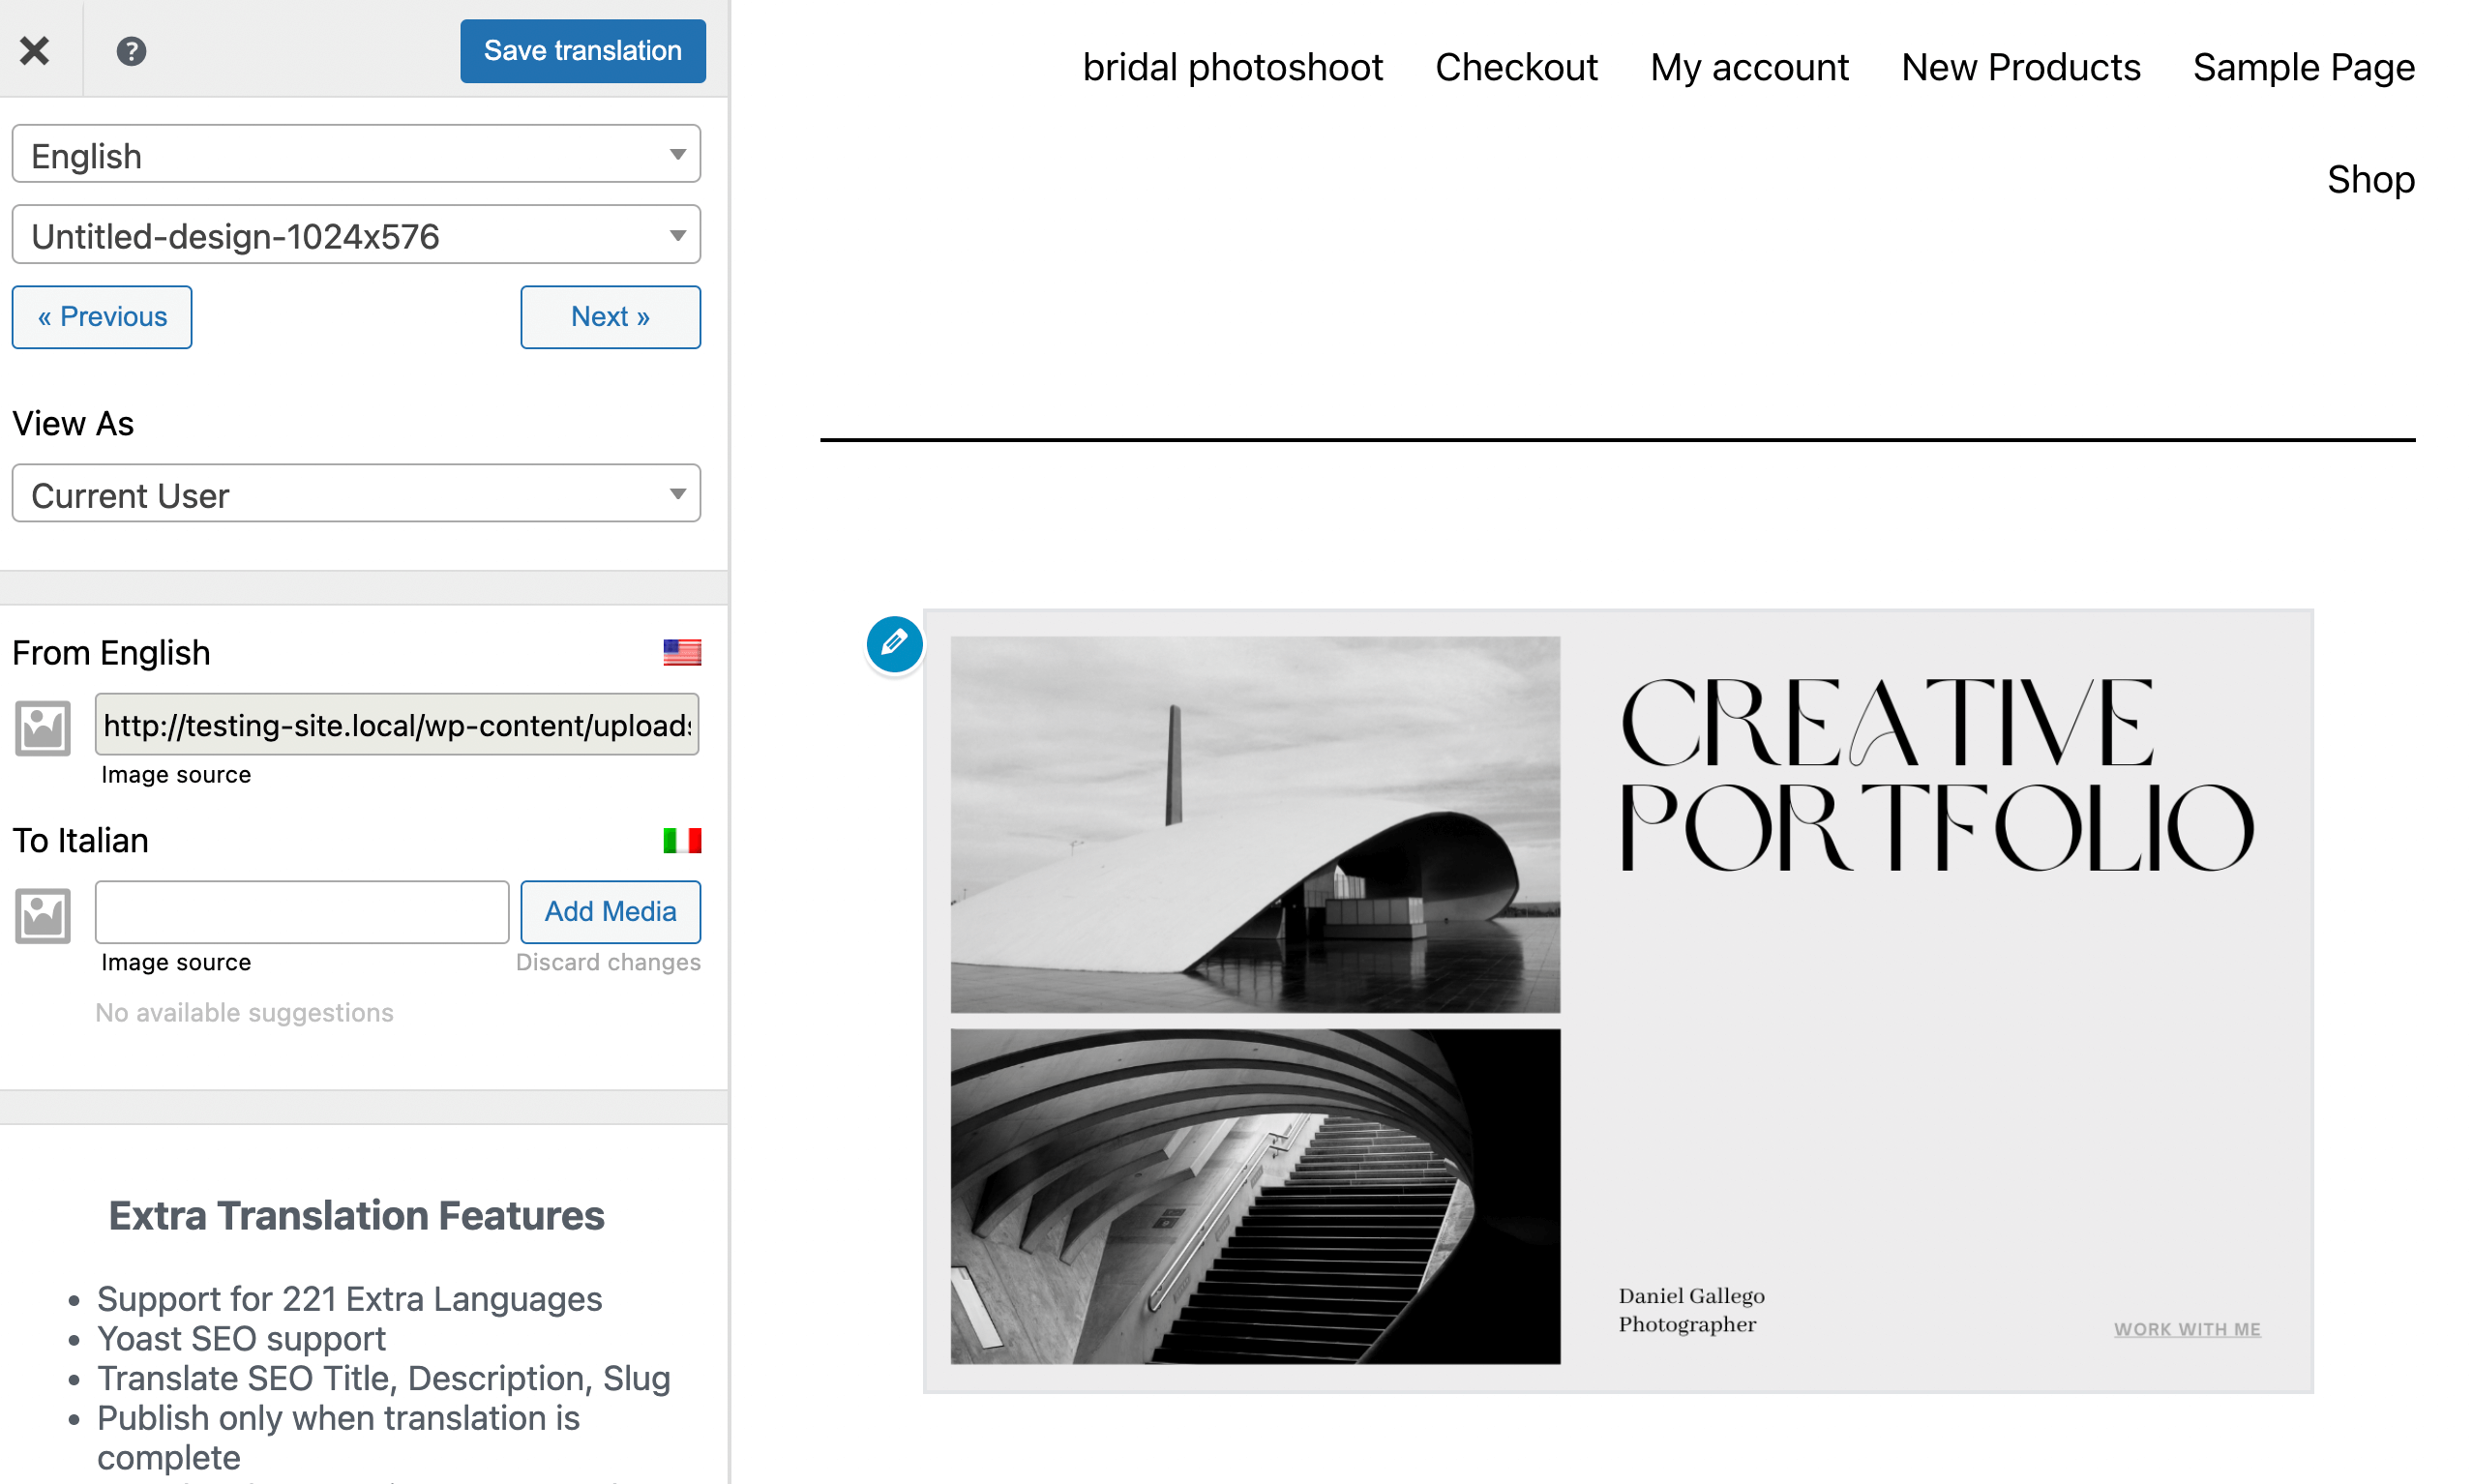
To fix this problem, you can upload a translated version of the image. First, create a new image with translated text. Then, click on Add Media and upload the new file:
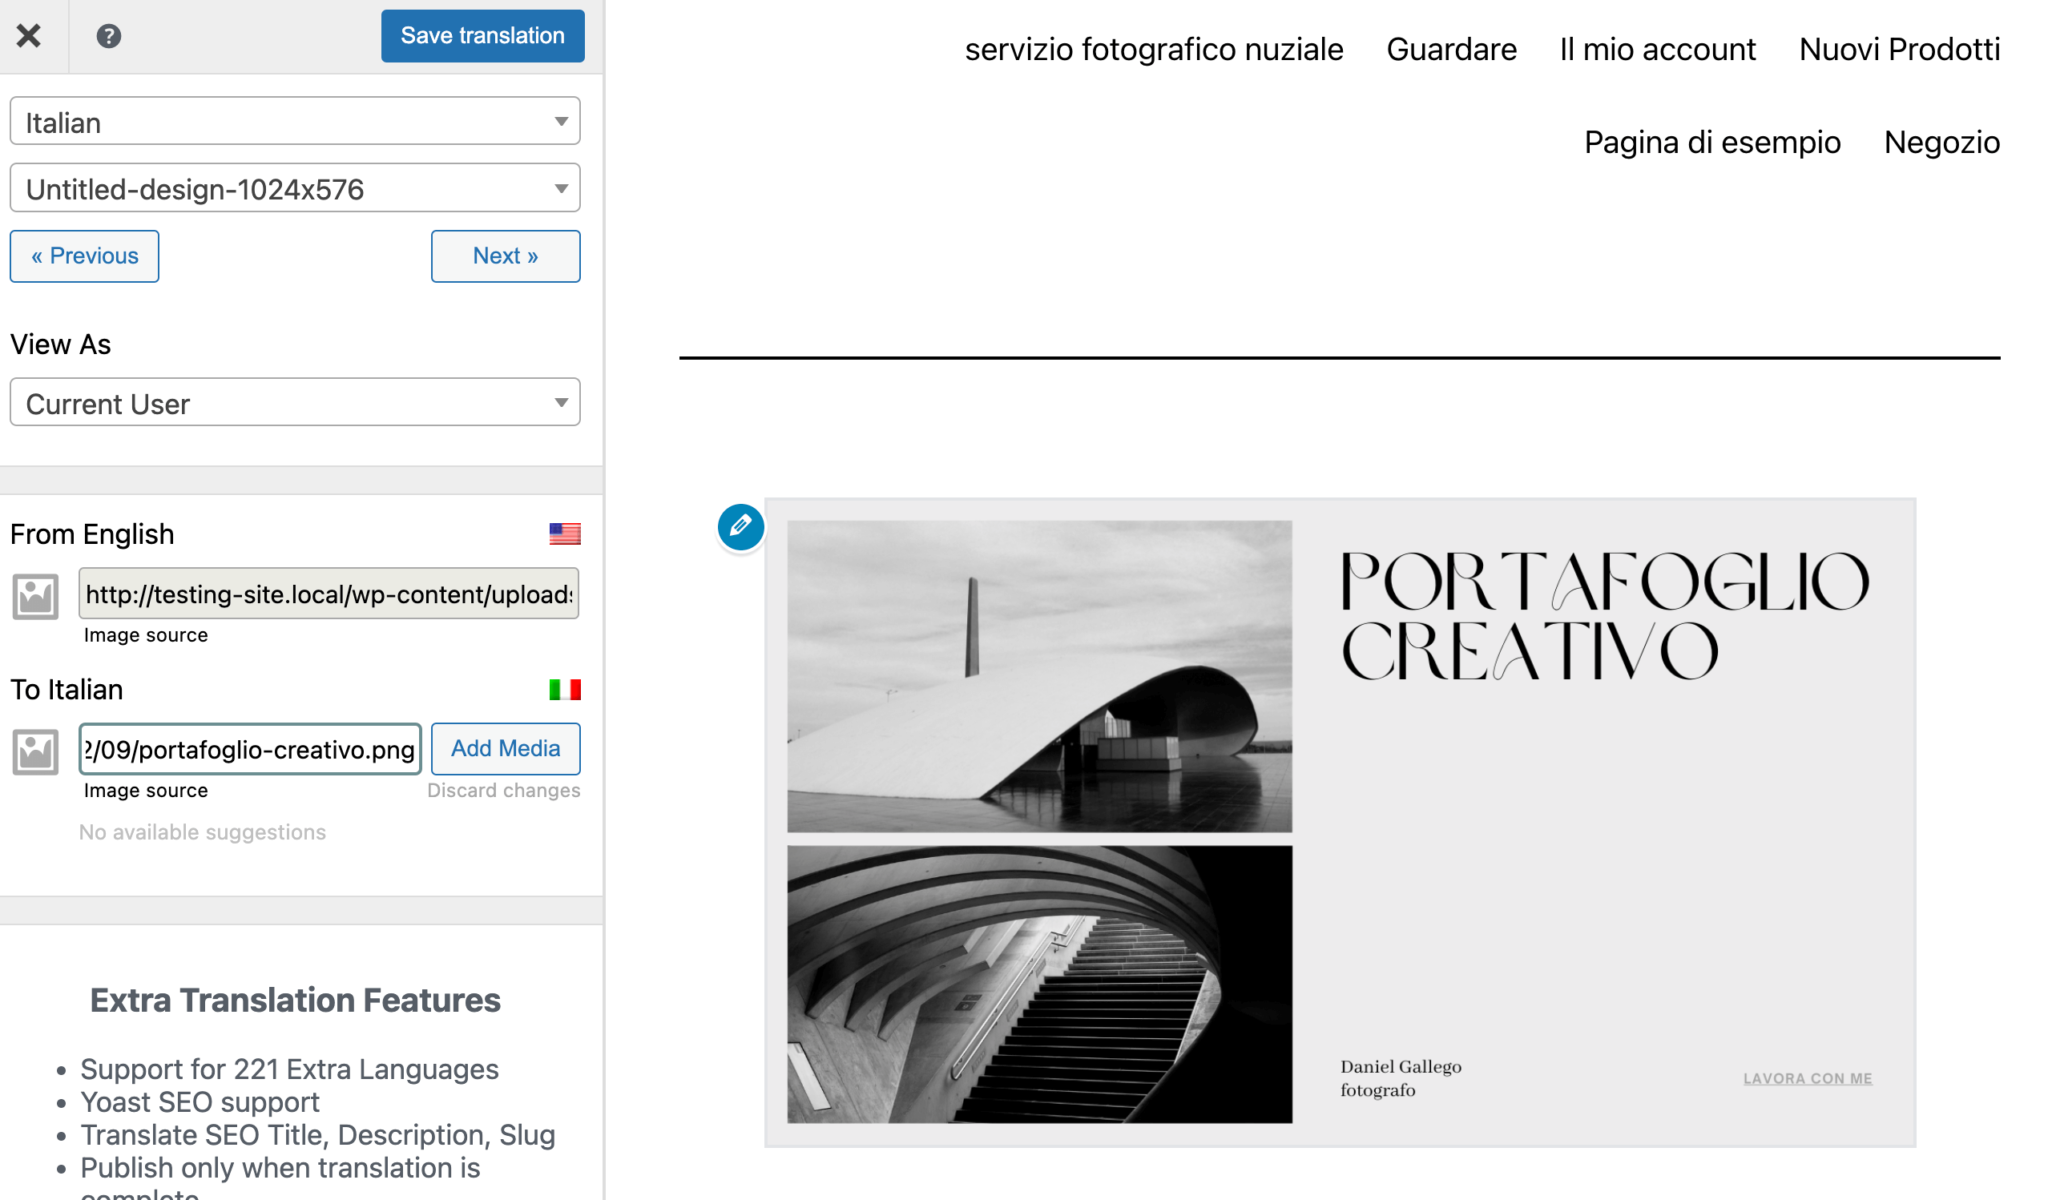
Once you save this change, the translated image will appear alongside the automatic translation of the text. This can allow international users to receive a fully readable version of your website!
Conclusion
You don’t have to limit your audience to your native country. By adding a few multilingual features, you can make your content accessible to users across the world. This can significantly expand your organic traffic and improve the user experience on your website.
To review, here’s how you can create a multilingual website:
- Create a language switcher.
- Set up automatic translation.
- Manually edit your translations.
Do you have any questions about how to add multilingual features to your website? Ask us in the comments section below!


